Download

1 / 26
260 likes | 446 Views
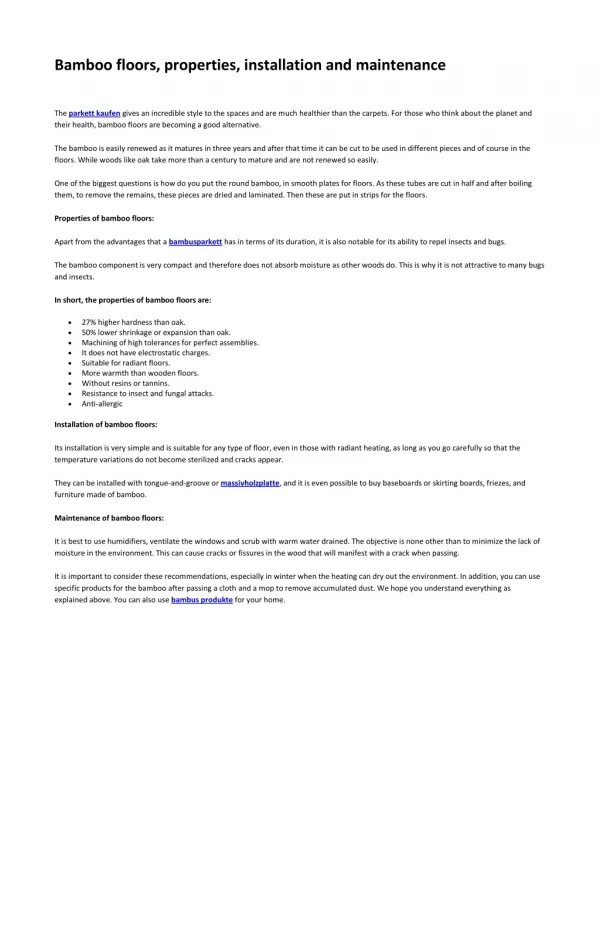
AquaStep provides installation and warranty information for floating floors, floating floorboards, laminate floors, timber floors, etc. For more information about our flooring service then visit us our website or call us @ 02 9683 1300.

E N D
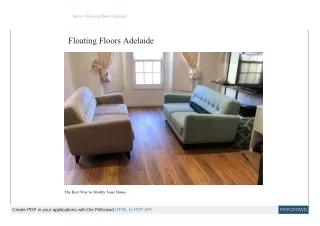
Floating Floors Installation and Warranty Information by AquaStep Visit: www.AquaStep.com.au Prepared By: AquaStep
About AquaStep Our floating floorboards, floating floors are easy to maintain compare to other flooring and it is available in various 15 designer colours. If you want more information about our flooring services then kindly contact us @ 02 9683 1300 or mail us @ sales@aquastep.com.au or visit our online website @ www.aquastep.com.au/about.html AquaStep provides wide variety of product(sheets) for floating floorboards, floating floors, timber flooring, laminate wood flooring, etc. Prepared By: AquaStep
Tools Required for Installation A few common tools are required for a successful installation: A wood saw (hand and drop). Aquastep is strong and hard. Regular saws will blunt quickly. It is recommended to use hardened Aluminium blades for longevity. Rubber mallet. Measuring tape and pencil Square Wooden blocks to set up the reserve “edge” gap. Striking block Drill and Pinch bar In wet area installations use PVA Cross linked waterproof adhesive on all board connections (side and edge) . Aquastep is waterproof, however your floor underneath may not be. Silicone all edges to prevent water migrating underneath your new floor. Depending on the complexity of installation, more specialized cutting tools may be required. If in doubt, seek professional help. Prepared By: AquaStep
Preparation The flooring boards should remain in their packaging until ready for installation. This will prevent accidental edge chipping and damage. Each board should be inspected before installation to ensure there is no packing or transport dam-age. Check to ensure there are no surface defects. No claims relating to surface defects can be accepted after installation. Before commencing work, ensure that the floor will fit under doors as well as skirting boards. It may be necessary to remove the skirting boards whilst the floor is being laid so as to allow a suitable gap along the edges (10mm). Determine which direction to install your flooring.. For best results the boards should be installed along the longest dimension of the room, and in square rooms, follow the direction of light. Prepared By: AquaStep
Sub Floor / Sub Floor Heating Sub Floor surfaces must be dry, level and sound. Most surfaces are suitable, including concrete, timber flooring, particleboard, vinyl, ceramic tiles and multiple screeds. Whatever the sub floor, it is recommended to use a 3 mm closed cell waterproof underlay to assist with bedding of the flooring and to further reduce impact sound transmission. Aquastep is suitable for use with all sub floor heating systems, and can with-stand temperatures up to 65 degrees Celsius. The floor should be flat to within 2 mm over 1 m with any abrupt variations leveled out or ground down. Prepared By: AquaStep
Laying Roll out and place your underlay. Butt joint the sides of the underlay and tape the joins together as per manufacturers instructions. Laying direction of the underlay is recommended to be the opposite direction to which the flooring is to be installed. The reserve space between the flooring edge and wall is 10mm. Place a wood block every 30cm to correctly align the flooring. Remove flooring from carton, being careful to inspect each board for any visual defects. Customers/ Installers must report visual defects to the retailer of purchase immediately and must not install them. Replacement boards will be provided to the original purchaser should any visual defect be apparent. Aquastep flooring is not to be installed under fixed building parts (doors, windows, cabinets etc.) Aquastep is a floating floor and any permanent fixture applied over it will violate the basic rule of a floating floor. Prepared By: AquaStep
1) Determine the Installation direction The installation direction is determined either by running the floorboards in the direction of the longest wall, or by following the main direction of light. There is no absolute right or wrong. It is an individual choice. Prepared By: AquaStep
2) Install the first row of flooring from a corner of the room, with the tongue side against the wall (allowing the 10mm reserve). Complete the first row. The last piece is easily marked for cutting by rotating 180°. Prepared By: AquaStep
3) If the last piece of the first row is more than 30cm in length, use it as the beginning of the second row. This will assist with reducing wastage on your project. Prepared By: AquaStep
4) Fit the flooring tongue of the 2nd row into the groove of the 1st row, at an angle of 20-30º. Press it flat gently and fasten the flooring along the short side (board width) by using the striking block and hammer. This is to get the boards along the short side snug and tight. The rest of the installation should be installed in the same way. Prepared By: AquaStep
5) If there are any pipes or columns to go around during the installation process, they should be cut/shaped and glued into position whilst maintaining the clicking process if possible. Where a board cannot be clicked into place due to obstructions, remove the edges with a saw and glue directly along the edges with the next board and onto the supporting floor. In these cases replace your underlay with a suitable thickness waterproof thin board. Prepared By: AquaStep
1) Around sliding doors and fixed cabinets a square angle should be used and fixed with glass glue under heavy objects. If conditions permit the angles and accessories may be fixed with screw wire or a wood wedge. 2) When installing flooring transitions under doors, apply with glass glue after cleaning up the site. Prepared By: AquaStep
3) Bathroom and kitchen installations are recommended to use waterproof glue on all edges to keep water spills on the surface. Whilst Aquastep is waterproof, the sub floor may not be. Seal edges with silicone in wet prone areas such as bathrooms. Prepared By: AquaStep
4) Note: When cutting boards, do so with the face of the plank facing down. This will reduce damages to the edges due to saw blades. Prepared By: AquaStep
Daily Maintenance and Care Maintain good air circulation in your rooms. Try to reduce movements in the freshly installed rooms for 24 hours. Heavy objects and furniture should be moved in after 24 hours, allowing Aq-uastep some time to fully relax after installation. Use doormats for doorways that lead directly outside or to a garage. Grit accumulates in these loca-tions and will damage any floor unless protected. Vacuum and dust your new floor daily to remove damage causing grit. Use of a wet mop is allowed since Aquastep is 100% waterproof. Never clean with abrasives, scouring powder or steel wool. Abrasive pads should never be used to clean Aqua step. Keep Alkaline liquids such as soda water or soapy water off the flooring surface. Inflammables such as gasoline and high temperature liquids are forbidden. If possible, try to avoid prolonged broil of high temperature light sources on the flooring. Aqua step is safe up to 65ºc. Extended temperatures beyond this limit may eventually cause surface deterioration. Wipe up spills when they occur and try to keep the floor dry and safe to avoid any slippage. Prepared By: AquaStep
Daily Maintenance and Care Do not use polishes or waxes. Steam Cleaners are acceptable use providing temperatures do not exceed 65ºc. Use easy-glide protective buttons or cushion protectors on the feet of furniture. Do not drag furniture across the floor. When a large piece of furniture or a heavy appliance across the floor, use rubber wheeled trolleys or lift and sit. The Aquastep Warranty applies only if the floor was installed in accordance with recognized installation practices and used as instructed taking due care of the maintenance instructions. If in doubt, ask your dealer for advice. The warranty cannot be applied if the surface is damaged due to incorrect use eg: damage caused by dropping objects, handling the floor with sharp objects or unsuitable cleaning processes. Do not use hard tools to scratch the floor. Prepared By: AquaStep
Daily Maintenance and Care Avoid viscous objects staining the floor, such as gums. Oil, Paint, Permanent Marker, Tar, Rubber heel marks, use a neutral cleaner on a clean light coloured cloth or nail polish remover if needed. Blood, Fruit Juice, Wine, Beer, Soda, General food spillages, use warm water and/or a neutral cleaner on a clean light coloured cloth. Candle Wax, Chewing Gum, first harden with ice, then very gently scrape. Wipe with warm water on a clean coloured cloth. Prepared By: AquaStep
Warranty General Conditions The manufacturer/supplier guarantees that the goods will be free from manufacturing defects from the date of installation for a period of 20 years. This warranty is valid for the 1st purchaser only and when installed in a normal domestic environment. This warranty is only valid when the product has been installed and maintained according to these printed instructions and where all applicable standards and practices have been observed. This warranty is in addition to, and in no way limits statutory warranties enjoyed by the 1st purchaser. Prepared By: AquaStep
Warranty Replacement When a claim is considered valid by the manufacturer or its representatives, the customer shall be provided with a replacement board/s from the current range. If the color is no longer available, the closest match within the current range will be provided. Compensation will be limited to material costs and will cover transportation to the original place of purchase. Indoor Use Only Aquastep Flooring is to be used indoors. It is not an outdoor product and is not to be used in this way. Any installations occurring in outdoor areas are directly the responsibility of the purchaser and are not covered in any warranty claim. Aquastep Flooring is only designed for interior residential and light public use. Avoid rooms with high tem-peratures (egg: Sauna). Prepared By: AquaStep
Warranty Sub Floor Heating Aquastep is suitable for use with sub floor heating up to a limit of 65ºc. Structural Warranty Aquastep is covered by a 20 year structural warranty. Under normal residential conditions and with proper maintenance, Aquastep will be free of structural defects such as delaminating, buckling and twisting. This warranty is not a wear warranty. Prepared By: AquaStep
Warranty Wear Warranty Aquastep is covered by a 10 year residential wear warranty. Non-residential installations or other than domestic use where extreme traffic conditions exist may lead to abnormal or accelerated wear and tear. Light/Medium commercial installations are warranted for 5 years. Gloss reductions and scratches are not considered wear through claims and are not covered in this warranty. Waterproof Warranty Aquastep is warranted to be 100% waterproof for a period of 20 years. Aquastep will not be affected by water or moisture and can be installed in areas subject to high humidity. Prepared By: AquaStep
Exclusions Improper Installation Aquastep is to be installed in strict accordance with the current written installation instructions. It is recommended that a good quality 3mm sound absorbing underlay be used. Use of inferior and/or cheap quality underlay's may void this warranty. Installations that are directly adhered to the sub floor surface (bathrooms) must have a completely level floor. Failure to provide a “glass” like surface without underlay may void this warranty. Prepared By: AquaStep
Exclusions Improper Maintenance Aquastep is to be maintained in strict accordance with our current written maintenance instructions. Use of un -authorized cleaning products or agents such as oils, ammonia based cleaning solutions or liquids will void all warranties. Failure to follow and routinely protect and maintain your floor may void this warranty. Abuse or Misuse This warranty does not cover indentations, scratch damages caused by negligence or damage caused by high heeled shoes, furniture or equipment, pets, pebbles, sand and striking impacts. Prepared By: AquaStep
Contact AquaStep Website: www.aquastep.com.au Address: 67/17-23 Newland Street, Bondi Junction, NSW 2022, Australia Contact No.: 02 9683 1300 / 02 9389 4389 Email: sales@aquastep.com.au Follow us on: Facebook: https://www.facebook.com/pages/AquaStep/437544196402948 Twitter: https://www.twitter.com/Aquastepau Gplus: https://plus.google.com/u/2/b/105347469364130046086/105347469364130046086/ Pinterest: https://www.pinterest.com/aquastepfloorin/ Prepared By: AquaStep