Download

1 / 12
0 likes | 8 Views
Microsoft Dynamics AX Training - Visual Path offers the Best D365 Ax Technical Online Training conducted by real-time experts.Our Dynamics 365 Online Training is available in Hyderabad and is provided to individuals globally in the USA, UK, Canada, Dubai, and Australia. Contact us at 91-9989971070.<br>Blog: https://axtechnical-123.blogspot.com/<br>whatsApp: https://www.whatsapp.com/catalog/919989971070<br>Visit: https://visualpath.in/microsoft-dynamics-ax-online-training.html<br>

E N D
How To Insert Data In D365 91-9989971070 www.visualpath.in
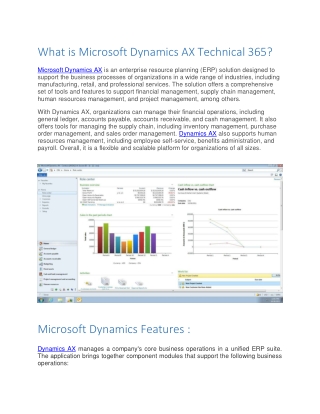
Dynamics 365 (D365) is a powerful platform for managing various aspects of business operations, including customer relationship management (CRM), enterprise resource planning (ERP), and beyond. One fundamental aspect of working with D365 is inserting data into its databases. Whether you're adding new customers, products, or transactions, understanding how to effectively insert data is crucial for leveraging the full potential of the platform. In this guide, we'll walk through the process of inserting data in D365 in a few simple steps. www.visualpath.in
Accessing Data Entities: The first step is to identify the data entity where you want to insert records. Data entities in D365 represent tables in the underlying database and serve as the primary interface for interacting with data. Navigate to the "Data management" workspace within D365 and locate the appropriate data entity relevant to your data insertion needs. www.visualpath.in
Preparing Data: Before inserting data, ensure that the data you're working with is properly formatted and meets any validation requirements set by D365. This may involve cleaning up data, formatting dates, and ensuring data integrity to prevent errors during the insertion process. www.visualpath.in
Using Data Management Framework (DMF): D365 provides the Data Management Framework (DMF) as a tool for importing and exporting data in bulk. Within the Data management workspace, select the "Import" option and choose the data entity you identified earlier. Follow the prompts to upload the data file containing the records you wish to insert. DMF allows for various data formats such as Excel, CSV, or XML. www.visualpath.in
Mapping Fields As part of the import process, you'll need to map fields from your data file to the corresponding fields in the selected data entity. Ensure that the mapping is accurate to avoid data being inserted into the wrong fields. D365 provides a mapping interface where you can match the fields manually or use predefined templates for common data imports. www.visualpath.in
Validating Data Before finalizing the insertion process, it's essential to validate the data to identify any potential issues or inconsistencies. D365 offers validation tools to check for errors such as missing required fields, data format discrepancies, or duplicates. Address any validation errors before proceeding to the next step. www.visualpath.in
Executing Insertion Once the data has been validated, proceed with executing the insertion process. D365 will process the data file and insert the records into the specified data entity. Depending on the volume of data, this process may take some time to complete. Monitor the progress and address any errors that may arise during insertion. www.visualpath.in
Verification and Monitoring After the insertion process is complete, verify that the data has been successfully inserted into D365. You can use built-in tools to view and query the data within the system. Additionally, monitor data integrity and performance to ensure that inserted records meet your expectations and adhere to business requirements. www.visualpath.in
By following these steps, you can effectively insert data into Dynamics 365, enabling you to leverage the platform's capabilities for managing and analyzing your business data efficiently. Whether you're migrating existing data or adding new records, mastering the data insertion process is essential for maximizing the value of D365 for your organization. www.visualpath.in
CONTACT For More Information About Ax Technical Online Training Address:- Flat no: 205, 2nd Floor NilagiriBlock, Aditya Enclave, Ameerpet, Hyderabad-16 Ph No : +91-9989971070 Visit : www.visualpath.in E-Mail : online@visualpath.in
THANK YOU Visit: www.visualpath.in