Download
1 / 51
0 likes | 26 Views
Guide to the steps of the male urogenital examination, including exam of the groin (hernia exam), penis, scrotum and scrotal contents (testicles), rectum and prostate.

E N D
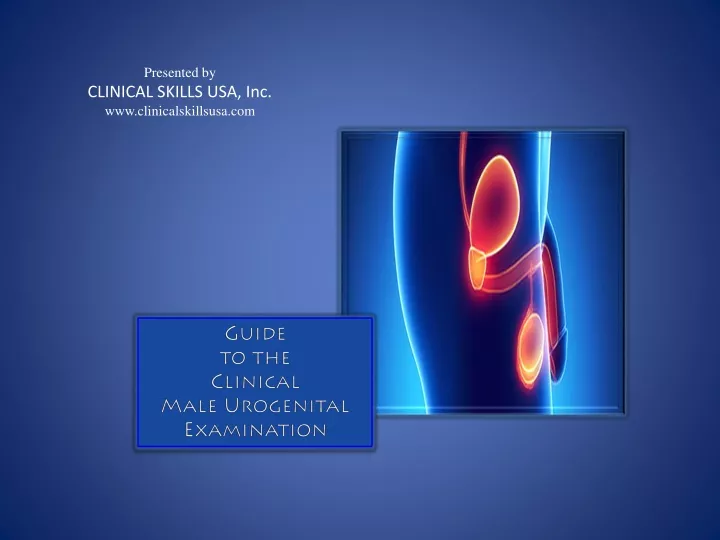
Presented by CLINICAL SKILLS USA, Inc. www.clinicalskillsusa.com Guide to the Clinical Male Urogenital Examination
Guide to the Male Urogenital Examination Instructional Objectives • Familiarize the clinical student with the male urogenital anatomy. • Instruct the clinical student, in the appropriate physical maneuvers for conducting the comprehensive male urogenital (URO) exam. • Instruct the clinical student, in the effective “patient-centered” communication skills associated with the male urogenital exam, including history-taking, easing patient anxiety, encouraging patient disclosure, and patient education and counseling. • Provide a “hands-on” practicum with a trained “Guiding Patient”, to apply these skills and increase student confidence in conducting the comprehensive male urogenital exam. 2011 © Clinical Skills USA All rights reserved
Key Communication Elements for the Male Urogenital Exam CLINICAL SKILLS USA, INC. Introduce the purpose and process for the URO exam. Thankyour patient for their cooperation and schedule future exam(s). Inquireabout present or recent URO or sexual problems/concerns. Encourage open discussion of questions and concerns. Reassure that the exam should not be painful. Ask that they report if it is. Educateyour patient about self-examination and recognizing abnormalities. Explaineach PE exam maneuver in advance, or during the process. Supportyour patient by periodically asking how they are doing. Summarize by discussing findings and recommending healthy lifestyle practices. 5Relaxyour patient by relieving anxiety and embarrassment.
Guide to the Male Urogenital Examination History-taking: The Male URO and Sexual History Explain the importance of this history information for the complete assessment of the patient’s health. Reassure the patient that all responses will be kept strictly confidential. Utilize gathered information as a “road map” in directing your physical exam. “I’d like to ask you some important questions about your urinary and reproductive systems, as well as, your sexual lifestyle. These are important questions that I routinely ask all of my male patients, and you should not feel embarrassed. Your responses will help me to develop a complete picture of your overall health.” 2011 © Clinical Skills USA All rights reserved
Guide to the Male Urogenital Examination History-taking: The Male URO and Sexual History Adapt questions to the age appropriateness of each patient. Place your emphasis accordingly. Younger males:Testicular health. Sexual practices and STDs. Middle-aged and older males:Prostate health. Sexual and urinary issues associated with dysfunction, e.g. pain, changes in urinary and/or bowel habits, erectile difficulties. 2011 © Clinical Skills USA All rights reserved
Guide to the Male Urogenital Examination Preparing the PatientTo reduce anxiety and to establish open two-way communication. • Conduct at the end of P.E. • Explain the reasons for the genital and rectal exam. “Many possible health disorders in this area”. • Re-assure the patient that there should be no pain associated with the exam, but it is very important that they report it if noticed. 2011 © Clinical Skills USA All rights reserved
Guide to the Male Urogenital Examination Positioning the Patient • Position yourself on a stool facing the patient. • Ask the patient to stand close to the exam table (or stable object) with feet spread to shoulder width. This may require that the patient remove his pants to minimize a loss of balance. • Stay in touch with the patient, by making periodic eye contact, and frequently asking, “How are you doing?” “Are you doing okay?” 2011 © Clinical Skills USA All rights reserved
Male Urogenital Exam Order of the Physical Examination Pubic and Groin Regions Hernias Scrotum (sac/testes/spermatic cord/vas) Penis Rectum and Prostate Breast (as needed, based on family history) Instructed by CLINICAL SKILLS USA, Inc. Teaching the patient-centered clinical skills required in serving the good health of men and women of all ages.
Guide to the Male Urogenital Examination I. Pubic Region “What to say”: “At this point in the physical exam I am going to examine your pubic area, genitals, and prostate. This portion of the exam should only last five to ten minutes and is very important, because of the many disorders associated with this part of your body. In addition to multiple prostate disorders and testicular cancer, there are many other diseases and disorders of the male URO system, which if caught early, are treatable and may prevent future pain and grief for you and your family.” “I am going to look for “lumps, bumps or anything out of the ordinary”. (Avoid heightening anxiety by being too specific.) “There should be no pain associated with this portion of the exam—however, it will be important that you let me know if you do notice any pain or tenderness, as a possible sign of a medical problem.” “Feel free to ask questions as we proceed.” 2011 © Clinical Skills USA All rights reserved
Guide to the Male Urogenital Examination I. Pubic Region Visually Inspect: • Look for skin disorders, edema, masses, ulcerations, infections, warts, or lesions. • Note bulges or scars in the inguinal region consistent with past or present hernias or other surgeries. • Evaluate the amount and distribution of the pubic hair. Compare to the Tanner Stages diagrams for adolescent development. • Explore the base of the pubic hair for signs of skin irritation or lice/nits. Excoriations in the area may provide clues. 2011 © Clinical Skills USA All rights reserved
Guide to the Male Urogenital Examination I. Pubic Region “What to say”: “I am now going to gently roll the pads of my finger tips along the front of your hip and the lower abdomen to evaluate the size and number of lymph nodes in the area. I will also be “pressing” the area for masses which could be evidence of a hernia. Please let me know if you feel any tenderness.” 2011 © Clinical Skills USA All rights reserved
Guide to the Male Urogenital Examination I. Pubic Region • Note masses, tenderness, and enlarged or immobile nodes. It is not uncommon to feel a few shotty nodes. 2011 © Clinical Skills USA All rights reserved
Guide to the Male Urogenital Examination II. Examine for Hernias “What to say”: “Now I’m going to examine the internal canal which runs along your groin area, examining for a hernia. I will be inserting my finger slightly into this canal. You should feel some pressure, but no pain. Please turn your head (away from me) and cough. And again, let me know if you feel any discomfort” 2011 © Clinical Skills USA All rights reserved
Guide to the Male Urogenital Examination II. Examine for Hernias Examinefor femoral hernias 2011 © Clinical Skills USA All rights reserved
Guide to the Male Urogenital Examination II. Examine for Hernias Detect and evaluate for inguinal hernias Insert index finger to 2nd digital crease, or entire “pinky finger” at an angle coinciding with the inguinal canal. 2011 © Clinical Skills USA All rights reserved
Guide to the Male Urogenital Examination II. Examine for Hernias Detect and evaluate for inguinal hernias 2011 © Clinical Skills USA All rights reserved
Guide to the Male Urogenital Examination III. Examine the Scrotum “What to say”: “I am going to examine your scrotum and testicles now to ensure that there is no swelling, or the presence of hard or tender nodules. I will roll my fingers gently so that you will not experience any pain.” “Have you experienced any recent pain or swelling of your scrotum?” “I am going to simultaneously instruct you in performing a Testicular Self-Exam, which I recommend that you perform once per month.” 2011 © Clinical Skills USA All rights reserved
Guide to the Male Urogenital Examination III. Examine the Scrotum 2011 © Clinical Skills USA All rights reserved
Guide to the Male Urogenital Examination III. Examine the Scrotum 2011 © Clinical Skills USA All rights reserved
Guide to the Male Urogenital Examination III. Examine the Scrotum 2011 © Clinical Skills USA All rights reserved
Guide to the Male Urogenital Examination III. Examine the Scrotum 2011 © Clinical Skills USA All rights reserved
Guide to the Male Urogenital Examination III. Examine the Scrotum Perform as neurological exam (eg spinal injury), or test for testicular torsion. 2011 © Clinical Skills USA All rights reserved
Teach Testicular Self-ExamTo encourage the male patient to “know his own body”. • Explain how to conduct the testicular self-exam (TSE): “Examining during or just after a warm shower or bath is the best time, while scrotum is loose.” “Support the testicles in one hand and feel each simultaneously with the other hand. They should feel glassy and smooth, like a hard boiled egg or olive.” “Gently roll the testicle between the thumb and the fingers. You may feel a soft tubular structure (epididymis) that appears on the top and back testis. It is normal, and should feel like a small deflated noodle.” “ Feel for any nodules or tenderness. There may not necessarily be any pain associated with these conditions. Consult your physician if you notice any of the above.”
Guide to the Male Urogenital Examination IV. Examine the Penis “What to say”: “I am preparing to examine the penis and will attempt to determine if there are any masses present, or if there is any abnormal skin changes or discharge.” “Have you experienced any abnormalities, including any unusual discharge, or pain with urination or erections?” If patient is uncircumcised: “Please retract the foreskin for me so that I might examine all surfaces of the penis.” 2011 © Clinical Skills USA All rights reserved
Guide to the Male Urogenital Examination Anatomy of the Penis Penile Anatomy 2011 © Clinical Skills USA All rights reserved
Guide to the Male Urogenital Examination IV. Examine the Penis • Identify if pt. is circumcised or uncircumcised. • If uncircumcised, ask the pt . to retract the foreskin himself. 2011 © Clinical Skills USA All rights reserved
Guide to the Male Urogenital Examination IV. Examine the Penis 2011 © Clinical Skills USA All rights reserved
Guide to the Male Urogenital Examination IV. Examine the Penis 2011 © Clinical Skills USA All rights reserved
Guide to the Male Urogenital Examination IV. Examine the Penis 2011 © Clinical Skills USA All rights reserved
Guide to the Male Urogenital Examination IV. Examine the Penis 2011 © Clinical Skills USA All rights reserved
Guide to the Male Urogenital Examination V. Examine the Anus, Perineum, Rectum & Prostate “What to say”: “You’re doing great and the exam is nearly complete. I am now going to examine your rectum and prostate. First, I will be visually inspect the area—and then, I will check the prostate to evaluate it’s size, shape, firmness, and signs of nodularity.” “Have you noticed any bleeding from your rectum or in your stool, pain with bowel movements, or urinary issues?” 2011 © Clinical Skills USA All rights reserved
Guide to the Male Urogenital Examination V. Examine the Anus, Perineum, Rectum & Prostate Positioning the Patient (A matter of examiner preference) • The “lateral decubitus” position allows the patient to remain on the exam table. • The “standing-leaning” position is ideal for simple prostate screening when the patient is not in a gown, or when an exam table is not available. Note the examiner’s hand upon initial contact. 2011 © Clinical Skills USA All rights reserved
Guide to the Male Urogenital Examination V. Examine the Anus, Perineum, Rectum & Prostate Positioning the Patient (A matter of examiner preference) 2011 © Clinical Skills USA All rights reserved
Guide to the Male Urogenital Examination V. Examine the Anus, Perineum, Rectum & Prostate • The anogenital (“median”) raphe is formed in the male embryo as the line of closure of the genital folds extending from the anus to the tip of the penis. It is differentiated in the adult in three regions: • - perineal raphe • - scrotal raphe • - penile raphe, or • -“penoscrotal raphe” • The extent of the distinctive raphe coarseness may vary from male to male, and should not be considered symptomatic. 2011 © Clinical Skills USA All rights reserved
Guide to the Male Urogenital Examination V. Examine the Anus, Perineum, Rectum & Prostate 2011 © Clinical Skills USA All rights reserved
Guide to the Male Urogenital Examination V. Examine the Rectum & Prostate “What to say”: “You’re doing great. I will now check your prostate and we’ll be done.” “The prostate exam will only take a few seconds.” “A regular prostate exam is an important part of good preventive healthcare.” “One in five men in the U.S. will develop prostate cancer in their lifetime.” “My touch may feel a little cold at first. You will feel some pressure, but no pain. You may feel an urge to urinate or have a bowel movement---but, you won’t. That is a normal sensation.” 2011 © Clinical Skills USA All rights reserved
Guide to the Male Urogenital Examination V. Examine the Anus, Perineum, Rectum & Prostate 2011 © Clinical Skills USA All rights reserved
Guide to the Male Urogenital Examination V. Examine the Anus, Perineum, Rectum & Prostate Proper DRE Insertion: • 1. Place pad of index finger on the • anus at 45 degree angle. All other • fingers rolled back. • 2.Wait for sphincter to relax • (approx. 3 seconds) • 3. Roll index finger inward slowly. • 4. Slide inserted finger tight along • anterior rectal wall. • 5. Push inserted finger deeply into rectum • as far as possible. • 6. Sweep finger from side-to-side until • prostate is located. Ask patient to • valsalva (“try to push my finger out”). 2011 © Clinical Skills USA All rights reserved
Guide to the Male Urogenital Examination V. Examine the Anus, Perineum, Rectum & Prostate Proper DRE Insertion – 3 Steps 1. Place the pad of inserting finger on anus. 2. Wait for anal sphincter to relax (approx. 3 secs.). 3. Roll inspecting finger inward slowly. Keep tight to the rectal wall and insert fully. 2011 © Clinical Skills USA All rights reserved
Guide to the Male Urogenital Examination V. Examine the Anus, Perineum, Rectum & Prostate • Locate the prostate gland. The • prostate lies at the base of the • bladder and can be found against the • anterior rectal wall. • Palpate the prostate in a firm circular • motion. • Patient may feel a sensation to urinate • as pressure is applied, due to the course • of the urethra passing through the gland. 2011 © Clinical Skills USA All rights reserved
Guide to the Male Urogenital Examination V. Examine the Anus, Perineum, Rectum & Prostate • Note size, shape, firmness, nodularity and • tenderness. The normal prostate has two • lobes with a midline sulcus. Normally the • size of a chestnut, about 2 to 4 cm in length • and width. Should feel symmetrical, firm and • rubbery. Softness may indicate infection, • and hardness may indicate disease. Should • feel like the flesh at the base of the thumb. • A carcinoma may palpate like the bone on • the side of the thumb. Medical Illustration Copyright 2005 Nucleus Medical Art, All rights reserved 2011 © Clinical Skills USA All rights reserved
Guide to the Male Urogenital Examination V. Examine the Anus, Perineum, Rectum & Prostate Assess the rectal wall “360-degree sweep” 2011 © Clinical Skills USA All rights reserved
Guide to the Male Urogenital Examination V. Examine the Anus, Perineum, Rectum & Prostate ANOSCOPY • A procedure to visualize the perianal area, anal canal and distal rectum. • Performed with patient presenting with perianal or rectal complaints, • or as a routine “well-male” or “well-woman” exam between scheduled • colonoscopies. • Performed following the DRE. 2011 © Clinical Skills USA All rights reserved
Guide to the Male Urogenital Examination V. Examine the Anus, Perineum, Rectum & Prostate ANOSCOPY • 1. Lubricate the anoscope well with the obturator in place. • 2. Position the patient in the lateral decubitus position with the patient's buttocks close to the • near edge of the examining table, with knees pulled up toward the chest. Drape the patient • so that only the buttocks is exposed. • 3. Spread the buttocks and gently insert the anoscope (with obturator) into the anal canal. • Asking the patient to take a few deep, gentle breaths may make the insertion easier • 4. Gently advance the instrument towards the umbilicus until the full length is inserted • If the patient complains of pain during insertion, note the location and quality and correlate • the pain with possible clinical symptoms. • 5. Remove the obturator and visualize the anal mucosa. • Any fecal matter can be removed with a large swab • Note the gross appearance of mucous membranes and vasculature. Look for presence • of pus, mucous, blood, ulceration, and hemorrhoidal tissue. 2011 © Clinical Skills USA All rights reserved
Guide to the Male Urogenital Examination V. Examine the Anus, Perineum, Rectum & Prostate ANOSCOPY • 6. Slowly rotate the anoscope (with the obturator still removed) as it is withdrawn, inspect the • anal canal , looking for mass lesions, hemorrhoids or fissures. A clear plastic anoscope • allows the examiner to visualize the mucosa both through the walls and opening of the anoscope. • 7. Visible masses or polyps should not be sampled as the anoscope is too short to get a good • perspective of the extent of the mass lesion. A sigmoidoscope, is best used here. Anal fissure seen through the wall of a anoscope 2011 © Clinical Skills USA All rights reserved
Guide to the Male Urogenital Examination V. Examine the Anus, Perineum, Rectum & Prostate Test for occult blood, if required. Apply fecal sample to a guaiac card. Or, provide the patient with a self-administered 3-day panel fecal collection kit. 2011 © Clinical Skills USA All rights reserved
Guide to the Male Urogenital Examination Concluding the Exam. DO NOT hand the patient the tissue box!! 2011 © Clinical Skills USA All rights reserved
Guide to the Male Urogenital Examination Concluding the Exam. • Thank the patient for their cooperation and reassure them by saying, “you did very well and I appreciate your assistance.” • Discuss the results of all aspects of the physical exam with the patient. • Address pertinent health issues, diagnostic impressions, and health maintenance recommendations. • Offer praise to the patient for their participation in the exam, encourage a healthy lifestyle, invite future contact with questions or concerns, and determine a follow-up exam schedule. 2011 © Clinical Skills USA All rights reserved
Guide to the Male Urogenital Examination Documenting the Exam. Subjective: What the patient tells you. Male urinary: Dysuria, frequency, urgency, UTIs, hematuria, proteinuria, Nocturia (>2), nephrolithiasis, incontinence (type). Urethral d/c, groin pain (hernia) Male sexual: STIs (type, tx), # of partners in lifetime, risky sex, recent change in sexual partner(s); infertility. Impotence/ED/pre-mature ejaculation; Vaccinations against Hepatitis A&B. Objective: Documentation of examination findings Male Genitourinary: Hair distribution, nits, circumcised/uncircumcised penis w/o lesions, masses, tenderness or d/c. scrotum – lesions, nodules, tenderness (masses- varicocele, spermatocele, hydrocele). Testes (size/symmetry, nodularity, tenderness) Hernia (direct/indirect), Suprapubic tenderness. Rectal: Masses, fistulas, fissures or gross blood (hemorrhoids, skin tags), STIs, trauma, sphincter tone, tenderness. Stool color and consistency, guaiac +/-. Prostate size, uniformity, nodules, firmness, tenderness; PSA test results. 2011 © Clinical Skills USA All rights reserved
Guide to the Male Urogenital Examination Any Questions? . 2011 © Clinical Skills USA All rights reserved