Download
1 / 11
110 likes | 290 Views
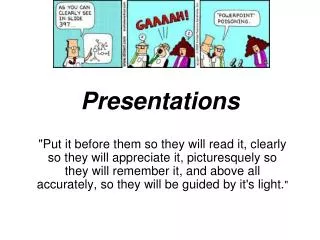
Discussing Results/Poster Presentations:. Today’s agenda: Consider the structure of the Discussion section. Some basic hints and things to avoid. Editing Discussion sections in “mock” papers. Posters and poster presentations. Wrap-up and assignments. The Discussion.

E N D
Discussing Results/Poster Presentations: Today’s agenda: Consider the structure of the Discussion section. Some basic hints and things to avoid. Editing Discussion sections in “mock” papers. Posters and poster presentations. Wrap-up and assignments
The Discussion Begin with the interpretation of the data, with respect to the specific objectives of the study, and get progressively broader, interpreting papers by others, ending with the concepts used to start the Introduction.
Basic hints and things to avoid: The Discussion should begin with a direct link between the Results and the hypotheses and/or goals or questions stated in the Introduction. It can be helpful to briefly restate the hypotheses. Don’t mix things up—keep the questions/hypotheses in the same order as presented in the Introduction. Discuss your data in the context of the hypotheses. Was each hypothesis supported or not? Then back away slowly, interpreting the results in the light of similar work by others, citing references were appropriate. End where you began, with the broad scope of the Introduction.
In-class activity: Let’s now take a careful look a Discussion section of a “mock” paper to see how it might be improved. First take a good look to see how it begins, how the sentences and paragraphs transition, and how it ends, and then use track changes to make changes. Pay careful attention to detail.
Posters vs. Oral Presentations: Many scientific meetings are very big, and not all authors are given time slots for oral presentations. Some people are shy about public speaking. Poster sessions are often mixed with food and drinks to encourage the audience to circulate. Poster sessions allow more detailed conversation between author and audience than oral talks. You can print or offer to e-mail the whole file to interested members of the audience. But, posters are not necessarily less work. Indeed, then can be more time-consuming to prepare.
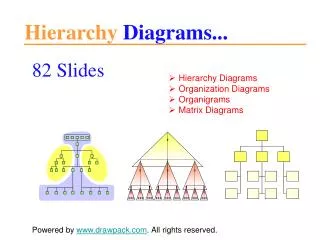
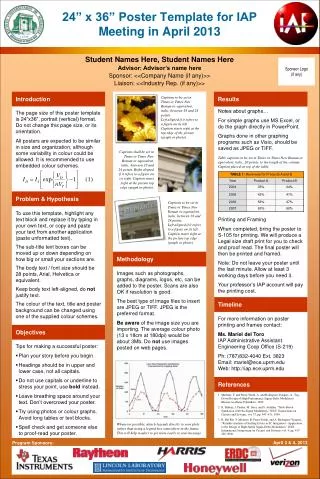
Tips on Posters: You must catch the eye of the passing audience, who will scan or inspect it, not fully read it. Too much text is a turn-off, so add graphs and photos. Words should be read by someone standing 2 m away. Tell a story—make it logical and engaging. Use a format that helps structure the poster. Try four columns, so the reader goes down each column. That way the person does not have to walk back and forth. Zoom in to make text boxes, then zoom out to check the layout. Try a standard template—they are available free, and many websites have useful information and tips. http://people.eku.edu/ritchisong/posterpres.html
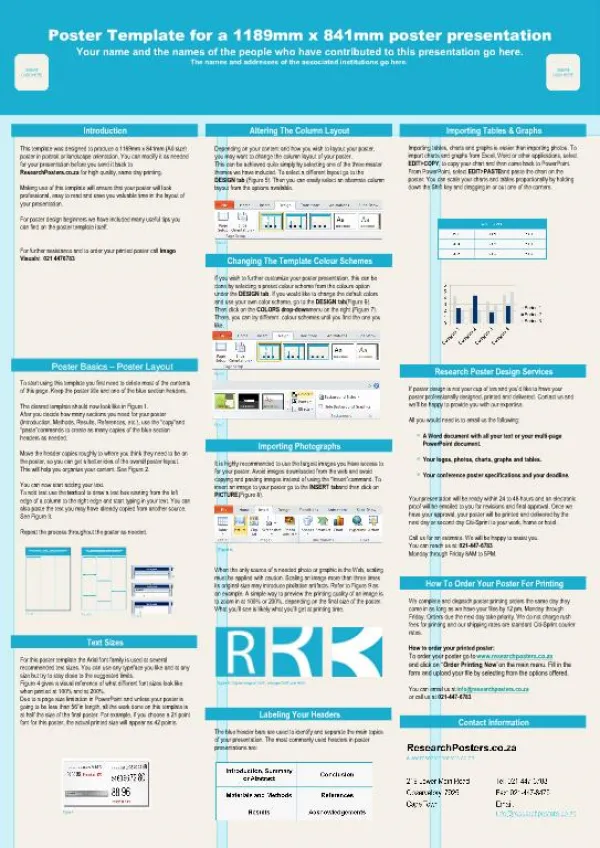
Title of Poster in Arial, Bold, 80-96 Points: Size Dependent on Length Names of Authors in Arial, 60 Points, Bold Lab Logo Institution Logo Heading 1, Arial, 54 points, bold Text in Arial, 40 points, Bold. Text in Arial, 40 points, Bold. Text in Arial, 40 points, Bold. Text in Arial, 40 points, Bold. Text in Arial, 40 points, Bold. Text in Arial, 40 points, Bold.Text in Arial, 40 points, Bold. Key Image 3 Heading 4, Arial, 54 points, bold Text in Arial, 40 points, Bold. Text in Arial, 40 points, Bold. Text in Arial, 40 points, Bold. Text in Arial, 40 points, Bold. Text in Arial, 40 points, Bold. Text in Arial, 40 points, Bold.Text in Arial, 40 points, Bold.Text in Arial, 40 points, Bold. Key Image 1 Key Image 5 Figure 3. Caption in Arial, 36 points, bold. Heading 3, Arial, 54 points, bold Text in Arial, 40 points, Bold. Text in Arial, 40 points, Bold. Text in Arial, 40 points, Bold. Text in Arial, 40 points, Bold. Text in Arial, 40 points, Bold. Text in Arial, 40 points, Bold.Text in Arial, 40 points, Bold.Text in Arial, 40 points, Bold. Text in Arial, 40 points, Bold.Text in Arial, 40 points, Bold. Figure 1. Caption in Arial, 36 points, bold. Figure 5. Caption in Arial, 36 points, bold. Heading 2, Arial, 54 points, bold Text in Arial, 40 points, Bold. Text in Arial, 40 points, Bold. Text in Arial, 40 points, Bold. Text in Arial, 40 points, Bold. Text in Arial, 40 points, Bold. Text in Arial, 40 points, Bold.Text in Arial, 40 points, Bold. Heading 5, Arial, 54 points, bold Text in Arial, 40 points, Bold. Text in Arial, 40 points, Bold.Text in Arial, 40 points, Bold.Text in Arial, 40 points, Bold. Text in Arial, 40 points, Bold. Key Image 4 Key Image 2 Acknowledgments (Arial, 40 points, bold) Acknowledgments in Arial, 32 points, bold--try to keep to one or two lines, References (Arial, 40 points, bold) First reference in Arial, 32 points, bold, with a reverse indent: alphabetical or numerical order. Second reference in Arial, 32 points, bold, with a reverse indent: alphabetical or numerical order. Figure 2. Caption in Arial, 36 points, bold. Figure 4. Caption in Arial, 36 points, bold.
More tips for posters For other examples, just Google “poster templates.” Try drafting with pencil and paper to get the layout first. Use a standard font (a sans serif typeface like Calibri or Arial), and be consistent throughout. Use color but be consistent. If data are shown in blue in one figure, don’t use red in another. Consider using arrows or flow-charts to guide the reader around. Remember, people are easily distracted. Give references for key papers but not too many.
When presenting the poster: Make eye contact and stand so as to encourage interest. Know your material and expect questions. Engage in a dialog; ask what the other person studies. Be ready for follow-up with business cards and printed mini-versions of the poster to distribute.
Poster presentations and peer grading: Next Monday, each of you will present your poster describing the publication you have been studying. You must limit your talk to about 15 minutes, allowing 1 or 2 minutes for questions and/or comments. All of us will take notes and grade each one. You will then e-mail me the final ppt file. Everyone will be counting on you: it’s really important that you come to class, not only to make your own presentation but to help provide feedback to others as well.
Assignments: Work on your poster and practice your delivery. Read about posters in the book, pages 201–209. Work on your papers. This is the 6th week of class and you can see from the syllabus that we are quickly moving towards the end, when you will be responsible for a paper and an oral presentation based on your original study. There is a lot of work ahead, so keep a sharp focus on your objectives. Bring what you have written so far to class on Wednesday—we’ll do some intensive peer review.