Download
1 / 58
590 likes | 720 Views
Disinfection and Sterilization. Mary T. Post, RN, MS, CNS, CIC Infection Prevention Specialist Oregon Patient Safety Commission. Objectives. Discuss: Current recommendations and standards for best practices in reprocessing surgical instruments and equipment

E N D
Disinfection and Sterilization Mary T. Post, RN, MS, CNS, CIC Infection Prevention Specialist Oregon Patient Safety Commission
Objectives Discuss: • Current recommendations and standards for best practices in reprocessing surgical instruments and equipment • Current recommendations and standards for quality assurance, monitoring, and documentation of the sterilization process Describe: • Common findings identified by Oregon Healthcare Regulatory and Quality Improvement (HCRQI) and the Centers for Medicare & Medicaid Services ASC surveys related to disinfection and sterilization • Rutala’s 14-Step protocol for disinfection/sterilization failures Discuss: utilization of tools designed to assist with ASC sterilization and disinfection practices
Who is at Risk? • Staff: when processing instruments, staff are at risk of exposure to blood or body fluids • Patients: microorganisms found on improperly processed items may cause infections during procedures • Community: if hands are contaminated or if there is an infection from exposure to bloodborne diseases
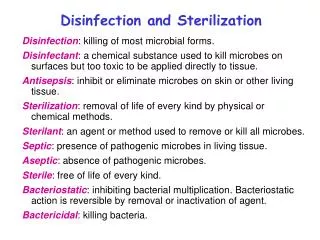
Disinfection and Sterilization EH Spaulding believed that how an object will be disinfected depended on the object’s intended use • Critical: objects that enter normally sterile tissue, the vascular system, or through which blood flows, should be sterile • Semi-critical: objects that touch mucous membranes or skin that is not intact require a disinfection process (high-level disinfection (HLD) that kills all microorganisms except small numbers of bacterial spores • Non-critical: objects that touch only intact skin require low-level disinfection
Processing “Critical” Patient Care Objects • Classification: critical objects that enter normally sterile tissue, the vascular system, or through which blood flows • Object: sterility • Level of germicidal action: kill all microorganisms, including bacterial spores • Examples: surgical instruments and devices, cardiac catheters, implants • Method: steam, ethylene oxide, hydrogen peroxide plasma, hydrogen peroxide vapor, ozone
Processing “Semi-critical” Patient Care Objects • Classification: semi-critical objects that come in contact with mucous membranes or skin that is not intact • Object: free of all microorganisms except high numbers of bacterial spores • Level of germicidal action: kills all microorganisms, except high numbers of bacterial spores • Examples: respiratory therapy and anesthesia equipment, GI endoscopes, endocavitary probes, etc. • Method: high-level disinfection
Selecting a Process • Be certain to read the instrument manufacturer’s instructions for reprocessing • Use the correct processing methodology for each instrument
Point-of-use Keeping instruments moist at the use location (e.g., operating/procedure room): • Prevents biofilm development • Protects instruments • Facilitates decontamination and cleaning
Transport of Soiled Instruments/Equipment • Bins with lids • Impermeable color bags • Closed/covered carts • Closed sterilization container systems • Biohazard label
Remember:Have a Dirty-to-Clean Work Flow • Traffic flow • Physical separation from all other areas of processing department • Procedural barrier separation • Ideally, doors are closed and pass through windows are closed
Decontamination Environment • Room should be negative pressure • Temperature: 60-65 F • Humidity: 30-60% • Temperature/humidity monitors available • No fans or portable air conditioners
Decontamination • The first step in processing instruments • Safer to handle for whomever performs cleaning and further processing • Reduces the number of organisms • Eliminates fluids or tissue remains • Removes contaminants that collect in joints, groves and teeth of items
Cleaning • Wear appropriate personal protective equipment • Disassemble or open items to be cleaned • Scrub items underwater in tepid water and approved detergent (if appropriate) to prevent aerosolization • Label solutions appropriately; fill to appropriate level in bin • Rinse items several times to insure all detergent is removed • Mechanical (tunnel) washers
Clean Work Area • Where instrument packaging, sterilization, and storage should occur • Should be positive pressure to the decontamination area • Temperature range: 68 to 73 degrees F • Humidity: 30-60 degrees
Drying • Leave items disassembled, separated and open • Allow to dry thoroughly before packaging • Visually inspect items to be certain they are clean
Wrapping & Sealing • Inspect wrapping to be sure it’s free from holes/damage • Limit contents in each package to ensure processing is able to reach item surfaces thoroughly • Pack contents so they can be opened and easily delivered onto a sterile field • Use appropriate chemical monitor facing plastic (so it can be read)
Double Pouching • Inside pouch smaller than outside pouch • Inner pouch should not be folder over onto itself • Perform only if validated for that by manufacturer
Labeling • Identify contents and initials of person packaging items • With a water resistant marker or labeler: • Sterilization date: month/date/year • Load number • Sterilization equipment (if more than one autoclave) • Statement: “Product not sterile if packaging is open, damaged. Check before using.” • Labels on plastic side only for pouches; label on tape for wrapped package
Rigid Sterilization Containers • Should be sized appropriately for the contained instruments (not too large, not too small) • Lids need to be closed appropriately and should not be cracked, chipped, etc. • Materials should be compatible with type of sterilizer chemicals in use
Sterilization Wrap • Woven wrap • Non-woven • Single layer (two layers sequentially wrapped) • One-step wrap (two layers bonded together; simultaneous wrap)
Quality Assurance Monitoring for Steam Sterilization Critical parameters for each load: • Steam penetration • Adequate temperature • Pressure • Time Use mechanical, chemical and biological monitors to evaluate sterilizing conditions and effectiveness
Sterilization Monitoring: Mechanical Indicators • Cycle time, temperature, and pressure is displayed on sterilizer gauges with each instrument load • A printout or graph documents these parameters
Sterilization Monitoring: Chemical Indicators (CI) • Responds with characteristic chemical or physical change to one or more physical conditions within sterilizing chamber • Used to detect potential sterilization failures that could result from incorrect packaging or loading of sterilizer, or malfunctions of sterilizer • AAMI defines six classes of CI based on ability to monitor one or multiple sterilization parameters
Sterilization Monitoring: Chemical Indicators (CI) • Indicate that item has been exposed to the sterilization process; does not prove sterilization has been achieved • Should be placed inside each pack to verify steam penetration • Should also be fixed to outside of each package to show it has gone through sterilization process
Class V and VI Integrators • Chemical indicator that reacts to more than one of the critical parameters (steam penetration, temperature, pressure, time) • Provides high level of quality assurance • Must be used with a biological indicator • Class VI Integrators (Emulating) are new and are being added to AAMI standards ST79 (must be used with a BI)
Sterilization Monitoring: Biological Indicators (BI) • Closest to being ideal monitor and measure of effectiveness by challenging sterilization process against resistant spore (Bacillus spores) • Monitors efficacy of air removal and steam penetration • Use BI daily if sterilizer is used daily • Use BI for every implant • Use BI for every ETO run • Need procedures for follow up if BI positive
Biological Indicators (BI) Steps for Use • Write sterilizer number, load, and date on indicator • Place in package in area most difficult to sterilize • Run sterilizer per manufacturer’s directions • Check chemical indicator for change • If chemical indicator has changed, remove and place BI in incubator (must crush capsule to activate upon placing in incubator) • Place a BI control (indicator that has not been processed) into incubator • Incubate for specified time
Biological Indicators (BI) Steps for Use (cont.) • Remove at regular intervals and visualize color change • Incubation time varies with product • Read and record results • Test negative (purple) • Test positive (yellow): sterilization process has failed due to improperly processed load, failure to meet temperature or exposure parameters, mechanical problems, etc. • Note: Rapid-action BIs are automatically read by the incubator
Sterilization Preparation • Textile packages on top • Peel pouches on edge • Instrument sets flat • Rigid containers under wrapped packages • Items should never touch sterilizer chamber walls Do not overfill!
Sterilization • Sterilize prepared items according to the directions in the manufacturer’s manual for the specific sterilizer that you use • Be certain the sterilizer receives scheduled routine maintenance as required by the manufacturer
Immediate Use Sterilization • See Flash Sterilization Clarification - FY2010 Ambulatory Surgical Center (ASC) Surveys http://www.cms.gov/SurveyCertificationGenInfo/downloads/SCLetter09_55.pdf • Keep manufacturer’s instructions for all automated washing, disinfecting, and sterilizing equipment readily available to staff
CMS Questions CMS will ask ASCs: • Is the sterilizer labeled for this cycle by the manufacturer? • What is the sterilizer manufacturer-recommended load for that cycle? • Is the containment device used labeled by its manufacturer for use in that cycle? • For what load is the containment device recommended by its manufacturer?
CMS Questions (cont.) CMS will observe staff perform equipment reprocessing: Sterilization • Critical equipment is sterilized • Items are pre-cleaned according to manufacturer’s instructions or evidence-based guidelines prior to sterilization • Medical devices and instruments are visually inspected for residual soil and re-cleaned as needed before packaging and sterilization • A chemical indicator is placed in each load • A biologic indicator is performed AT LEAST weekly and with all implantable loads
CMS Questions (cont.) • Each load is monitored with mechanical indicators (e.g., time, temperature, pressure) • Documentation for each piece of sterilization equipment is maintained and up to date and includes results from each load • Items are appropriately contained and handled during the sterilization process to assure that sterility is not compromised prior to use • After sterilization, medical devices and instruments are stored in a designated clean area so that sterility is not compromised • Sterile packages are inspected for integrity and compromised packages are reprocessed
Additional CMS Questions • Is the chemical indicator used labeled for use in this cycle by its manufacturer? • If a biological indicator is used, is it labeled for use in this cycle by its manufacturer? • If the cycle is used frequently, is it checked regularly with a biological indicator?
Documentation Use company documentation booklet or the sterilizer load documentation sheet to document: • Sterilizer number and/or location • Load number • Sterilizer operator • Cycle exposure time and temperature • Biological indicator use: documentation and results • Recall documentation (if applicable) Retain records for seven years
If BI Test is Positive • Record results; report and follow up immediately • Remove sterilizer from service until reason is determined • Check sterilizer records or logs to see if all other critical parameters were meet • Mechanical (time, temperature, pressure) and chemical (internal and/or external) • Identify and correct any errors found • Retest sterilizer and evaluate mechanical, chemical and biological monitors • Check if other items have failed indicators from previous loads
If BI Test is Positive • If repeat BI is negative and critical parameters are met, return sterilizer to service • If still positive: • Have sterilizer serviced • Can repeat BI using different manufacturer or lot Need written protocol for positive BIs and recall process when indicated
Recall Process • Initiated when load sterility is questioned • Recall all items processed between the failed biological (positive failure) indicator and the previous BI (negative failure) • Notify departments of the recall and collect unused items with questionable sterility • Implement Rutala’s 14 step investigation process
Transporting • All carts used to carry sterile items and supplies are to be covered and cleaned routinely • Cover single items that are hand carried • Do not carry them under your arms • Sterile supplies and contaminated supplies are to be transported separately
Storage • Closed cabinet that does not crush, bend, compress, or puncture packages • If no cabinet: covered plastic container • Open storage: lowest acceptable shelf 12” from floor & highest shelf 18” from ceiling • Sterile supplies are considered contaminated if contact with wet or contaminated surfaces, including the floor • Use sterile supplies on a “first in, first out” basis • Visually inspect packaging for integrity and labeling prior touse
Loaner Instrument Policy • Hot topic • If you borrow instruments from another facility, have a policy • Manufacturer’s instructions should be reviewed and available onsite to staff • Be certain the right process for reprocessing is used (e.g., temperature, time, method, etc.) • Keep a documentation log
Multi-Society Guideline for Reprocessing Flexible Gastrointestinal Endoscopes, 2011 • Since 2003, changes in: • High-level disinfectants • Automated endoscope reprocessors • Endoscopes • Endoscopic accessories • However, efficacy of decontamination and high-level disinfection is unchanged and the principles guiding both remain valid • Additional outbreaks of infection related to suboptimal infection prevention practices during endoscopy or lapses in endoscope reprocessing (unfamiliarity with endoscope channels, accessories, attachments; gaps in infection prevention at ASC) • Examples: failure to sterilize biopsy forceps between patients • Lapses in reprocessing tubing used in channel irrigation
Endoscope Reprocessing • Pre-clean: at point-of-use, remove debris by wiping exterior and aspiration of detergent through air/water and biopsy channels • Clean: mechanically cleaned with water and enzymatic cleaner • HLD/Sterilize: immerse scope and perfuse HLD/ sterilzant through all channels for exposure time (>2% glut at 20m at 20 degrees); if AER used, review model-specific reprocessing protocols from both the endoscope and AER manufacturer
Endoscope Reprocessing (cont.) • Rinse: scope and channels rinsed with sterile water, filtered water, or tap water; flush channels with alcohol and dry • Dry: use forced air to dry insertion tube and channels • Store: hang in vertical position to facilitate drying; stored in a manner to protect from contamination
Multi-Society Guideline for Reprocessing Flexible Gastrointestinal Endoscopes, 2011 Unresolved issues • Interval of storage after which endoscopes should be reprocessed before use • Data suggest that contamination during storage for intervals of 7-14 days is negligible
Monitoring Temperature of High-Level Disinfectant • Advanced Sterilization Products, May 2011 • Regulatory and accrediting organizations have increased their scrutiny of HLD temperatures and often request objective evidence that reprocessing temperatures meet requirements • In many cases, the ambient temperature of a reprocessing area is sufficient to ensure the minimum reprocessing temperature is maintained during HLD - BUT NOT ALL • The basin with solution may need to be warmed before the processing begins • The minimum temperature should be maintained or exceeded throughout the soaking time; warmers available on market • Regulators have asked users to conduct daily temperature monitoring of HLD and record on the log along with MEC
Steris System - Peracetic Acid 0.2% • SS1 Processor: tabletop liquid peracetic acid system • Used for instruments such as endoscopes • FDA has advised users to transition to alternative processing methods • New STERIS System 1E approved by FDA for HLD • Multiple concerns: for latest info see FDA and STERIS websites
CMS High-level Disinfection (HLD) • Semi-critical equipment is HLD or sterilized • Items are pre-cleaned according to manufacturer’s instructions or evidence-based guidelines prior to HLD • Medical devices and instruments are visually inspected for residual soil and re-cleaned as needed before HLD • HLD equipment is maintained according to manufacturer instructions • Chemicals used for high-level disinfection are: • Prepared according to manufacturer instructions • Tested for appropriate concentration according to manufacturer’s instructions • Replaced according to manufacturer’s instructions • Documented to have been prepared and replaced according to manufacturer’s instructions
CMS HLD (cont.) Instruments requiring high-level disinfection are: • Disinfected for the appropriate length of time as specified by manufacturer’s instructions or evidence-based guidelines • Disinfected at the appropriate temperature as specified by manufacturer’s instructions on evidence-based guidelines • Items that undergo HLD are allowed to dry before use • Following HLD, items are stored in a designated clean area in a manner to prevent contamination