Download
1 / 6
60 likes | 132 Views
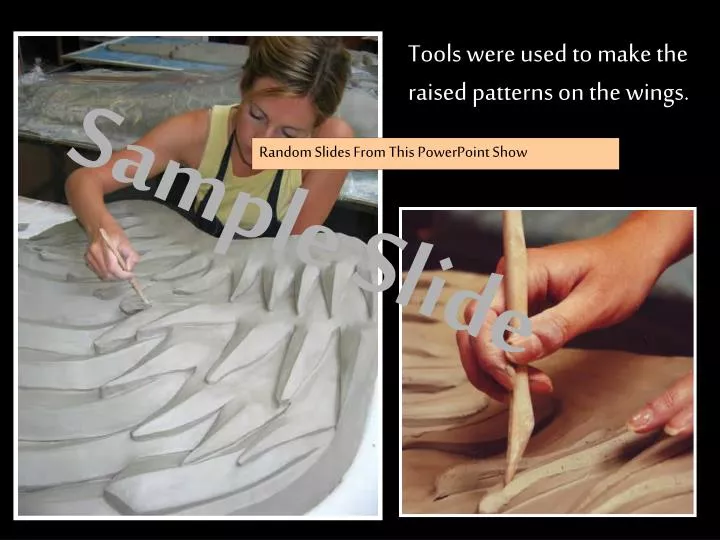
Tools were used to make the raised patterns on the wings. Random Slides From This PowerPoint Show. Sample Slide. This is just one tile by the same artist. Can you see the textured surfaces? How did they do that?. Random Slides From This PowerPoint Show. Sample Slide.

E N D
Tools were used to make the raised patterns on the wings. Random Slides From This PowerPoint Show Sample Slide
This is just one tile by the same artist. Can you see the textured surfaces? How did they do that? Random Slides From This PowerPoint Show Sample Slide
How to make a relief tile First you need to plan your tile by making a drawing. When you have all your ideas, you can begin. Random Slides From This PowerPoint Show Sample Slide To make a tile you need to start with a piece of clay.
Learning objectives • Children should learn: • To apply observational drawings to construct a tile relief using clay. • To try out tools and techniques for making a tile panel in clay • Activity: Make a relief tile • Look at and talk about the Lisa Milroy picture and discuss different shapes, textures, colours, patterns. From the photographs of different houses previously collected, make a drawing that focuses on a range of textures. • Learning outcomes • Children: • Transfer their drawings onto another material, and explore the use of tools and techniques of clay relief modelling. • Clay work: • Make marks in the clay using drawings as reference. Emphasis on pressing, pushing and making different marks with different tools. • Build on the surface of the clay by pinching and adding extra shapes with marks and textures.
QCA Objectives: • Children should learn: • to try out tools and techniques and apply these to materials and processes • Activities: • Producing the panels for the mural • Ask each group to produce a panel for the mural. Provide each group with a base board large enough for the group to work on and materials and tools for modelling in clay or another suitable material. • Show the children how to mark out the main areas of their design on their base. If they are using clay, they will need to roll out a base about 1.5cm thick. • Ask the children to develop the surface of the panel by: • adding clay or other materials such as Modroc • pressing shapes, patterns and textures into the surface • engraving shapes, patterns and textures using a pointed tool • modelling the surface to refine the shapes and forms of the design • When the clay is 'leather hard', the surface can be painted with different coloured clay 'slips' and then fired in a kiln. If the work is not fired, it can be decorated with paint mixed with PVA glue. • Mount the panels together to make a group mural. Discuss how the blocks could be arranged to emphasise the effects of shape, pattern and decoration. • Outcomes: • work collaboratively to create a relief panel by exploring and using a variety of materials and techniques • discuss and agree how the work will be displayed
www.ks1resources.co.uk KS1Resources.co.uk If your back button doesn’t work……… to return to your last webpage CLICK HERE www.graphicsfactory.com