Download
1 / 49
490 likes | 626 Views
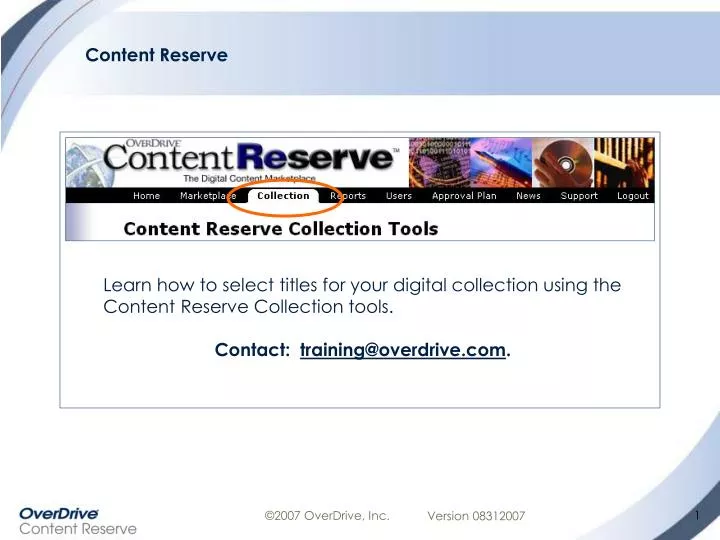
Content Reserve. Learn how to select titles for your digital collection using the Content Reserve Collection tools. Contact: training@overdrive.com. Objective. Our goal today is to provide step-by-step instructions on ordering digital content for your digital collection.

E N D
Content Reserve Learn how to select titles for your digital collection using the Content Reserve Collection tools. Contact: training@overdrive.com.
Objective Our goal today is to provide step-by-step instructions on ordering digital content for your digital collection. Content is ordered through Content Reserve. www.contentreserve.com
Workflow Overview • Content Reserve tools provide everything you need to create and edit Select Lists. • Select Lists are converted directly to a Purchase Order and submitted online. • New digital content becomes available to your patrons within 60 minutes or less. Create a Select List Reports: Review Usage Edit a Select List Checkout & Download Complete PO = Purchase Titles available on site
Ordering Methods • There are two ways to browse for titles you want to purchase: • Search for desired titles. • Quick search. • Advanced search. • Import a ‘Suggested Title List’. • For your convenience, OverDrive content specialists have developed recommended lists of titles, organized by subject. • You can import a ‘Suggested Title List’ into your account, and build a purchase order from it.
Download Standing Order Plans (DSOP) • Benefits: • Immediate access to best sellers. • No need to monitor new releases – titles are added automatically. • Efficient budget planning for the year. • How it works: • Build your own customized plan -- you select the number of titles and copies. • To begin, go to: Content Reserve > Collection tab > Download Standing Order Plans. • A confirmation email will be sent 2 weeks prior to the beginning of each month with the expected titles and estimated total. • To edit a plan, go to: Content Reserve >Reports tab > View Download Standing Order Estimates. • On the first of each month, your DSOP will run and your titles will appear on your website available for holds. After the ‘on sale date’ passes, titles become available for download.
What licensing models are available? • One Copy – One Patron • Purchase a title. The library / consortium owns the title. • If a patron checks out a title, it is removed from circulation. • Patrons may request a checked out title by placing a hold. • Maximum Access • Annual subscription. • One copy is available for unlimited simultaneous checkouts. • Titles will always be available for your patrons. • Holds are never necessary.
Step by Step Using Content Reserve
Login to Content Reserve • Login: www.contentreserve.com. • To change your password or start page: Home tab > Manage User Information. • If you need your login info, contact your library’s OverDrive project coordinator.
OverDrive Digital Library Reserve: Collection Manager • Collection Manager • Select the ‘Collection’ tab. • Next, select ‘Content Reserve Collection Tools’. • The ‘Content Reserve Collection Tools’ screen is displayed.
Content Reserve Collection Tools The Content Reserve Collection Tools submenu • Create New Select List • Search for available titles and select quantities to purchase for your shelves. • Suggested Title Lists • Import Suggested Title Lists created by our content specialists. • Add the entire list or individual titles to your Select List.
Create a New Select List • Click on ‘Create New Select List’ to add a new Select List. • Select ‘Add a new select list to the work queue’. • Content Reserve automatically assigns a name to your new Select List. Edit the name if desired. • Adhering to a naming convention for your Select Lists will help you track multiple purchase orders. • You may have more than one Select List active at a time.
Manage Select Lists / Edit Name • Once you have chosen to ‘Create New Select List’ you will be taken to the ‘Manage Select List’ screen. • Click on ‘Edit Name’ to edit the name of your list. • Perform a ‘Quick Search’ or ‘Advanced Search’ to browse for titles. Quick Tip: How to edit the name of an existing Select List. Open the Select List to be renamed: Collection Tab > Content Reserve Collection Tools > Continue Work. Click on the Select List to be renamed. The ‘Manage Select List’ page will open. Click the ‘Edit Name’ link.
Building a Select List with a Search • You can search for titles you want to purchase in two ways: • Quick search. • Search a single field. • Advanced Search. • Search multiple fields.
Quick Search • To Quick Search: Click the dropdown arrow next to ‘Quick Search By’. Select a search topic. • Another box will appear where you can enter your search term(s). • Click ‘Go’ to launch your search. • Possible search topics include: • Title. • Creator. • Pub Entity: The business name of a publishing house. • Publisher: The name of a publishing division. • Subject.
Advanced Search • To perform an Advanced Search click the ‘Advanced Search’ button. • AnAdvanced Search may be used to define multiple terms. • Title. • Creator: Author, Illustrator, Narrator, or Translator. Also, Conductor or Composer. • Format: Adobe Reader, Mobipocket Reader, OverDrive Audio, OverDrive Music, OverDrive Video. • Pub Entity: Publishing Entity. The business name of a publishing house. • Publisher : The name of a publishing division. • Imprint. • Identifier: ISBN or DOI. • Language: Foreign language instruction and titles. • Subject: Subject Area. Provided by Publisher. • Keyword: May be provided by Publisher. • Pub Date: Publication date for digital title. • SRP: Suggested Retail Price. • Approval Plan. • Status: Search against your existing collection, including patron holds.
Advanced Search • If your search returns the message: ‘There are no titles that match your current search criteria. Please try a new search’, simply remove one of the search criteria and try the search again.
Working with Search Results:Alpha Index • Use the alpha index to quickly jump from one letter to another when searching for a particular title. • If there are no titles available that begin with a particular letter, that letter will be grayed out.
Working with Search Results:Enhanced Titles and Public Performance • titles: These titles include supplemental material such as liner notes or mobile versions of a video title. • While browsing, click on the ‘Enhanced’ text to learn more. • Public Performance Permitted :Video titles with this notation are licensed for viewing with a group in a public place, such as a classroom or church setting. Titles without the ‘public performance’ designation are licensed for home and personal use only. • This information will also display on your public facing digital library site.
Working with Search Results: Adding Titles to your Select List • Add titles to your Select List in two ways: • Use the option ‘Edit All’ to easily add the desired number of copies of every title from your search. • Scroll through the search results and enter the desired numbers of copies in the ‘Current List Units’ field. When finished click the ‘Add to List’ button. • View the Select List by clicking ‘View List’.
Preview and Excerpt Features • Preview Feature: You may preview titles for 24 hours • To enable the Preview feature, contact your OverDrive Project Manager. Include your Login ID and your library’s IP address / range. • Excerpt Feature • eBooks have text excerpts on the details page while OverDrive Audio Books / Music / Video titles have excerpts which open in Windows Media Player. Text Excerpt. OverDrive Audio Books / Music / Videos feature an excerpt link. A two minute sample will play in Windows Media Player.
Working With Your Select List • SORT: Click on any column header to sort on that column. • Title: Click on any title link to view the details page for that title. • FMT Column: • PDF – Adobe eBook. • MOBI – Mobipocket eBook. • OAB – OverDrive Audio Book. • ODM – OverDrive Music. • ODV – OverDrive Video. • Units: Edit number of units with ‘Edit All’ or by clicking directly on the unit number. • Pending: Click on the number to view other Select Lists which contain the same title. • Hold: Indicates number of holds currently on this item. • Total: Purchase Price (SRP x number of units). • Remove Titles: Select the check box(es) next to the title(s), and click ‘Remove Titles’.
Building a Select List with Suggested Title Lists • A Suggested Title List is an easy way to import titles and quickly create a Select List. • Digital Library Reserve’s content specialists have created these popular lists for your convenience. • Check the boxes next to the Select List(s) you are interested in, and click ‘Add Checked List(s) To Your Work Queue’. • Once the list is added click ‘OK’. Operation complete alert.
Suggested Title Lists (cont.) • Once you select ‘OK’, the ‘Content ReserveCollectionTools’ submenu is displayed. • From here choose the ‘Continue Work’ option. • The ‘Select Lists in Work Queue’ screen is displayed. • If you have multiple Select Lists open, they are displayed. • Click on the Suggested Title List you imported.
Suggested Title Lists (cont.) • This will load the titles from the Suggested Title List into your work queue as a Select List. • The system will automatically name your Select List with the same name as the Suggested Title List. • Please remember to edit the name to the naming convention for your Library. Updated: Manage order name option
Editing a Select List • Once you have created a Select List, you can edit the list before submitting it as a purchase order. • How to change quantity for a title: • Under the ‘Units’ column, select the number that you wish to edit. • A ‘Manage Units’ box is displayed, enter the quantity of units that you wish to purchase, then click ‘OK’. • The next screen will prompt you to ‘Retry’ or ‘Cancel’ the edit. Select ‘Retry’ to save the change you made. Manage units option.
‘Continue Work’ on an Existing Select List • Quick Tip: Access an Existing Select List. • Go to: Collection Tab > Content Reserve Collection Tools > Continue Work. • Click on the Select List you would like to open. • The ‘Manage Select List’ page appears where you can continue searching for additional titles. • From the ‘Manage Select List’ page, click ‘View List’ at any time to edit your Select List.
Merge Select Lists • Quick Tip: How to merge Select Lists. • Go to: Collection Tab > Content Reserve Collection Tools > Merge Select Lists. • Indicate Primary List (into which others will be merged). Click ‘Continue’. • Indicate list(s) to merge into Primary List. • Click ‘Submit’. Step 2: Indicate list to merge into Primary List
Delete Select Lists • Quick Tip: How to delete Select Lists. • Go to: Collection Tab > Content Reserve Collection Tools > Clear Work Queue. • Select ‘Clear all Select Lists’ or control-click to highlight multiple lists. • Click ‘OK’.
Compile Select Lists • Select titles for an order from multiple select lists, including Suggested Title Lists. • Requires ‘Manage Collection’ and ‘Create Compiled Select List’ user rights. • ‘Submit Select List’ user right is required to submit the final list as a Purchase Order.
Compile Select Lists • Quick Tip: How to ‘Compile Select Lists’. • Go to: Collection Tab > Content Reserve Collection Tools > Create New Compiled Select List. • Content Reserve automatically assigns a name to your new Select List. Edit the name if desired. • Click ‘OK’. • Indicate the list(s) from which you would like to choose titles. • Click ‘Continue to next step’. • All selected lists will be ‘compiled’ to a single Select List. Duplicate titles will be highlighted in bold. • Indicate the titles to add to your final Select List, and then click ‘Add Selected Titles To My List’. • Click ‘View My List’ at any time to view selected titles. • Next, click ‘Continue to Purchase Page’ for the option to submit the new list as a purchase order.
Completing Your Purchase Order Create Worksheet, Complete PO options • When your Select List is complete and ready to submit as a Purchase Order, click the ‘View List’ button and verify your list of selected titles. • Create Worksheet (optional): • Click on the ‘Create Worksheet’ button to export your Select List to a spreadsheet program such as Microsoft Excel. • Complete Order: • Click on the ‘Complete P.O.’ button and your order will be submitted to the system. • You will be given the option to add an ‘Internal purchase order ID’ to your purchase order. • Remember to adhere to your library’s naming convention for easy tracking. Enter your internal purchase order ID here
Completing Your Purchase Order • After entering your internal purchase order ID you should see this screen. If not, you may need to turn off your pop-up blocker software. (In Internet Explorer: Tools > Pop-Up Blocker > Turn Off Pop-Up Blocker). Quick Tip: Was my P.O. submitted successfully??? From the Reports Tab, go to View Purchase Order History. How to turn off pop-up blocker software: Open Internet Explorer. Go to: Tools > Pop-Up Blocker > Turn Off Pop-Up Blocker. Your purchase orders will be listed here.
Step by Step: Build a Maximum Access Collection Maximum Access
How to build a Maximum Access collection • Maximum Access Benefits: • Annual subscription. • Unlimited simultaneous checkouts. • No need for holds. • Titles are always available for checkout.
Publishers Offering Max Access • Audio is available from: • Blackstone Audio, Inc. • Video is available from: • A & E Television Networks • Clearvue & SVE • Image Entertainment • Mill Creek Entertainment, LLC • Venevision International
Working with search resultsMax Access / One Copy - One User • Max Access titles will be included in the search results for a traditional ‘one copy / one user’ Select List. • These titles are accompanied by a note ‘Only available in Max Access’. No ‘quantity’ box is displayed. • Titles that are available in both the Maximum Access and the one copy - one user model will be accompanied by a note ‘Also available in Max Access’.
STEP TWO: Select ‘Shop Max Access’ • To start a Maximum Access Order: • Select the ‘Collection’ tab. • Next, select ‘Content Reserve Collection Tools’. • The ‘Content Reserve Collection Tools’ screen is displayed. • Select ‘Maximum Access’ from the ‘Content Reserve Collection Tools’. • The ‘Maximum Access Collection Tools’ screen is displayed. • Then select from the following options: • ‘Create New Maximum Access List’. • ‘Continue Maximum Access Work’. • ‘Manage Existing Subscription’. • ‘Clear Work Queue’.
STEP THREE: Add titles to your subscription • If creating a new Max Access List, Content Reserve automatically assigns a name to your new list. Edit the name if desired. • Adhering to a naming convention for your lists will help you track multiple purchase orders. • You may have more than one Max Access List active at a time.
STEP THREE: Add titles to your subscription • Once you have chosen to ‘Create New Maximum Access List’, you will be taken to the ‘Manage Maximum Access’ screen. • Perform a ‘Quick Search’ or ‘Advanced Search’ to browse for titles. • Next, add titles to your subscription. • Content Reserve will automatically calculate ‘Total units’ and ‘Units remaining’.
STEP FOUR: Complete your purchase order • To complete your order, click on ‘View List’. • Edit Select List Name: Option to assign a custom name to your purchase order. A naming convention is recommended. • Create Worksheet: Option to export your order to an Excel Worksheet for easy printing or to email as an attachment. • Remove Titles: Remove titles by clicking ‘Remove’. • Complete P.O.: This will submit your selections to OverDrive as a Maximum Access purchase order.
News • One stop for all the latest news: • Suggestions for increasing digital book circulation. • Recommended Orders (Suggested Title Lists). • New Publishers. • Resources: OverDrive current and past catalogs.
Support • Support Resources: • Login to Content Reserve: www.contentreserve.com. • Click on the ‘Support Tab’. • Access training slideshows and prerecorded trainings. • Slideshows available for Adobe Acrobat Reader or Microsoft PowerPoint. • NEED HELP? Email our support staff: support@libraryreserve.com.
Reports • Many reports are available! • Current Waiting List: View titles currently on your patrons’ waiting lists. • Purchased Title Report: View all titles owned plus checkouts, holds, and turnover rates for each title. • Activity Charts: View patron borrowing activity. • Digital Library Statistics: View summary statistics for your OverDrive Digital Library including titles, checkouts, holds, and patrons. • Traffic Reports: View traffic reports from the past 3 calendar months.
Reactivate a Download • A patron might report: • A missing download button. • A download error. • Why does this happen? • Adobe eBooks: A license can be downloaded one time during a single lending period. • OverDrive Video: A license can be downloaded two times during a single lending period. • OverDrive Audio Titles: A license can be downloaded three times during a single lending period. • A license for a checked out title is downloaded when a patron clicks on the download button.
Reactivate a Download • A library staff person with access to Content Reserve can reactivate a download. • You will need the patron’s Library Card Number and Title. • Login to Content Reserve: Reports Tab > Search Checkouts. • Enter the patron’s library card number. The ‘Checkout Details’ page appears. • Click ‘View’ next to the title you wish to reactivate. • Under ‘Reactivate Checkout’, enter a reason (required for Adobe eBooks). • Click ‘Reactivate’. • The title can now be downloaded by the patron.
Next Steps • Login to Content Reserve, and get started. • Sign-up for the ‘Preview’ Feature if you are interested. Email your OverDrive project manager and include your Login ID and IP address / range. • Check out OverDrive’s Training Resources. • If you need technical assistance email:support@libraryreserve.com.
Jump In! • Jump in and have fun! • We wish you much success with your new digital collection! • Please contact us if there is anything we can do to help.