Download
1 / 27
820 likes | 2.04k Views
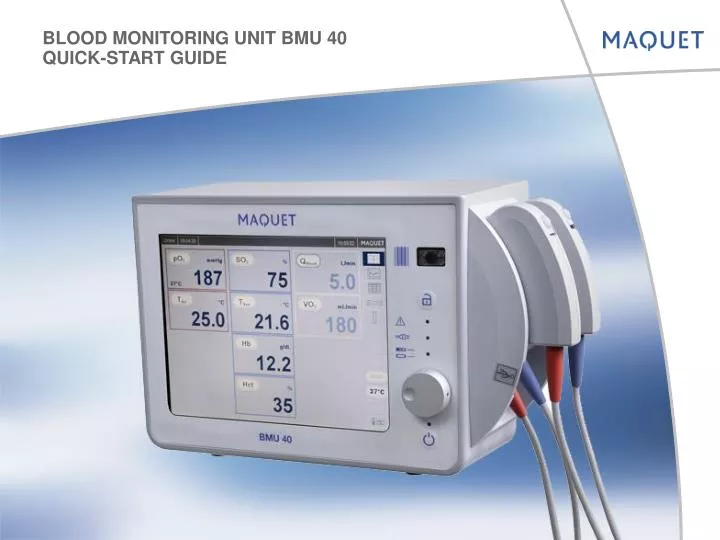
BLOOD MONITORING UNIT BMU 40 QUICK-START GUIDE. 7 steps to get started:. Check the monitor for completeness and intactness Attach the optional holder to the BMU 40 and mount it on the pole Assure main power supply

E N D
7 steps to get started: • Check the monitor for completeness and intactness • Attach the optional holder to the BMU 40 and mount it on the pole • Assure main power supply • Start the device and wait until the probe heads are initialized. Probes must be properly placed in the probe retainer. • Activate scanner and scan barcode labels • Connect probe heads to BMU Sensor and/or BMU Cell • Start perfusion by pressing the ”Go online” button
Scope of delivery: • Monitor incl. venous and arterial probe heads • User manual and main power cable • Positive end test protocol • USB memory stick • Holder incl. adpater plate and screws, if ordered • Transport case, printer, and other accessories come separately
External devices: • Connect external devices such as printer, OR computer, or heart-lung machine according to the user manual • Printer must be in a distance of at least 1.5m from the operating table • External devices on the serial ports of the BMU 40 must comply with IEC 60950, IEC 60601-1, and IEC 60601-1-2 in case they are standing within a range of 1.5m or less away from the operating table • External devices on the serial ports of the BMU 40 must comply with IEC 60601-1, IEC 60601-1-1, and IEC 60601-1-2 in case they are standing within a range of 1.5m or less away from the BMU 40
Assembling the holder: • Fasten adapter plate on the back of the BMU 40 • 2. Attach holder arm on the adapter plate
RS-232 (input/output) RS-232 (input/output) USB for printer Power supply Fuse Grounding pin Check connections:
Connecting and initialising the probe heads: • Before you switch on the BMU 40, make sure that the probe heads are connected properly to the pobe head holder. • First hook it in on the lower end and then click the nose into the probehead.
Initialising the probe heads: • After successful initialisation of the probe heads, the starting screen appears.
Calibrating the unit: • Enable Scanner • Hold the barcode label in front of the scanner at a distance of 20 – 30 cm • Connect probe heads to BMU Sensor and BMU Cell
Correct probe-cuvette connection: • First hook in the probe head on one side and then click the plastic nose into the probe head on the other side • Make sure that the connection is correct • Please note: Incorrect probe-cuvette-connections may lead to invalid measurement data!
Starting perfusion: • When barcode labels are scanned and the probe heads are connected perfusion can be started • Press the ”Go online” button on the touch screen
BASIC FUNCTIONS - USER INTERFACE Numeric screen:
BASIC FUNCTIONS - USER INTERFACE Graphic screen:
BASIC FUNCTIONS - USER INTERFACE Tabular screen:
BASIC FUNCTIONS - BLOOD PARAMETERS Measured and/or displayed:
Main Screen • Graphic screen • Tabular screen • Settings • Calibrate • Mute • Printer • Online/Offline mode • 37°C mode • USB memory stick • Save current data as snapshot Navigation bar:
Recalibration: • Draw a blood sample and synchronically press the button in order to store the current data on the device • Adjust the parameters by chosing the relevant ones on the screen • Remember that pO2 and pO2 (37°C) depend on each other • Apply calibration
Settings alarm limits: • Click on Settings -> Alarm settings • Alternatively: Click direct on the relevant parameter on the numeric screen and set alarm limits
Saving perfusion data: • Plug in the USB memory stick • Switch to offline mode by clicking the Online/Offline button for at least three seconds • Select perfusion • Select file format (CSV is compatible to MS Excel) • Export perfusion • Go online again by clicking again the Online/Offline button
Finishing perfusion: • Finish current perfusion by starting a new one: • Press Setting -> Perfusion settings • New perfusion • Alternatively: Switch off the device by pressing the ON/OFF button for at least two seconds
For disinfection the following cleaning supplies are successfully tested and can be used: • Alcohol (Ethanol, Isopropanol) • Cidex OPA (J&J) • Pursept (Merz) • PeraSafe (PAA)
General details: • BMU 40 is only to be used by medical staff who is qualified accordingly • Before initial operation read the user manual • Keep the unit connected to power supply to ensure that the battery is always fully charged • The user is responsible that the clinical environment complies with the limits specified in IEC60601-1-2 • Switch off the unit during storage, maintenance, repairing, and cleaning • Maintenance and reparation can only be performed by the authorised MAQUET service
Potential influence on measurement results Optical SvO2 measurement methods can be influenced by • Methylene blue • Indocyanine green • Evans Blue • Fetal hemoglobin and unusual levels of • Bilirubin • Lipids • Beta Carotine • Carboxyhemoglobin • Methemoglobin • Sulfhemoglobin
Influence on measurement results Hb/Hct measurement can be influenced by • Sickle cell anemia • Macrocytic anemia • Hyperlipidemia
Sensors, cells, and probes: • Sensors and cells must not be cleaned with alcohol, aether, or acetone • Avoid fingerprints on cells and sensors • Sensors and cells have to be disposed after use and must not be used twice • Each sensor and cell has a unique barcode which can only be used one time. The system denies any barcode which had already been used • To clean the probes, use only water and a soft non scratching tissue • Avoid scratches on the probes • Don’t use chemical cleaning supplies to clean the sensor surfaces of the probes
CONTACT If you have any questions, please contact: Thomas Markmann Product Manager Phone: +49 (0) 7478 921 247 Fax: +49 (0) 7478 921 400 Mobile: +49 (0) 174 91 92 866 E-mail: thomas.markmann@maquet-cp.com