Download
1 / 29
290 likes | 413 Views
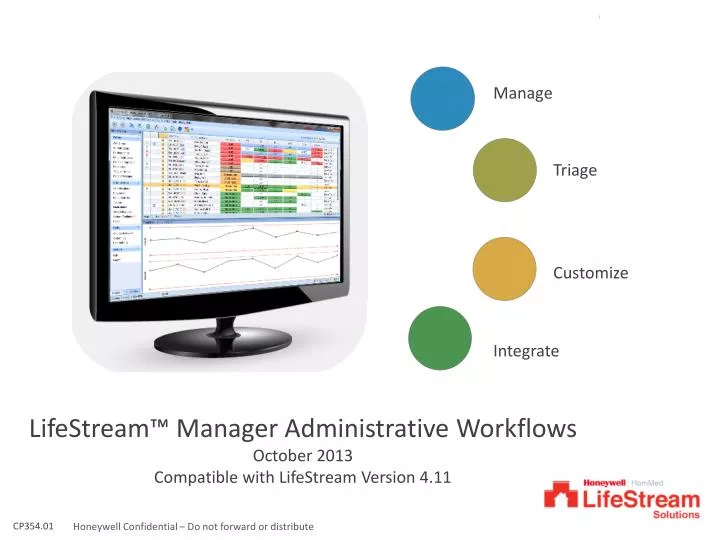
Manage. Triage. Customize. Integrate. LifeStream™ Manager Administrative Workflows October 2013 Compatible with LifeStream Version 4.11. CP354.01. Objective:

E N D
Manage Triage Customize Integrate LifeStream™ Manager Administrative Workflows October 2013 Compatible with LifeStream Version 4.11 CP354.01
Objective: Provide LifeStream Administrators training on the LifeStream Manager features that are controlled through the roles and responsibilities in the application. Agenda: System Configuration Access Patient Scheduling Data Management Objective and Agenda for this session
Only Administrators and IT user roles can make modifications in LifeStream Select System Configuration from the Navigator menu The System Configuration window appears System Configuration System Configuration window System Configuration
Logout Interval: Enter the minutes of inactivity (between 5 and 30) that will result in automatic log out of the system Minimizes exposure of sensitive information to non-authorized personnel Organization: Edit the name of your organization Informational/Non-Editable Fields: Database Version: The current version of LifeStream that is loaded on your system LifeStream Analytics Feature: Contact Honeywell to activate Patient Messages Enabled: Contact Honeywell to activate System Configuration Enter preferences in the System Information fields:
Communications: Displays current monitor configurations for the transmission of information PIN & Security Codes specific to your Company: Same credentials used to download LifeStream Relay data: How LifeStream communicates with the monitor Data Export: Displays information related to export data from your system to Strategic Healthcare Programs (SHP) Indicates the SHP HL7 interface status System Configuration Enter preferences in the Communications and Data Export fields:
Customizable Fields • Understanding the Other tab: • The Othertab displays information related to how the system is being used • All fields are editable except Last String Update, Manual Monitor Limit and PERS Interface Type • Highlight the field to be edited and select the Edit icon. Note: If the field is not editable, the Edit icon will be grayed out 2. Click Edit 1. Choose a field to edit
Allow Manual Monitors: A Manual, or ‘virtual’ monitor, allows you to enter patient data without actually assigning them a monitor Use this feature as a progression from monitoring to independence Callback Time Default: Enter the time for eligible monitors to call back for patient messaging The field is set globally, and affects all monitors within your PIN that have patient messaging capability Customizable Fields
Customizable Fields Auto-acknowledge enabled for packets: Y or N • Choose Yes: • Empty packets, transmit errors, and within limits packets will be automatically acknowledged when the next packet arrives from the monitor • Missing data will also be automatically acknowledged if Alert if Missing is not selected • Packets eligible for automatic acknowledgement (green) when you un-assign a monitor from a patient will be auto-acknowledged • Choose No: • Disable the Auto-acknowledge features if you want EVERY packet to have a note entered by a user
Customizable Fields Current Status Condition Filter Feature Current Status can be filtered by the triage level: Example: If a team is ‘Responding to Readings’ you may want the RNs to only review the ‘Alert’ readings. Applying the filter means RNs will only have the Alerts displayed in their Current Status View. 1 Each User can customize their Current Status view: From the menu bar, select the pull-down arrow next to the Condition Filters icon. 2 3 2. A pull-down menu appears showing all of the available conditions. 3. Check desired boxes.
Customizable Fields Custom Fields 1 through 4 Custom Fields: Unique to your organization and can include anything relevant to you Examples: Team name, Language, Risk Factor Score, Last Hospital d/c Date, or EMS Number The specific field name will display in the Patient Demographics window • Display Custom Fields on Reports: Fields for internal use only can be hidden from the Tabular Trend reports. • Note: • Custom Fields may be used in Analytics reporting • Custom Fields may also be displayed in the Patient List when selected from the Column Chooser
Customizable Fields Filter Alert Counts by Selected Site/Category • The count in the lower right corner of the screen shows ALL remaining unacknowledged readings when this filter is off. • Enabling this feature will limit the count to only those unacknowledged readings for the selected Site/Category. • Globally disable report export/email • Controls the ability to EXPORT documents from LifeStream to another format. • YES prevents any exchange of information via another format or email. • NO allows reports to be saved to a new format and/or emailed.
Customizable Fields Outcomes Questionnaire Indicator: Relates to responses to the Outcomes Check the Outcomes Questionnaire box in Demographics Outcomes Questions will populate a report in Organization Reports Note: Questions 48 – 51 are related to Outcomes and must be programmed on the patient’s monitor in order to activate the report
Customizable Fields Patient Tier: Define customized date ranges for sorting purposes on the Patient List and Current Status screens. Select the Edit Icon on the tool bar 2. Check Enable Tiers box 2 3 • Select two or three tiers based on your organizational preferences • Tier 1: Enter the initial date range • Tier 2: Enter the following date range • Tier 3: Not editable – defaults to ‘Is greater than’ the Tier 2 end date 4 4. Save
Customizable Fields Patient Tier: Once enabled, individual clinicians can use the setting by editing their user preferences on the Patient List and Current Status screens. • Clinicians may select Patient Tier from the Column Chooser • Patient Tiers will display to enhance patient management • The column may be moved using the click and drag method
Scheduling Multiple Patients • Enable Multi-Patient Scheduling • Create schedules for multiple patients via one ‘activity’ vs. on an individual patient basis • Allows Clinicians to make changes to many patients programming with one event The Multi-Patient Scheduling icon will be displayed in the Patient List and Equipment Setup.
Scheduling Multiple Patients • 2. Filter patients by Diagnosis, if preferred • 3. Select the Preset you want to assign to this group of patients • Select the patients from the list by checking the box beside their name • 4. Select Load 1. Check box next to patient name 2. Filter by diagnosis 3. Select Preset 4. Select Load
Multiple-Block Schedules • Multiple-Block Schedules enabled for Questions • Create multi-block schedules (up to 12) during one work activity: • Notes: • The ‘Questions’ tab within Equipment Setup provides the choice of weekly or multiple blocks of 7-days • If choosing a Multiple Blocks schedule, choose the number of blocks desired up to 12
Benefits of Extending Patient Schedules: Reduces need for clinicians to modify schedules every week, and allows progressive clinical management of patient Enables multiple clinical work flows to create schedules to accommodate a variety of organizational processes: Clinician managing a single patient assigns the same questions schedule to another patient, or multiple patients Clinician managing a single patient makes the question scheduled for that patient into a new “Preset” Clinician is able to assign a Preset to a single patient or group of patients from “Preset” menu Extending Patient Schedules
Examples: Repeat certain questions/reminders in subsequent blocks Or, choose education in early blocks and drop in later blocks. Repeat: Select Last Block if you only want the last 7-days to repeat once the schedule is completed Select Entire Schedule to start over with Day 1 after all blocks are completed. Extending Individual Patient Schedules Select the questions / reminders and schedule them for the desired 7-day blocks
Extending Patient Schedules: Use Case Diabetes Patient Scenario: • Week One: Full schedule asking questions about medications • Week Two: Questions and education about signs of disease • Week Three: Questions and education around diet • Week Four: Questions and education around exercise Week 2:Signs of disease Week 3: Diet Week 4: Exercise
Data Management Establishing Basic Data Data can be entered at any time; however, there are several items you can set up before using LifeStream by leveraging existing data, including : • Care provider list • Diagnoses list • Telemonitoring equipment list • Insurance company list • Medications list • Patient list
Adding Care Providers Note: Any time you see 3 similar icons they will mean: Add, Edit and Delete. Hover over any icon for a description. 2. Click Add Care Provider 5. Click Save 1. Select Care Providers 3. Enter Care Provider Information Note: NPI is mandatory for physicians if you will be using an interface to another EMR. 4. SelectPatient Categories box to enable LifeStream users to filter patients by name. Note: Use Patient Categories sparingly. It can be checked at any time.
Adding Diagnoses 2. Choose Add Diagnosis 3. Enter Diagnosis (Required) and ICD Code (optional) 4. Check Patient Category box to designate as a Category (optional) 1. Click Diagnoses 5. Click OK
Adding Equipment Notes: • As of November of 2012, all new equipment shipped from Honeywell will be loaded into your organization’s PIN and set to the Unassigned site. • Any time you need to change this information including Status, select the Edit Icon. • When equipment is unassigned it will default to Needs to be Picked Up and must be Available Status to be assignable again. The Equipment List window allows you to add telemonitoring equipment to LifeStream. Multiple tabs are available to allow you to add peripherals, as needed. Best Practice: Assign ONE person to be responsible for equipment management, including inventory, cleaning, and checking equipment in/out 3. Select Add Equipment 2. Choose the equipment tab you wish to edit • Select the Tab of the type of equipment you are adding • Select the Add Equipment icon • Enter required information • The revision # is entered when the monitor transmits to LifeStream • Select the location from which this equipment will be managed then OK. 1.
AdditionalLifeStream Training Modules • Administrator module—October 9th • Intermediate module—October 28th • Advanced module—November 14th
Additional Educational Resources • Access Product Manuals and Quick Reference Guides via the Help menu in LifeStream • The Administrative Workflows Manual will give more detailed information including setting up Sites and Categories • Access additional resources including training videos, and other Clinical Support materials via the password-protected pages on our website: http://www.hommed.com/lifestream-services/clinical-support/ • Contact your Honeywell HomMed team: • Regional Territory Manager • Clinical Consultant • Customer Service: 888-353-5404