Download
1 / 50
500 likes | 602 Views
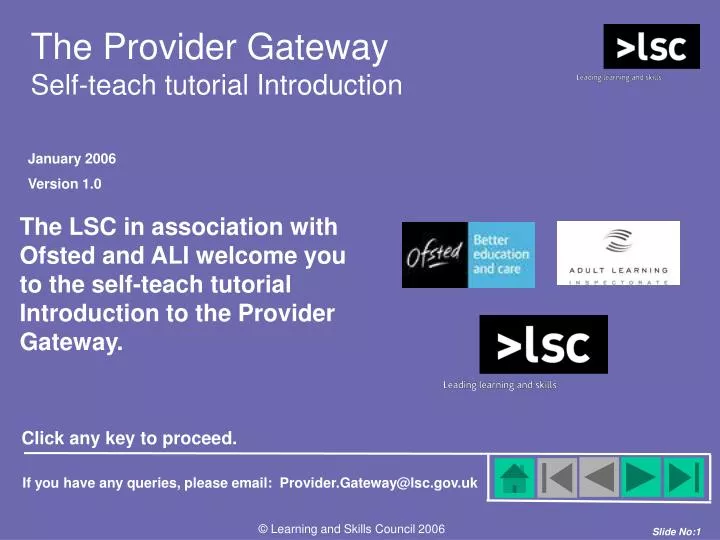
The Provider Gateway Self-teach tutorial Introduction. January 2006 Version 1.0. The LSC in association with Ofsted and ALI welcome you to the self-teach tutorial Introduction to the Provider Gateway. Click any key to proceed.

E N D
The Provider GatewaySelf-teach tutorial Introduction January 2006 Version 1.0 The LSC in association with Ofsted and ALI welcome you to the self-teach tutorial Introduction to the Provider Gateway. Click any key to proceed. If you have any queries, please email: Provider.Gateway@lsc.gov.uk
HOME – Will always take you to ‘Tutorial Contents’ Navigation How to Use the Buttons You can navigate your way through this tutorial by using the forward and backward buttons below or by clicking the mouse. Buttons which are coloured grey are inactive on the current slide, like the SECTION BACK button below. SECTION BACK – Will take you to the ‘Section Contents’ of the current section BACK – Will take you back one screen FORWARD – Will take you forward one screen SECTION FORWARD – Will take you to the ‘Section Contents’ of the next section
Aims and Objectives The aims of this tutorial are: • To introduce you to the Provider Gateway, including: • An overview of the facilities and features it provides. • What information it holds. • Who can use the Gateway and for what purposes. • How to log on. • How to change your password. • How to navigate around the Gateway using the menu and links. • To explain the role of the User-Approver and how to carry out User Administration. • To direct you to further training tutorials covering the Document Exchange and Learner Achievement Tracker facilities in greater detail.
Section 2 How to log on and log off Section 1 Overview of the Provider Gateway Section 4 User Administration (for User-Approvers and LSC Helpdesk users) Section 3 How to change your password 2 1 4 3 Tutorial Contents The tutorial is divided into four sections. You can click on a section title on the list opposite to go directly to the start of the section. Each section starts with a Section Contents slide, from which you can link to specific topics.
Section 1Overview of the Provider Gateway • This section explains: • The purpose and benefits of the Provider Gateway to partnership organisations. • Who can use the Gateway. • The services provided by the Gateway. • The benefits of the Gateway. • How the security of information is ensured. • Guidance on the LSC’s policy towards access to information. • The Home screen and the main menu for navigating the Gateway. You can work through the section sequentially, or use the links in the panel to the left to go to specific topics. Links to topics • Partnership approach • Who can use Provider Gateway • Provider Gateway services • Benefits of Provider Gateway • Security of Information • Freedom of Information • The Home screen
Partnership Approach Overview of the Provider Gateway 1 Provider Gateway is a web-based portal, hosted by the LSC, working in partnership with schools, colleges, work-based learning providers, local authorities and the Inspectorates. It provides partnership organisations with access to the information they need to achieve the goal of continuous improvement in the provision of learning and skills.
Who can use Provider Gateway Overview of the Provider Gateway 1 Provider Gateway can be used by: • Schools and colleges. • Work-based learning and further education providers. • Local Authorities (to support school improvement and in their capacity as work-based learning providers). • Ofsted and the ALI. • Local LSC staff. • National LSC Help Desk staff.
Provider Gateway services Overview of the Provider Gateway 1 Provider Gateway currently provides two key services to partnership organisations: • Document Exchange is a service to facilitate the processes of annual assessment and inspection. It provides a central location, accessible by all partnership organisations, for the exchange and storage of information. • Learner Achievement Tracker is a service that generates Value Added and Distance Travelled (VA/DT) reports for the learners at a provider, including: • Summary Charts. • National Comparison Graphs. • National Chances Charts.
Overview of the Provider Gateway 1 Benefits of Provider Gateway • Reduced bureaucracy. Providers, the Inspectorates and the LSC will upload documents relating to the processes of inspection and continuous improvement to the Document Exchange area on the Gateway , where all partnership organisations can access them. • Consistency. The same version of a document or report is available to all partnership organisations. • Security. Only authenticated users of the service can access the services on the Gateway. Documents can only be viewed and downloaded and reports can only be generated by authorised users. • Simplicity. The Gateway is easy to use and provides a uniform interface for all users. • Flexibility. The Gateway can be expanded in the future to provide services to other organisations.
Overview of the Provider Gateway 1 Security of information • All information relating to a provider is held in strict confidence on the Gateway. • No provider can view a SAR, CPR or any other document or report relating to another provider. • Authorised staff, including (home-based) inspectors in Ofsted and the ALI, can search on all providers on the Gateway and view and download the documents pertaining to any provider. • In the LSC, authorised staff in the National Office and local LSCs can view and download the documents pertaining to any provider. • The Council shall not be liable for the provision or use of data outside of the arrangements set out above.
Overview of the Provider Gateway 1 Freedom of Information GUIDANCE ON THE LEARNING AND SKILLS COUNCIL’S POLICY FOR ACCESS TO INFORMATION You should be aware that the LSC is subject to the requirements of the Freedom of Information Act 2000 (FOIA), which gives the public a legal right of access to information held by public authorities. A person making a FOIA request is entitled to two things, unless an exemption applies. These are: To be informed whether the LSC holds information of the description requested; and if so, to have that information communicated to him or her. All information the LSC holds is covered by FOIA including information the LSC holds about third parties. This means the LSC will be obliged by law to disclose such information unless an exemption applies. The legal obligation to respond to request from the public under FOIA rests with the LSC. The LSC must therefore respond to requests as it sees fit at its sole discretion. If the LSC receives a request that it considers appropriate to meet, we will use reasonable efforts to notify you and we will consider any representations you make that information is exempt provided that we receive them within 5 days of our notification.
The Home screen Overview of the Provider Gateway 1 The Home screen The Home screen is the first screen you see when you log on to Provider Gateway (see Section 2 for instructions for logging on). The menu on the left-hand side allows you to navigate to the services provided by the Gateway.
The Home screen (continued) Overview of the Provider Gateway 1 The Home screen (continued) • Document Exchange is a common store for documents relating to the annual assessment of providers, including: • Self-Assessment Reports (SARs) from providers. • College Performance Reports (CPRs) from Ofsted. • Provider Performance Reports (PPRs) from the ALI. • FE Stats Update and Other Learner Type (OLT) workbooks from providers. • See the Document Exchange self-teach tutorial for full instructions on the Document Exchange service and how to use it.
The Home screen (continued) Overview of the Provider Gateway 1 The Home screen (continued) • Learner Achievement Tracker (LAT) is a service for creating Value Added and Distance Traveled (VA/DT) reports on the progress of learners at a provider, including: • Summary Charts. • National Comparison Graphs. • National Chances Charts. • See the Learner Achievement Tracker self-teach tutorial for full instructions on the LAT service and how to use it.
The Home screen (continued) Overview of the Provider Gateway 1 The Home screen (continued) • User Administration is an option that: • Allows all Gateway users to change their passwords. • Allows User-Approvers to create and delete users of the Gateway. • See Section 3 of this tutorial for instructions about changing your password. See Section 4 for full instructions about creating and deleting users in User Administration.
The Home screen (continued) Overview of the Provider Gateway 1 The Home screen (continued) Training Docs/Help provides access to the LSC’s Learner Achievement Tracker (LAT) website, where the self-teach tutorials for using Provider Gateway can be found. There are three tutorials, including: • Overview of Provider Gateway (this tutorial). • Document Exchange. • Learner Achievement Tracker (LAT). • Click on Training Docs/Help to go to the LSC website, where the tutorials can be found.
The Home screen (continued) Overview of the Provider Gateway 1 The Home screen (continued) • Click on Log Out to log out of the Gateway.
Overview of the Provider Gateway 1 End of Section 1 Overview of the Provider Gateway
Section 2How to log on and log off Overview This module explains how to log on to the Gateway and how to log out. You can work through the module sequentially, or use the links in the panel to the left to go to specific topics. Links to topics • Logging on • Logging off
Logging on How to log on and log off 2 Logging on To log on to the Gateway: • Launch your Internet browser (for example, Internet Explorer). • Enter the Address of the Gateway and press RETURN. Note: The Gateway address will be supplied to you by the LSC.
How to log on and log off 2 Logging on (continued) Logging on (cont.) The Provider Gateway Home screen is the first screen displayed when you reach the Gateway. • The menu on the left side of the screen enables you to navigate to the services on the Gateway. • Your user access to these services is controlled by your username. For example, your username may give you access to Document Exchange and/or LAT. • Click the link to select the service you want to use.
How to log on and log off 2 Logging on (continued) Logging on (cont.) The login screen is displayed. • User Name. Enter your username. • Password. Enter your password. • Click the LOGIN button. • Provided your login ID allows you to access the service you have selected, the service will open at its Home screen. • For further information about the Document Exchange and Learner Achievement Tracker (LAT) services, select the Training Docs/Help link on the menu. The User Administration option is described in Section 4 of this tutorial.
Logging off How to log on and log off 2 Logging off To log out of Provider Gateway: • Click the Log Out option on the menu.
How to log on and log off 2 Logging off (continued) Logging off (cont.) Logging out takes you back to the Home screen. From here you can log on to another service, or simply close the window.
How to log on and log off 2 End of Section 2 How to log on and log off
Section 3How to change your password Overview This section explains how to change your password. You can work through the section sequentially, or use the links in the panel to the left to go to specific topics. Links to topics • Password rules • How to change your password
How to change your password 3 Password rules • When you are first set up as a Gateway user a password will be assigned to you. • When you log on to the Gateway for the first time you will be required to change your password. • Thereafter you can change your password at any time. • A password must meet the following requirements: • It must be between 8 and 11 characters in length. • It must contain at least one number. • It must contain a mixture of upper case and lower case characters. • For example, a valid password could be Pa55w0rd.
How to change your password How to change your password 3 How to change your password • Click on User Administration on the main menu.
How to change your password 3 How to change your password (continued) How to change your password (continued) The Change Password screen is displayed. • User Name. Your username is displayed in this field. • Old Password. Type your old password in this field (the characters appear as asterisks). • New Password. Type your new password in this field. • Confirm New Password. Retype your new password (New Password and Confirm New Password must exactly match). • Click the SAVE CHANGES button.
How to change your password 3 How to change your password (continued) How to change your password (continued) Processing your new password may take a few seconds. • When processing is complete you will see a message confirming that your password has been changed. • Then after a few seconds you return to the Home screen.
How to change your password 3 End of Section 3 How to change your password
Section 4User Administration This section explains the role of the User-Approver, who is responsible for creating and maintaining users on the Provider Gateway. You can work through the section sequentially, or use the links in the panel to the left to go to specific topics. Links to topics • The User-Approver • The User Administration Home screen • How to create a new user • How to amend an existing user • How to change your password
User Administration 4 The User-Approver • A User-Approver is able to perform the User Administration functions on the Provider Gateway. User Administration involves maintaining the user population by: • Creating new users. • Modifying a user’s details. • Resetting a user’s password. • Deleting a user.
User Administration 4 The User-Approver (continued) The User-Approver role is carried out by users at all different levels of the Gateway for their own organisation. • At the National LSC, LSC Help Desk users will be User-Approvers with the ability to maintain users with any role and at any level on the Gateway, including creating User-Approvers for Ofsted, the ALI and local LSCs. • User-Approvers for Ofsted, the ALI and local LSCs have the ability to maintain the users in their own organisations. User-Approvers at local LSCs will be able to create the User-Approvers for the providers that belong to their LSC. • User-Approvers at providers have the ability to maintain the users in their organisation.
The user administration Home screen User Administration 4 User administration Home screen When you log in to User Administration as a User-Approver, the user administration Home screen is displayed. This screen allows you to: • Create new users. • Select a user to modify their details. • Change your own password.
How to create a new user User Administration 4 How to create a new user To create a new user: • On the user administration Home screen, click on the CREATE NEW button.
User Administration 4 How to create a new user (continued) How to create a new user (continued) • The Data Collections User screen is displayed. You can either: • Take a user who is already set up as a Data Collections user, and set them up as a Provider Gateway user. • Create a brand new user (one who is not already set up as a Data Collections user). • The difference between these two options is that for an existing Data Collection (DC) user the Gateway will validate the DC username before taking you to the next step.
User Administration 4 How to create a new user (continued) How to create a new user (continued) • To amend/update an existing DC user: • Enter the username in the field. • Click on the EXISTING DC USER button. • To create a brand new user: • Click on the BRAND NEW USER button.
User Administration 4 How to create a new user (continued) How to create a new user (continued) • The User Account Record screen is displayed. • Enter the new user’s details as appropriate. • User login name and User full name are mandatory.
User Administration 4 How to create a new user (continued) How to create a new user (continued) • The choices available to you on the drop-down lists for User UPIN and User LSC are constrained by your role. • For example: • If you are a local LSC User-Approver, you will be able to set up new users for the providers that belong to your LSC, and only those UPINs will be listed. The User LSC will default to your own LSC and no other choices will be listed. • If you are an ALI or Ofsted User-Approver, no UPINs will be listed because you cannot create users at a provider.
User Administration 4 How to create a new user (continued) How to create a new user (continued) • A user can have more than one role on the Gateway. You must give the new user at least one role. • The Available Roles are constrained by your role. For example, • If you are a provider User-Approver, you can select from roles in your organisation. • To assign a role: • Click on the role in the Available Roles window to highlight it. • Click the Add>> button to move the selected role to the User’s Roles window.
User Administration 4 How to create a new user (continued) How to create a new user (continued) • When all the details are complete and the role is assigned, click the SAVE button. • Note that the BACK button takes you back to the User Administration Home screen without saving the user details.
User Administration 4 How to create a new user (continued) How to create a new user (continued) The new user is saved as an active user. The DISABLE button is enabled, allowing you to deactivate the user. When a user is deactivated they can no longer use the Gateway, but their details remain on the system and they can be reactivated using the ACTIVATE button. You can also use the DELETE button to delete the user from the Gateway. Deleting a user removes them from the system completely. Note that a new user is assigned a system-generated password, which you will need to communicate to the user. They will probably want to change it!
How to amend an existing user User Administration 4 How to amend a user To amend a user: • On the user administration Home screen, use the drop-down list to select the user. • Click the GO button.
User Administration 4 How to amend an existing user (continued) How to amend a user (continued) • The User Account Record for the selected user is displayed. • You can use the active buttons along the top to disable or delete the user, or to reset the user’s password. • The Data Collections user field indicates, Yes or No, whether the user is set up as a user on the LSC’s Data Collections service. If Yes, you can amend the user’s details and roles, but you cannot delete or disable the account. • The REFRESH button refreshes the user details from the database. You can use it before you save any changes if you need to refresh the original details.
User Administration 4 How to amend an existing user (continued) How to amend a user (continued) • Edit the details as required. You can amend the user’s assigned roles by adding new roles or removing roles. • Click the SAVE button to save the changes.
User Administration 4 How to amend an existing user (continued) How to amend a user (continued) • If you reset a user’s password by clicking the RESET PASSWORD button, the Gateway generates a random password for the user and displays it at the bottom of the screen. • You will then need to communicate the new password to the user, who can then elect to change it.
How to change your password User Administration 4 How to change your password You can change your password at any time. • On the user administration Home screen, click on the CHANGE PASSWORD button. • The Change Password screen is displayed. Use it as explained in Section 3. • Note that CHANGE PASSWORD changes your password, not that of a user. To reset a user’s password you need to amend the user’s details as described in the previous topic, How to amend an existing user, and use the RESET PASSWORD button.
User Administration 4 End of Section 4 User Administration
End of Tutorial You are now ready to log on to the Provider Gateway. Refer to the Document Exchange and LAT tutorials for detailed information about these services.