Download
1 / 47
480 likes | 1.56k Views
Ricoh Aficio MP 2550 to 5001 Series. Rogue Community College. Quick Reference User Guide. Compliments of: IKON Office Solutions. Table of Contents. Copier Functions How To Copy Documents How To Make 2 Sided Copies How To Staple Documents Staple Documents/Sample Copy Function

E N D
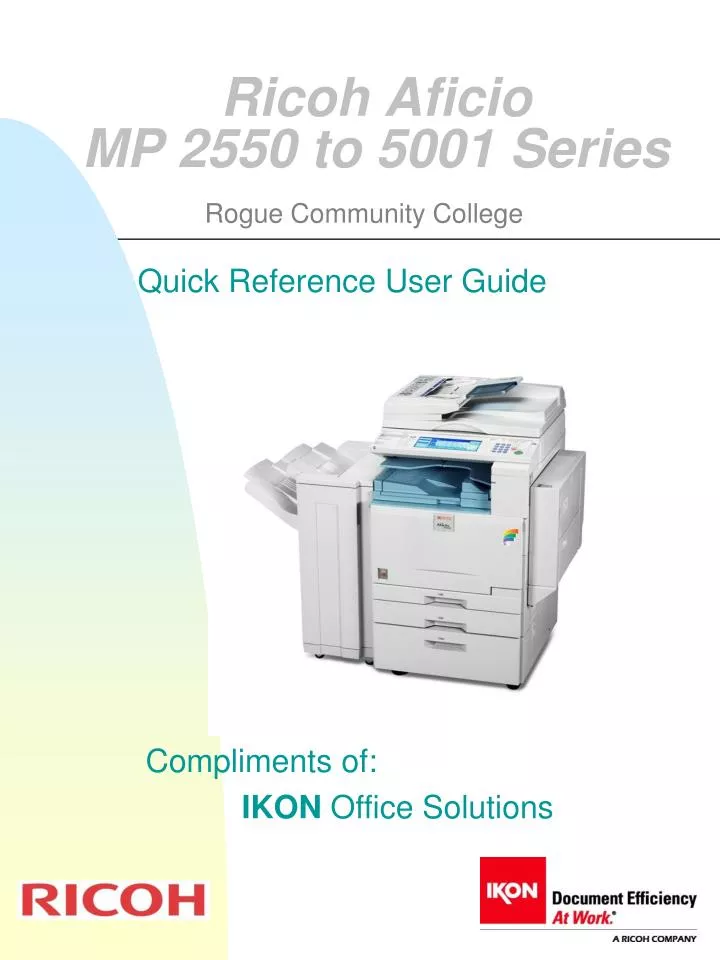
Ricoh Aficio MP 2550 to 5001 Series Rogue Community College Quick Reference User Guide Compliments of: IKON Office Solutions
Table of Contents Copier Functions • How To Copy Documents • How To Make 2 Sided Copies • How To Staple Documents • Staple Documents/Sample Copy Function • 2 or 3 Hole Punch Option • Batch Feed Mode/Auto Duplex • Auto Reduce and Enlarge Magnification • Image Combination • Book Copying • Magazine Mode • Chapters • Adding Covers To Documents • Inserting Blank Slip Sheets • Bypass Tray – Copying On Transparencies (OHP) • Bypass Tray – Copying On Heavy Paper • Copy Job Interrupt Ricoh MP4000/MP5000 Quick Reference Guide
Table of Contents Document Server Functions • Setting the Auto Erase Function • Scanning To The Document Server • Printing From The Document Server E-mail Functions • User E-Mail Registration Set Up • Using E-0mail Registration • Changing User E-mail Registration • Deleting A User E-mail Registration • Group E-mail Registration Set Up • Registering E-mail Destinations To Group • Using E-mail Group Registration • Deleting A Group Registration User Code Functions • User Code Set Up and Activation • Using User Codes • Printing User Code Values Ricoh MP4000/MP5000 Quick Reference Guide
COPIER FUNCTIONS Ricoh MP4000/MP5000 Quick Reference Guide
How To Copy Documents • Place originals face up, portrait orientation in Document Feeder (ADF) • Enter desired number of sets or copies on the numeric keys • Press START Ricoh MP4000/MP5000 Quick Reference Guide
How To Make 2 Sided Copies • Place originals face up, portrait orientation in Document Feeder (ADF) • Select the 2 sided option • Enter desired number of sets or copies • Press START Ricoh MP4000/MP5000 Quick Reference Guide
How To Staple Documents Staple • Place originals face up in the Document Feeder (ADF) • Select the staple position from the Speed Keys on the Keyboard • Enter desired number of copies • Push Start Ricoh MP4000/MP5000 Quick Reference Guide
Staple Documents/Sample Copy Function • Place originals face up in Document Feeder (ADF) • Select any appropriate enhancement modes • Select the one of the Stapling position Speed Keys on screen • Press the Sample Copy button (see arrow) • Enter number of sets desired • Press START • Screen message will display: • 1 set has been printed • If you want to print remaining sets, press CONTINUE button • Press SUSPEND button to change settings • Select the option above you desire Ricoh MP4000/MP5000 Quick Reference Guide
2 or 3 Hole Punch Option • If your system has the punch option, place originals face up in Document Feeder (SADF) or on Glass Platen • Select any appropriate enhancement modes • Select punch patternthat matches your document orientation from the keyboard’s Speed Keys • Enter desired number of copies • Press START Ricoh MP4000/MP5000 Quick Reference Guide
R R R Batch Feed Mode/Auto Duplex = • Select the 1:2 Duplex Speed Key • Touch Sort button • Touch Special Original button • Select Batch • Touch OK • Select quantity using the numeric pad • Place the first batch of documents in the SADF • Press Start • Add remaining originals, pressing start after after each new batch • Continue adding originals until all originals are complete • Press the # key after all originals are scanned and the job will begin to print. Ricoh MP4000/MP5000 Quick Reference Guide
Auto Reduce and Enlarge Magnification These instructions will assist you in placing 8.5x11 image on to a 11x17 sheet • Place the letter size original face up, portrait orientation in the ADF • Select a paper tray containing 11x17 paper • Select Auto Reduce/Enlarge button • Press Start • Retrieve output Ricoh MP4000/MP5000 Quick Reference Guide
Image Combination This feature permits users to combine multiple input pages on a single output page • Place documents face up in the ADF • Originals can be grouped in order of 2,4,8 Or 16 to a page • Select Dup/Combine/Series button • Select COMBINE button • Originals: Select 1 sided or 2 • Copy: Select 1 sided or 2 • Select the number of input pages per output page • Press OK • Enter number of sets desired • Press START Ricoh MP4000/MP5000 Quick Reference Guide
Book Copying • Place Book on Glass Platen • Select Dup./Combine/Series button • Select SERIES button • Select: • Book to 1 sided for single pages • Press OK OR • Select BOOK button • Select BOOK TO 2 SIDED button on the right of the screen • Press OK • Enter desired sets • Press Start Ricoh MP4000/MP5000 Quick Reference Guide
Magazine Mode MAGAZINE MODE permits the user to put multiple input pages in a booklet format Use of a SADDLESTITCHED FINISHER will staple these pages down the center and fold them • Place all originals face up in ADF in the sequence you want them in your booklet….Cover, inside cover, page 1, etc • Select Dup./Combine/Seriesbutton • Select Book button • Originals: Select single or double sided • Copy: Select Magazine • Touch OK • Enter desired number of sets • Press Start Note: • Selecting LETTER paper will result with a half-size booklet • Selecting 11 x 17 paper will result with a full 81/2 x 11 booklet Ricoh MP4000/MP5000 Quick Reference Guide
Chapters Inserting Chapter Sheets in a 2 step process. Step 1: Telling the machine from which drawer the chapter sheets will be drawn from • Select USER TOOLS/COUNTER button • Select SYSTEMS SETTING box • Select PAPER TRAY SETTING tab • Select NEXT button to go to the 2nd screen • Press: Cover Sheet Tray box • Select the tray from which the Chapter Sheets will be drawn Tray1, Tray2, etc • Select Method Of Duplex: Single or Double sided • Display Time = At Mode Selected • Press OK, EXIT, EXIT to return to the main screen Ricoh MP4000/MP5000 Quick Reference Guide
Chapters Step 2 is instructing the Unit where you want the Chapter Pages inserted • Press the COVER/SLIPSHEET tab on the bottom of the touch screen • Press the CHAPTER button • Complete the boxes shown on the screen by entering the sheet number the chapter sheet is to be inserted in the output • Use the # key after each entry • Press OK to return to the main screen • Place documents face up in the document feeder • Select the number of sets desired • Strongly recommend a SAMPLE COPY to assure all in their proper sequence. Ricoh MP4000/MP5000 Quick Reference Guide
Adding Covers To Documents The purpose of this function is to add either pre-printed front and back covers, or other covers, to any document. Like Chapters, this is a 2 step function Step 1: Telling the unit which paper tray the covers will be drawn from • Press USER TOOLS/COUNTER button • Press SYSTEM SETTINGS button • Press PAPER TRAY SETTINGS tab • Press NEXT to go to Screen 2 • Select COVER SHEET TRAY • Select tray from which covers drawn • Select single or double sided covers • Display Time: At Mode Selected • Press OK, EXIT, EXIT to return to home screen Ricoh MP4000/MP5000 Quick Reference Guide
Adding Covers To Documents STEP 2 • Place the cover stock in the tray selected in Step 1 • Place documents face up in the document feeder • Select any and all finishing options for the job • Press the Cover/Slip Sheet Tab onthe touch screen • SelectFRONT COVERoptions • Copy= first page in document feeder will be copied onto the cover • Blank=preprinted cover, first page in the document feeder will appear AFTER the cover • SelectBACK COVERoptions • Same as FRONT COVER above • PressOK • Strongly recommend a Sample Set Ricoh MP4000/MP5000 Quick Reference Guide
Inserting Blank Slip Sheets The purpose of this function is to insert slip sheets into any document. Like Chapters and Covers, this is a 2 step function Step 1: Telling the unit which paper tray the slip sheets will be drawn from • Press USER TOOLS/COUNTER button • Press SYSTEM SETTINGS button • Press PAPER TRAY SETTINGS tab • Press NEXT to go to Screen 2 • Select SLIP SHEET TRAY • Select tray from which slip sheets will be drawn • Select single or double sided sheets • Display Time: At Mode Selected • Press OK, EXIT, EXIT to return to home screen Ricoh MP4000/MP5000 Quick Reference Guide
Inserting Blank Slip Sheets STEP 2 • Place the ship sheets in the tray selected in Step 1 • Place documents face up in the document feeder • Select any and all finishing options for the job • Press the Cover/Slip Sheet Tab onthe touch screen • Select SLIP SHEET options • Blank=Blank Slip Sheets will be inserted where told by the following screen • Select DESIGNATE/CHAPTER • Complete the boxes by showing before which input page the blank Slip Sheet is to be inserted. • PressOK • Strongly recommend a Sample Set Ricoh MP4000/MP5000 Quick Reference Guide
Bypass Tray - Copying On OHP • Place originals in the ARDF or on glass platen • Place Transparencies in bypass tray • Press the # button on key pad • Select OHP • Press OK • Press Start • Transparencies must be of Laser Copier type to withstand the heat of the laser engine. Failure to adhere will result in engine jams • Note: If you select OHP Transparencies, Labels, or Thick Paper in Special Paper, you cannot have copies delivered face down - -they will JAM Ricoh MP4000/MP5000 Quick Reference Guide
Bypass Tray – Copying On Heavy Stock • Place original in the ARDF or on glass platen • Place Stock Paper in bypass tray • Press the # button on key pad • Select Heavy • Press OK • Enter desired number of sets • Press Start • Note: If you select OHP Transparencies Labels, or Thick Paper in Special Paper, you cannot have copies delivered face down -they will JAM • Media type must be within the Copier paper specifications to avoid damaging the engine Ricoh MP4000/MP5000 Quick Reference Guide
Copy Job Interrupt • While a current COPY job is running • Press Interrupt key on the touch screen • Place NEW originals in the ARDF or on glass platen • Press START • After copies have been made, remove originals and copies • Press InterruptKey again to resume original job No job setting may be used with copy Interrupt Ricoh MP4000/MP5000 Quick Reference Guide
DOCUMENT SERVER FUNCTIONS Ricoh MP4000/MP5000 Quick Reference Guide
Setting Up The Automatic Erase When documents are scanned into the Document Server, each is date and time stamped. A unit shipped from the factory is set for an automatic 3 day erase of all documents. The Automatic Erase Function can be user adjusted anywhere from 1 day to 180, or it may be turned off entirely. Setting The Automatic Erase Parameter • Press USER TOOLS/COUNTER button • Press SYSTEMS SETTINGS button • Press ADMINISTRATOR TOOLS tab • Press NEXT to go to Screen 2 • Press AUTO DELETE FILE IN DOCUMENT SERVER button • Enter the desired time to auto delete with the numeric keys • Press # key when through • Pressing the OFF button means the automatic erase has been turned off • Exit User Tools/Counter Ricoh MP4000/MP5000 Quick Reference Guide
Scanning To Document Server • Press Document Server button (see arrow) • The originals to be scanned into the Document Server are placed face up in the ADF or on the glass platen • Press SCAN ORIGINAL button • Press USER NAME button • Press MANUAL ENTRY button and type in your name. • Press OK • PressFILE NAME button and type in the name of the file to be scanned. • Press OK • Optional PASSWORD: Using numeric keys enter a 4 digit password. System will ask you t confirm it. • Press OK • Press START • New File will show in Document Server list • To continue Scanning Additional Documents, repeat steps above Ricoh MP4000/MP5000 Quick Reference Guide
Print From Document Server • Press Document Server (see arrow) • Finding the document you wish to print • Enter your USER NAME in its OR • Enter the FILE NAME in its box you wish • Touch the document you wish to print • If password protected, enter the numeric password • Touch To PRINT SCREEN PAGE button • Select print options (2 sided, staple) • Press START button Ricoh MP4000/MP5000 Quick Reference Guide
E-MAIL FUNCTIONS Ricoh MP4000/MP5000 Quick Reference Guide
User E-mail Registration Set-Up • Press User Tools/Counter • Press Systems Settings • Press Key Operator Tools • Press Nextto access second screen • Press Address Book Management • Press New Program • Press Change next to User Destination/Name • Press Change next to Key Display to change • Select Title - to File e.g Smith select (RST) • Press E-mail, enter User’s E-mail address • Register as a Sender - ON • Senders Password - ON* • *Prevents other users from using your e-mail • Enter Password - Type in your Password (numeric Only) • Press OK • To enter additional E-mails, continue from step six above • Press Exit repeatedly to Exit set-up Ricoh MP4000/MP5000 Quick Reference Guide
Using E-mail Registration • Place originals in document feeder on on glass platen • Press Scanner • Press Manual Input • Enter Recipient's E-mail destination • Press OK • Repeat steps to add additional addresses • Press Attach Senders Name • Press your registered named box • If stored with Password, enter password • To attached a Subject Header • Press Attach Subject Header • Use pre- stored headers or press Manual input to attach a new subject header. • Press OK • Select File Type to change scanning file type • Press Scan Settings to change options • Copy type, density, resolution size, etc. • Press OK • Press Start to Scan/E-mail documents Ricoh MP4000/MP5000 Quick Reference Guide
Changing User E-mail Registration • Press User Tools/Counter • Press Systems Settings • Press Key Operator Tools • Press Nextto access second screen • Press Address Book Management • List appears • Select the User E-mail you wish to change • Press the E-mail Address key • Press Change next to User Name • Enter the new E-mail information • Press OK • To Change Password • Press Change at Right of Password • Enter New Password • Press OK • Press Exit repeatedly to Exit set-up Ricoh MP4000/MP5000 Quick Reference Guide
Deleting A User E-mail Registration • Press User Tools/Counter • Press Systems Settings • Press Key Operator Tools • Press Nextto access second screen • Press Address Book Management • List appears • To Clear only the E-mail Address • Select the User E-mail user to clear • Press the E-mail Address key • Press Change next to User Name • Press the Delete All key • Press OK • To Clear all information for user • Pressthe Delete Key • Select the user to Delete • Press the Key or enter the registered # • Press the YES key • Press the Exit key to Exit set-up Ricoh MP4000/MP5000 Quick Reference Guide
Registering E-mail Destinations to Group • Press User Tools/Counter • Press Systems Settings • Press Key Operator Tools • Press Next to access page 2/3 • Press Address Book Management • Press User(s) destination key that you want to register in a group • Press Group key • Select a group to which you want to register the e-mail destinations • Press OK • To Display an E-mail Destination • Press Address Book: Program /Change /Delete Group • Select the Group where the data you want to confirm is registered • Press Programmed Users (all user e-mail destination will show) • Press OK • To enter additional Groups, repeat the above steps Ricoh MP4000/MP5000 Quick Reference Guide
User E-mail Registration Set-Up • Press User Tools/Counter • Press Systems Settings • Press Key Operator Tools • Press Nextto access second screen • Press Address Book Management • Press New Program • Press Change next to User Destination/Name • Press Change next to Key Display to change • Select Title - to File e.g Smith select (RST) • Press E-mail, enter User’s E-mail address • Register as a Sender - ON • Senders Password - ON* • *Prevents other users from using your e-mail • Enter Password - Type in your Password (numeric Only) • Press OK • To enter additional E-mails, continue from step six above • Press Exit repeatedly to Exit set-up Ricoh MP4000/MP5000 Quick Reference Guide
Using E-mail Registration • Place originals in document feeder on on glass platen • Press Scanner • Press Manual Input • Enter Recipient's E-mail destination • Press OK • Repeat steps to add additional addresses • Press Attach Senders Name • Press your registered named box • If stored with Password, enter password • To attached a Subject Header • Press Attach Subject Header • Use pre- stored headers or press Manual input to attach a new subject header. • Press OK • Select File Type to change scanning file type • Press Scan Settings to change options • Copy type, density, resolution size, etc. • Press OK • Press Start to Scan/E-mail documents Ricoh MP4000/MP5000 Quick Reference Guide
Changing User E-mail Registration • Press User Tools/Counter • Press Systems Settings • Press Key Operator Tools • Press Nextto access second screen • Press Address Book Management • List appears • Select the User E-mail you wish to change • Press the E-mail Address key • Press Change next to User Name • Enter the new E-mail information • Press OK • To Change Password • Press Change at Right of Password • Enter New Password • Press OK • Press Exit repeatedly to Exit set-up Ricoh MP4000/MP5000 Quick Reference Guide
Deleting A User E-mail Registration • Press User Tools/Counter • Press Systems Settings • Press Key Operator Tools • Press Nextto access second screen • Press Address Book Management • List appears • To Clear only the E-mail Address • Select the User E-mail user to clear • Press the E-mail Address key • Press Change next to User Name • Press the Delete All key • Press OK • To Clear all information for user • Pressthe Delete Key • Select the user to Delete • Press the Key or enter the registered # • Press the YES key • Press the Exit key to Exit set-up Ricoh MP4000/MP5000 Quick Reference Guide
Group E-mail Registration Set-Up • Press User Tools/Counter • Press Systems Settings • Press Key Operator Tools • Press Next to access second screen 2/3 • Press Address Book: Program /Change/Delete Group • Press New Program • Press Change next to Key Display to group name • Enter Group name • Press Key Display Change to change name • Press SelectTitle - to sort groups e.g Smith select (RST) or other sort modes • Press OK • To enter additional Groups, continue from step six above Ricoh MP4000/MP5000 Quick Reference Guide
Registering E-mail Destinations to Group • Press User Tools/Counter • Press Systems Settings • Press Key Operator Tools • Press Next to access page 2/3 • Press Address Book Management • Press User(s) destination key that you want to register in a group • Press Group key • Select a group to which you want to register the e-mail destinations • Press OK • To Display an E-mail Destination • Press Address Book: Program /Change /Delete Group • Select the Group where the data you want to confirm is registered • Press Programmed Users (all user e-mail destination will show) • Press OK • To enter additional Groups, repeat the above steps Ricoh MP4000/MP5000 Quick Reference Guide
Using E-mail Group Registration • Place originals in document feeder on on glass platen • Press Scanner • Press Manual Input • Select Recipient's Group E-mail destination • Press OK • Press Attach Senders Name • Press your registered named box • If stored with Password, enter password • To attached a Subject Header • Press Attach Subject Header • Use pre- stored headers or press Manual input to attach a new subject header. • Press OK • Select File Type to change scanning file type • Press Scan Settings to change options • Copy type, density, resolution size, etc. • Press OK • Press Start to Scan/E-mail documents Ricoh MP4000/MP5000 Quick Reference Guide
Deleting A Group Registration • Press User Tools/Counter • Press Systems Settings • Press Key Operator Tools • Press Nextto access second screen • Press Address Book Management • List appears • To Clear only the E-mail Address • Select the User E-mail user to clear • Press the E-mail Address key • Press Change next to User Name • Press the Delete All key • Press OK • To Clear all information for user • Pressthe Delete Key • Select the user to Delete • Press the Key or enter the registered # • Press the YES key • Press the Exit key to Exit set-up Ricoh MP4000/MP5000 Quick Reference Guide
USER CODE FUNCTIONS Ricoh MP4000/MP5000 Quick Reference Guide
Turning ON/OFF User Code Function • Select USER TOOLS/COUNTER • Select SYSTEM SETTINGS • Select ADMINISTRATOR TOOLS • Scroll to Screen 2 • Select USER AUTHENTIFICATION MANAGEMENT • Press USER CODE AUTH button • Select Copier Options codes will apply to • Scroll to Screen 2 • Select Printer options codes will apply to • Select Other Functions codes will apply to • Press OK Scroll to Screen 1 See next page to enter individual codes and the functions those codes will engage. Ricoh MP4000/MP5000 Quick Reference Guide
User Code Set Up And Activation Entering Individual User Codes You now are at Screen 1 of 5 under ADMINISTRATOR TOOLS • Scroll to page 2/5 using the down arrows • Select Address Book Management • Select New Program • Select Change next to Name • Enter Name using the keyboard • Select OK • Select Auth Info • Type in the User Code (8 nbrs max) • Press # Key after entering • Press NEXT button • Confirm from the list of Available Functions • Copy: FULL COLOR, ETC • Print: COLOR • Other: Document Server or Scanner • Select OK To enter more individual codes, start at the top of this page Press EXIT three times to return to main copier screen Ricoh MP4000/MP5000 Quick Reference Guide
Using User Codes When you walk up to the Copier and the panel requests your user code • At system Prompt _ _ _ _ _ _ • Enter your User Code • Press the # sign • System is now ready for use • After completing your task • Press the Yellow & Orangebuttons together • This will Reset the pass code • The next user will need to input their own user code to access system Ricoh MP4000/MP5000 Quick Reference Guide
Printing User Codes/Counters • Select USER TOOLS/COUNTER • Select SYSTEM SETTINGS • Select ADMINISTRATOR TOOLS • Select DISPLAY/CLEAR/PRINT COUNTER • Select PRINT COUNTER • Press START button • Press Exit 3 times Ricoh MP4000/MP5000 Quick Reference Guide
Deleting Individual Users • Select USER TOOLS/COUNTER • Select SYSTEM SETTINGS • Select ADMINISTRATOR TOOLS • Scroll to Screen 2 • Select ADDRESS BOOK MANAGEMENT • Press the DELETE button • Press the individual you wish to delete • Confirm you wish to delete: • Yes or NO • Press Exit 3 times Ricoh MP4000/MP5000 Quick Reference Guide