Download
1 / 24
240 likes | 510 Views
Project Futura. Introduction. To help relatively experienced student to learn advanced knowledge of Micromouse Kit Mouse that capable to make advance movement, such as curve turn and acceleration were made as teach tools High resolution encoder is the key.

E N D
Introduction • To help relatively experienced student to learn advanced knowledge of Micromouse • Kit Mouse that capable to make advance movement, such as curve turn and acceleration were made as teach tools • High resolution encoder is the key. • You can apply the what you’ve learned to a working mouse without struggling with potential hardware problem. • You need to design your own mouse for competition
Demo http://www.youtube.com/watch?v=YJhf3xfEgZY
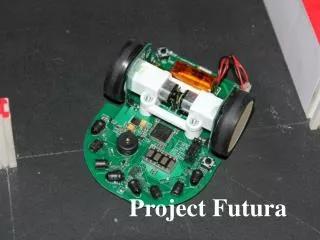
Finish Assembling and do tests to Make sure everything is working
Pack them into containers Ready to use for future We spent lots of efforts to make these mouse, play it carefully since they will be used repeatlyin the future
Keil IDE • We will be using the Keil IDE to write our code and program the mouse • Step 1: Install the file mdk460.exe • Step 2: Install the st-link_v2_usbdriver • Step 3: Open the file FuturaProject/project/micromouse_test.uvproj with Keil uVision4
Adding a new file to Keil • Step 1: Create the file in eitheruser_Libraries/src (.c files) or user_Libraries/inc (.h files) • Double click on the group user_Libraries_src or user_Libraries_inc in the “Project” pane and select your file
Downloading your code to the mouse • Connect the three mouse pins, TMS, TCK, and GND, to the ST-link programmer pins, IO, CLK and GND respectively • In KeiluVision, compile your code by pressing F7. Then click Flash->Download.
Sensors • void readSensor() • Reads each sensor and places the results in the global variables: LFSensor, RFSensor, DLSensor, and DRSensor. • This should be called in your systick handler
Gyro • void readGyro() • Similar to readSensor() • Sets the variables aSpeed (your mouse’s angular speed) and angle (the current angle of your mouse
Volt Meter • void readVolMeter() • Sets the variable voltage • Always make sure your batteries are well charged, especially when using the small batteries
Encoders • int32_t getLeftEncCount() & int32_t getRightEncCount() • Returns the current encoder count • 3520 encoder counts per revolution
User Interface • Buzzer • void shortBeep(int duration, intfreq) • duration – milliseconds • freq – Hz (example 8000) • Matrix display • void displayMatrix(const char* s) • s – 4 character (max) string • See others in matrixDisplay.h • LEDs • LED1_ON, LED2_ON … LED11_ON • LED1_OFF, LED2_OFF … LED11_OFF
Delay • void delay_ms(u32 nTime) • nTime – milliseconds
Interrupts • void systick() • A 1 millisecond timed interrupt • It is a function that runs every millisecond • void button1_interrupt() & void button2_interrupt() • These functions are run when a button is pressed
Motors • void setLeftPwm(int32_t speed) & void setRightPwm(int32_t speed) • speed – A value ranging from -999 through 999, representing the duty cycle of the pwm for the motor.
printf • Used to print debugging information • Example: • printf(“Left front sensor: %d\r\n”, LFSensor); • See more information here: http://www.cplusplus.com/reference/cstdio/printf/
PuTTY • PuTTY is a desktop application that can be used to communicate with the mouse • Download the windows version here: http://the.earth.li/~sgtatham/putty/latest/x86/putty.exe • Set connection type to “Serial” • Under “Serial line” type “COMX” where X is your COM port number • You can find the COM port in Windows Device Manager • In the “Serial” tab, set “Flow control” to “None” • Default options should be fine for everything else
PuTTY • Connect the FTDI board pins TX, RX, and GND to the RX, TX, and GND pins on the mouse • TX connects with RX • RX connects with TX • You can now communicate with your mouse using printf and PuTTY