Download
1 / 34
340 likes | 417 Views
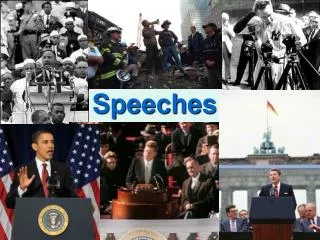
Senior Boards Speeches. A short guide. Some Basic Issues. You do NOT need to stand behind a podium. You are not required to use PowerPoint. You are required to have some sort of visual. Video clips should not exceed two minutes. Face your audience

E N D
Senior Boards Speeches A short guide
Some Basic Issues • You do NOT need to stand behind a podium. • You are not required to use PowerPoint. • You are required to have some sort of visual. • Video clips should not exceed two minutes. • Face your audience • Figure out ahead of time how to click through slides
If you should decide to use PowerPoint Bad Idea Good Idea Avoid long sentences Use a minimal number of text lines per slide Use an easy-to-see font Don’t overdo the special effects • Start by creating an outlineThe most important part of any presentation is the content, not the graphical appeal. That is why you should develop your presentation with the content first, before deciding on the look (colours, graphics, etc.) Create a good structure for your presentation by reflecting on the goal of the presentation, what your audience is thinking right now, and what points you need to make in order to move the audience from where they are to where you want them to be. Write an outline on paper or use sticky notes so you can move ideas around. By creating an outline first, you ensure that the content of your presentation is solid before you concern yourself with the visual elements.Use Contrasting ColoursIf you want your audience to be able to see what you have on the slide, there needs to be a lot of contrast between the text colour and the background colour. I suggest a dark background with light text – I usually use a medium to dark blue background and white or yellow letters. Some prefer a light background and dark letters, which will also work well - which you choose will depend on personal preference. Don’t think that just because the text looks fine on your computer screen that it will look fine when projected. Most projectors make colours duller than they appear on a screen, and you should check how your colours look when projected to make sure there is still enough contrast. To check that your colors have enough contrast, use the Color Contrast Calculator.Use a big enough fontWhen deciding what font size to use in your presentation, make sure it is big enough so that the audience can read it. I usually find that any font size less than 24 point is too small to be reasonably read in most presentation situations. I would prefer to see most text at a 28 or 32 point size, with titles being 36 to 44 point size. The only reason I would use a font less than 24 point is when adding explanatory text to a graph or diagram, where you could use a 20 point font size. If you are given a small screen in a big room, your font will look smaller because the image will not be as big as it should be. In this case, see if you can get a larger screen, use a wall instead of a screen to project on, move the chairs closer to the screen or remove the last few rows of chairs. I've put together a chart that lists how far away the last row of your audience should be based on the size of screen, font size and visual acuity testing - use the Font Size chart here.
Using visuals • Do it • Choose meaningful images • Should be eye-catching • Should add something to the presentation
Using visuals • Don’t overdo it.
Pictures as Backgrounds Bad idea Good idea Give the text box a solid fill, then make it slightly transparent Right click on text box Click format shape Select solid fill Adjust transparency Around 40% is good • If you do it like this, you can’t see it. • The audience struggles to read your text. • It just looks bad.
Pictures as Backgrounds Bad idea Good idea Give the text box a solid fill, then make it slightly transparent Right click on text box Click “format shape” Select “solid fill” Adjust transparency Around 40% is good • If you do it like this, you can’t see it. • The audience struggles to read your text. • It just looks bad.
Another Option • You can make the whole picture transparent. • Right click on blank part of slide • Select “format background” • Check “picture or texture fill” • Where it says “Insert from,” click on file • Choose your file • Adjust transparency (toward the bottom of the menu) • Around 60% should be good, but play with it
Some Colors Do NOT Go Together Bad Idea Good Idea Using colors that contrast Using a contrasting color that is pleasing to the eye • Using colors that don’t contrast enough • Using colors that give people headaches (or seizures)
Choosing your words Bad idea Good idea Use short sentences of phrases Leave yourself something to add Why? • Put everything you plan to say on the slide because then you are tempted to read it to your audience, even though they are likely educated and can read for themselves. • This will also lead to putting too many lines of text on a slide.
Structure of Presentation According to the rubric
Introduction • Clear purpose established • Student introduced him/herself appropriately • Student caught listener’s attention quickly and appropriately Hutch in the oven
Introduction Tips • No need for words to introduce yourself. • You already know your name, where you plan to go to college, where you live, etc. • Use an appropriate picture instead • Or just introduce yourself and your project while your title slide is up
Planning an Educational Trip to Belize Ashley Hutchinson
Body • Main points supported with accurate detail • Logical organization • Topic adequately covered; • Student held listener’s attention • Physical • Why you chose it • Process • Learning stretch • Difficulties • Mentor • Research • How it connects to physical • Thesis • Couple of interesting facts
Introducing your Project • Say something attention-grabbing • There is no magic formula for this • Consider what you yourself found interesting about your project • Briefly mention the topic of your physical project AND your research paper
Educational Tour of Belize • 2008 trip • Opportunity knocks! • Experiential education
Goals • At least 15 participants • Under $2500 • At least three distinct landscapes • Biodiversity • Cultural diversity • See a spider monkey!
Getting Started • Logistics • Where? • When? • Communication • With tour company • With students • With parents
Evidence of Learning • Evidence of self-discovery • Use of “I learned” or “I discovered,” etc. • Evidence of significant learning stretch • Make sure to emphasize these things • Don’t make the judges guess • This can be done while describing whole process
Pre-trip Planning • Contact Explorica • Contact Teaching Fellows • Plan itinerary • Write proposal • Recruit students • Get students signed up • Make sure everyone pays
Belize Bound! • Get to know group • Tour Belize City • Poverty • People • Experience the rainforest environment • Jaguar preserve • Ziplining and cave tubing • Mayan ruins • Relax with the island life • Snorkeling
Balanced Content • Not too much on research paper or too much on project • Both elements adequately discussed • Student relates paper and project
Belize Needs More Conservationists Land Sea
Conclusion • Student wraps-up effectively • Sense of closure; student leaves a • Memorable and positive impression • Student connects project to “real world” • This is a good place for your visual or demonstration • If you end on a video or demonstration, have something prepared to say at the end so the judges know it’s the end
Visual • student MUST include a visual aid or demonstration • Should be interesting • Appropriate • Able to be seen by audience • Neat • Creative • Helpful • On topic
Language Usage • student uses standard English • precise word choice; • transitions are used to make connections • words are pronounced accurately • Student avoids distracting “fillers” (um, like, you know, uh, etc.)
Look at the Audience But don’t make it a creepy uncomfortable stare
Stand up Straight • Don’t rock the podium. In fact, just don’t use one.
Sound Like you Liked your Topic I loved my project! I learned so much! Um, I, like, hated my project. It was, like, so boring. I wish I had done a different project. (Wah)