Download

1 / 22
401 likes | 644 Views
Poultry Blood Collection. By Akrum Hamdy akrum312@hotmail.com www.kenanaonline.com/ws/AkrumHamdy. Why Bleed Your Birds?. (blood collection) can play an important role in determining the cause of morbidity (sickness) and mortality (death loss) experienced in your flock.

E N D
Poultry Blood Collection By Akrum Hamdy akrum312@hotmail.com www.kenanaonline.com/ws/AkrumHamdy
Why Bleed Your Birds? (blood collection) can play an important role in determining the cause of morbidity (sickness) and mortality (death loss) experienced in your flock. In addition, flock health monitoring can be achieved by obtaining serum samples. whole blood, plasma, and serum. Whole blood samples are usually used by the veterinarian or flock specialist to examine, by microscopy, the condition of the erythrocytes (red blood cells), leukocytes (white blood cells), and thrombocytes (platelet-type cells). Plasma samples are often used by the veterinarian to obtain the chemical profile of the bird?. Serum samples are used by the veterinarian to obtain antibody titer levels present to determine flock exposure to disease agents.
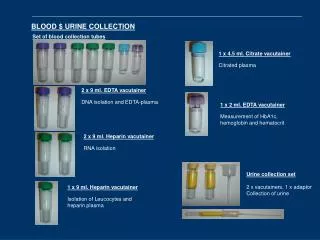
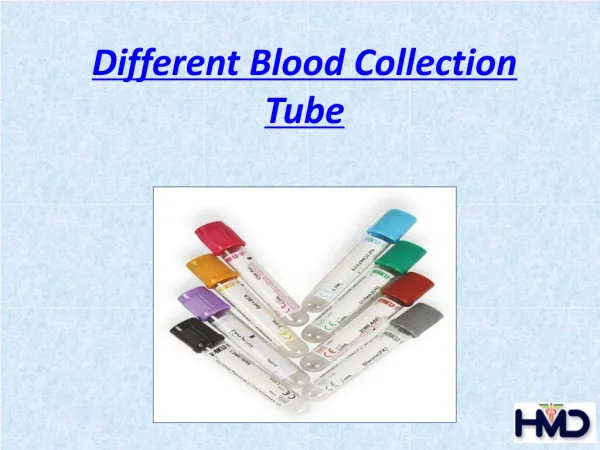
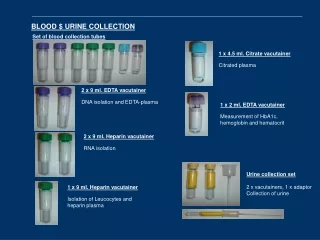
What Will You Need to Collect Blood? 1- 3 mL syringes (1 mL = 1 cc) 2- Needles (the higher the gauge, the smaller the diameter of the needle). The 25 gauge x 1 inch length is preferable for most birds. 3- Blood collection vials. 4- Mini cooler (for transportation of blood samples to the laboratory) .
Note the colored caps/plugs identifying the type of blood vials.
Examples of sick birds that have ruffled feathers and appear ?depressed.?
How Much Blood Can One Collect? The amount of blood that can be safely collected from a clinically healthy bird is 1% of its body weight, in grams. For example, the maximum amount of blood to take from a 500 g bird is 5 mL (5 cc) of blood. In addition, one should collect less blood from birds that are sick.
Where Are the Blood Collection Sites?The large vein under the wing (brachial vein) 1- Place the bird on a table, setting it on its side. 2- Lift up the wing with one hand and part the feathers along the wing. Water can be used to help keep the feathers separated. 3-Place the needle at a slight angle, bevel up, against the vein on the underside of the wing. (The bevel is the side of the needle with the angle and the hole.) Insert the needle into the vein and slowly withdraw blood.
4- Remove the needle and apply pressure to the vein for a few seconds. This will help to minimize the development of large hematomas, which can be common with poultry. 5- Fill the appropriate vial 1/3 to 1/2 of its full volume. Allow the vacuum in the vial to empty the syringe, rather than pushing on the plunger, as this will prevent hemolysis (rupture of red blood cells). This volume is needed to ensure enough blood is collected to obtain an adequate sample.
Separation of wing feathers, exposing the brachial vein (left). Vein puncture and the withdrawal of blood (right).
The vein on the side of the outstretched neck (jugular vein) Place the bird on a table, setting it on its 1- sideStretch out the neck with one hand and part the feathers along the neck
3-Place the needle at a slight angle, bevel up, against the vein. Puncture the vein and slowly withdraw blood. 4- Remove the needle and apply pressure to the vein for a few seconds. Fill the appropriate vial 1/3 to 1/2 of its full volume.
Exposed jugular vein (left) and withdrawal of blood (right).
The vein on the inner leg, above the hock (medial metatarsal vein) 1-Place the bird on a table, setting it on its side. 2- Stretch out the leg with one hand and part the feathers along the hock joint. 3- Place the needle at a slight angle, bevel up, against the vein. 4- Puncture the vein and slowly withdraw blood.
5-Remove the syringe and apply pressure to the vein for a few seconds. Fill the appropriate vial 1/3 to 1/2 of its full volume.
Filling of EDTA vial by allowing vacuum to empty the syringe.
What Should Be Done After the Blood Is Collected? To obtain whole blood and plasma, gently mix the drawn blood by inverting the tube a few times. This will ensure proper mixing of the anticoagulant with the whole blood. To obtain serum, place the blood vial on a slanted surface for 10 to 15 minutes to allow for clotting. The plasma and serum samples can now be spun by centrifugation. Vials containing the blood samples (serum, plasma, or whole blood) should be refrigerated and sent to a diagnostic laboratory as soon as possible.
Vial with gel separator and whole blood before centrifugation.
Vial with gel separator after centrifugation. Note the gel separator separates the blood cells from the serum.
Thank You Next Presentation will be Blood Cells Examinations