Download

1 / 2
20 likes | 34 Views
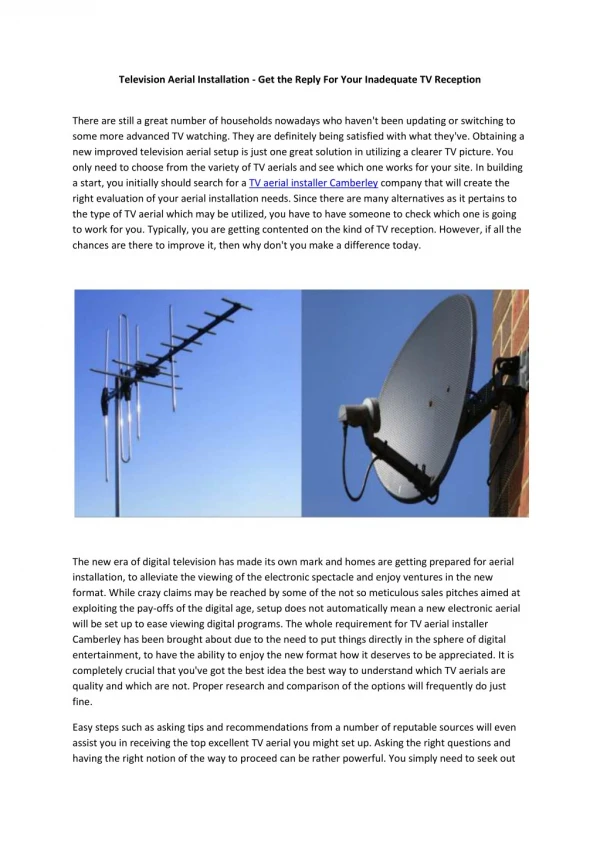
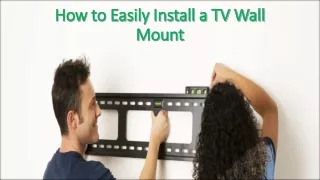
How to install a labgear tv aerial in Oldham, Did you know that our install and maintain a variety of systems around the following areas: Oldham, u00a0Ashton-under-Lyne, Heywood, Rochdale, Bacup, Todmorden, LittleboroughChadderton, Higginshaw, Heyside, Royton, Shaw, Delph, Denshaw, Diggle, Dobcross, Greenfield, Uppermill, Austerlands, Grasscroft, Grotton, Lees, Lydgate, Scouthead, Springhead, Waterhead, Mossley, Mossley Cross, Ashton-Under-Lyne, Bardsley, Westwood, Freehold, Heywood, Ashworth, Balderstone, Castleton, Norden, Rochdale, Buckley, Facit, Great Howarth, Healy, Hurstead, Rochdale, Shawforth, Wardle, Whitworth, Bacup, Britannia, Stacksteads, Littleborough, Shore, Smithybridge, Summit Burnedge, Firgrove, Hurstead, Milnrow, Rochdale, Smallbridge, Thornham.<br>New or replacement aerial: Oldham Aerials only install quality aerial systems designed to last in the Lancashire elements and to endure the seagulls in the Falmouth area! We can maintain domestic and commercial systems in any setting from homes to holiday parks and hotels.u00a0<br>Signal surve: Also, Aerials Oldham can survey your house or building site in the Oldham area to check the signal strength and advise where your aerial need to be located and which system is best suited to your locationu00a0<br>TV reception problems: Furthermore, Oldham aerials can measure your signal strength at the aerial and fault find aerial systems to diagnose a fault in your house, we have local knowledge of signal strengths in Falmouth town and surrounding villages such as Mawnan Smith and Constantine... u00a0<br>TV wall mounting: Gary at Oldham aerials can supply and install a range of AV amplifiers that will provide amazing audio from a range of devices such as Apple Tv, Sky now, Tv sound and many more devices in Dolby 7.1, 5.1.2!u00a0<br>Sonos home audio: Oldham Aerials can install a Sonos system that will improve your televisions sound and allow you to plat that music or audio in any room.u00a0<br>Extra tv points: We can install and extend television points wherever you need them, we are used to working in the new build houses of Bacup and the very old houses in neighbouring villages such a Rochdale and Todmorden.u00a0<br>This is a digital terrestrial TV service, supplied to your house through an aerial, all modern televisions have inbuilt Freeview, if your TV is very old (10 years or more) it may require a Freeview set-top box, Freeview offers a large range of channels (TV and radio), if you don't have a digital aerial we can supply and install one, Freeview is a great choice is you are on a budget and don't want a contract with SkyQ.u00a0<br>What channels are available on Freeview? u00a0From the two main transmitters in Oldham you will receive over 70 television channels including the most popular ones such as BBC1, BBC2, ITV and Channel 4, you also get over 30 digital radio channels, if you live outside the range of these transmitters most areas have a repeater mast that will off a reduced amount of TV and radio channels - If this is not acceptable we can usually install Freesat that provides a similar service to the main two transmitters in Oldham.u00a0<br>u00a0

E N D
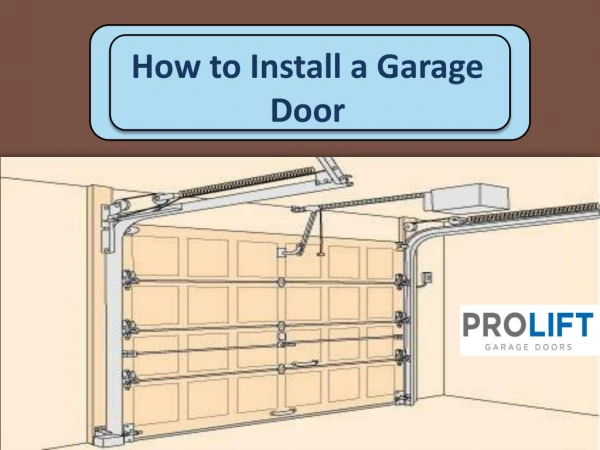
High Gain Professional T Band Aerial Lte800 READY LAB450T USER GUIDE Congratulations on the purchase of your high gain digital aerial. The aerial is ideal for the reception of all available signals in medium, weak and fringe areas. The aerial has also been designed to restrict bandwidth to prevent interference & channel loss on TVs caused by signals from 4G mobile phone transmitters. The aerial is of particularly robust construction to ensure a long operating life. •Ideal for fringe reception areas • Tilting mast clamp for easy adjustment • Easy dipole assembly • Unique compact folding design • Frequency: 470 - 790MHz • Forward Gain: 14.5dBi • Length: 1100mm • Electronic 75Ω balun • Connection: F type Installation Instructions 8mm Fig. 1 For optimum results install the aerial using double screened CAI approved digital coax cable and screened coax outlets. You will need to fit the coax cable with an F type connector to connect to the aerial balun. cut or tear away foil inner wire 1. Prepare the Coax Cable: Firstly fit the rubber weather boot provided, to the aerial end of the cable. Strip the end of the cable as shown in Fig. 1. Once you have stripped the cable, twist the braid and pull it back on itself, make sure that no braid is touching the copper core, this will cause a short on the cable and you will not get any signal. fold braid back over sheath 6.5mm end of insulation should be flush with this face Fig. 2 2. Fitting the F connector (not supplied): Now, simply twist on an ‘F’ connector and trim central conductor. For best results the aerial should be mounted on an outdoor aerial mast and pointed in the direction of the nearest transmitter* making sure it is in a position where the transmitter signal will not be obstructed by nearby trees and buildings. If you are in any doubt about the direction in which the aerial should be pointing or the orientation of the aerial (horizontal for main transmitter, vertical for relay transmitter) check your neighbours’ aerials. 2mm approx. screw connector body onto cable Locked Symbol Fig. 3 Fig. 4 Locking knob Fig. 5 3. Unfold the booms as shown above. To lock the booms in position turn both of the two knobs on either side of the aerial in a clockwise direction through 180˚ making sure that the arrows line up with the locked symbol - see Fig. 4. locating stud 4. Next fasten the balun to the underside of the main central boom as shown in Fig. 5. Make sure the balun is the right way round with the locating stud slotted into the locating hole on the underneath of the central boom.
Fig. 6 5. The reflector bracket rotates through 90˚. When boxed it is usually in the horizontal position as it takes up less space. Before attaching the reflectors the bracket must be rotated into the vertical position as shown in Fig. 6. If you need to rotate the bracket push it towards the front of the aerial to unlock, then rotate clockwise through 90˚ using the arrow as a guide then pull the bracket back into it’s original position. * reflector bracket back view rotate 90˚ clockwise before mounting attaching reflectors 6. Slide the reflectors into the reflector bracket until the locating studs click into place as shown in Fig. 6.* 7. Use the tilting mast clamp supplied to fix the aerial securely to the mast. Adjust the tilt angle to make sure the aerial is horizontal, see Fig. 7 and 8. reflector locating studs 8. Connect the aerial downlead to the ‘F’ socket on the aerial balun (be careful not to over tighten the F connector as this will damage the balun). Ensure that the weather boot is correctly secured over the ‘F’ connector and socket - see Fig. 9. Make sure that the coax cable is routed as shown in Fig. 9 (through the middle of the lower reflector). Use insulating tape, to secure the the coax downlead to the reflector and mast. reflector bracket in vertical position 8. Fine adjust the tilt and direction of the mast clamp to tune for optimum reception. *Please note that when the reflector locating studs have clicked into place the reflector bracket is locked into position. If you are unable to push the reflectors in completely to locate the studs make sure the bracket has been pulled right back. Fig. 7 Fig. 8 Fig. 9 F Connection Weather Boot Troubleshooting No picture: Check all connections from aerial to TV. Poor picture: Check all connections from aerial to TV. Check aerial is properly aligned to the correct transmitter. If the aerial has been loft mounted try mounting outside. Make sure new digital coax cable has been used throughout the installation. Check the transmitter signal is not obstructed by nearby trees or buildings. If in a very weak signal area or for long cable runs, installing a masthead amplifier will improve the signal. If in a strong signal area the signal strength may need to be reduced by fitting an attenuator. Caution When mounting the assembled aerial, always observe safety precau- tions and use the correct equipment. Unless you are competent in the use of ladders and other access equipment,do not work outdoors at roof height. If in any doubt, refer to a qualified aerial installer. Specifications Frequency Range: 470-790MHz TV Channels: 21-60 Forward Gain: 12.3dBd Forward Gain: 14.5dBi Front/Back Ratio: >16.0 dB Beam Width: +/-16° PCB Balun: Yes Connector: F-Type Length: 1100mm Width: 535mm Insulating Tape Reflector Useful Websites for Digital Advice: *To find out which DTT channels should be available locally and to find out where your nearest transmitter is visit: http://www.digitaluk.co.uk/coveragechecker/ and enter postcode, house number if you also check the detailed view box you will see a list of transmitter’s with distances and compass bearings. For further information, please contact: Customer careline: 08457 573479 (Local Rate - UK Only ) Technical Support: www.philex.com/support/ For more information give us a call on 0800 0132341 or visit https://adicommunications.co.uk/tv-aerials-oldham Waste electrical products should not be disposed of with household waste. Please recycle where facilities exist. Check with your Local Authority for recycling advice. TV Aerials Oldham Oldham Broadway Business Park Broadgate, Oldham, OL9 0JA 01706892239 © Philex Electronic Ltd. 2013. v1