Download
1 / 4
0 likes | 21 Views
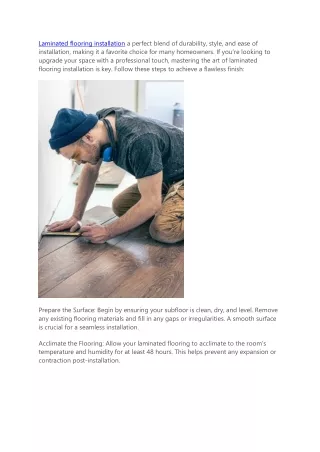
Laminated flooring installation a perfect blend of durability, style, and ease of installation, making it a favorite choice for many homeowners. If youu2019re looking to upgrade your space with a professional touch, mastering the art of laminated flooring installation is key.

E N D
Laminated flooring installation a perfect blend of durability, style, and ease of installation, making it a favorite choice for many homeowners. If you’re looking to upgrade your space with a professional touch, mastering the art of laminated flooring installation is key. Follow these steps to achieve a flawless finish: Prepare the Surface: Begin by ensuring your subfloor is clean, dry, and level. Remove any existing flooring materials and fill in any gaps or irregularities. A smooth surface is crucial for a seamless installation. Acclimate the Flooring: Allow your laminated flooring to acclimate to the room’s temperature and humidity for at least 48 hours. This helps prevent any expansion or contraction post-installation.
Underlayment Installation: Lay down an underlayment to provide cushioning, moisture protection, and sound absorption. Trim the underlayment to fit the room’s dimensions, overlapping seams by a few inches and securing them with tape. Plan the Layout: Determine the direction in which you want your flooring to run. Typically, it’s best to install laminated planks parallel to the longest wall in the room for a visually appealing look. Use spacers along the walls to maintain expansion gaps. Cutting the Planks: Measure and cut the planks accordingly, leaving a small gap between the flooring and the walls to accommodate for expansion. A table saw, circular saw, or jigsaw can be used for precise cuts. Install the First Row: Begin in a corner of the room, laying the first plank with the tongue side facing the wall. Use a tapping block and rubber mallet to gently tap the planks together, ensuring a snug fit. Continue Installation: As you progress, stagger the seams of the planks for a natural appearance and enhanced stability. Use the tapping block and mallet to secure each plank in place, maintaining consistent spacing between rows. Trimming Around Obstacles: For areas around door frames, vents, or other obstacles, measure and cut the planks to fit using a jigsaw or coping saw. Take your time to ensure precise cuts for a professional finish.
Final Rows and Finishing Touches: As you approach the final rows, measure and cut the planks to fit, leaving a gap for expansion. Use a pull bar to tightly fit the last rows into place, ensuring a seamless transition. Install Moldings: To complete the look, install baseboards and transition moldings to cover expansion gaps along walls and doorways. Secure the moldings in place with finishing nails or adhesive for a polished appearance. Finishing Touches: Once the installation is complete, thoroughly clean the floor to remove any dust or debris. Admire your handiwork and enjoy your newly transformed space! By following these steps and paying attention to detail, you can achieve professional- looking laminated flooring installation that will enhance the beauty and value of your home for years to come. Title: Mastering Hybrid Flooring Installation: A Comprehensive Guide Hybrid flooring combines the best features of laminate and vinyl, offering a waterproof and durable solution suitable for any room in your home. Whether you’re a seasoned DIY enthusiast or tackling your first flooring project, mastering hybrid flooring installation is within your reach. Here’s how to do it like a pro: Prepare the Surface: Start by ensuring your subfloor is clean, dry, and level. Remove any debris, old flooring, or adhesives, and fill in any cracks or gaps to create a smooth surface. Acclimate the Flooring: Allow your hybrid flooring to acclimate to the room’s temperature and humidity for at least 48 hours. This helps minimize expansion or contraction during installation. Underlayment Installation: Lay down a suitable underlayment to provide cushioning, moisture protection, and sound absorption. Trim the underlayment to size, overlapping seams and securing them with tape. Plan the Layout: Determine the best direction for laying the flooring planks, considering the room’s dimensions and natural light sources. Use spacers along the walls to maintain expansion gaps. Cutting and Fitting: Measure and cut the planks to size, leaving a small gap between the flooring and the walls for expansion. A utility knife or multi-tool can be used to make precise cuts.
Start Installation: Begin in a corner of the room, laying the first plank with the tongue side facing the wall. Use a tapping block and mallet to gently tap the planks together, ensuring a tight fit. Staggering Planks: As you progress, stagger the seams of the planks for a natural look and enhanced stability. Use the tapping block and mallet to join each plank securely. Trimming Around Obstacles: For areas around door frames, vents, or other obstacles, measure and cut the planks to fit using a jigsaw or coping saw. Take your time to ensure accurate cuts for a professional finish. Final Rows and Finishing Touches: As you approach the final rows, measure and cut the planks to fit, leaving space for expansion. Use a pull bar to snugly fit the last rows into place. Install Moldings: Complete the installation by installing baseboards and transition moldings to cover expansion gaps along walls and doorways. Secure the moldings with finishing nails or adhesive. Cleaning Up: Once the installation is complete, clean the floor thoroughly to remove any dust or debris. Step back and admire your handiwork –you’ve successfully installed hybrid flooring like a pro! With attention to detail and careful planning, you can achieve a professional-looking hybrid flooring installation that will enhance the beauty and functionality of your home for years to come.