Download
1 / 8
0 likes | 2 Views
Weddings are among the most cherished life events, and custom wedding banners have become an essential part of the decor. Whether itu2019s a u201cWelcome to Our Weddingu201d sign or a personalized photo backdrop, banners add a personal and polished touch to any wedding celebration.

E N D
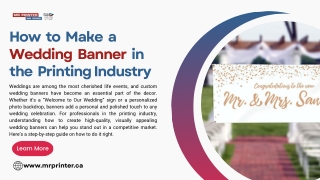
How to Make a Wedding Banner in the Printing Industry Weddings are among the most cherished life events, and custom wedding banners have become an essential part of the decor. Whether it’s a “Welcome to Our Wedding” sign or a personalized photo backdrop, banners add a personal and polished touch to any wedding celebration. For professionals in the printing industry, understanding how to create high-quality, visually appealing wedding banners can help you stand out in a competitive market. Here’s a step-by-step guide on how to do it right. Learn More www.mrprinter.ca
Understand the Client’s Vision Start by having a detailed discussion with the client. Key questions include: What is the theme or color scheme of the wedding? What message or text should appear on the banner? Do they want photos or specific graphics included? Where will the (indoor/outdoor)? What are the exact dimensions? Gather all the inspiration they have—Pinterest boards, mood boards, font preferences, and color palettes—to ensure you’re aligned with their vision. banner be displayed
Choose the Right Materials The choice of material is crucial based on the venue and purpose. Common banner materials include: Vinyl (PVC): Durable and weather-resistant, ideal for outdoor use. Fabric (Polyester or Canvas): Great for indoor events, offering a soft, elegant look. Mesh: Best for windy outdoor areas, allowing air to pass through. Be sure to use fade-resistant, waterproof inks if the banner will be outdoors.
Use professional design software like Adobe Illustrator, Photoshop, or CorelDRAW. Some key design considerations: Resolution: Ensure a minimum of 150-300 DPI for high-quality large prints. Safe Zone and Bleeds: Keep text and essential elements inside the safe zone and include a bleed (typically 0.125–0.25 inches) for trimming. Typography: Use elegant, readable fonts. Script fonts work well for weddings but should be legible from a distance. Color Profile: Work in CMYK color mode for print accuracy. If photos are used, ensure they are high resolution (at least 300 DPI) to avoid pixelation.
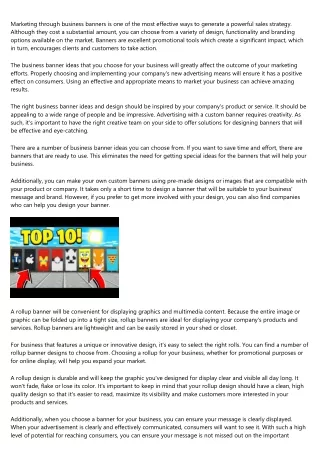
Proofing and Client Approval During this stage, thoroughly double-check the following elements: Spelling and grammar: Typos are one of the most common mistakes and can easily be overlooked. Review all names, titles, and messages with a fresh set of eyes. Dates, names, and location info: These details are often copy-pasted from various sources. Confirm everything against the original client input or invitation. Layout and alignment: Ensure all elements are centered properly, not overlapping, and spaced consistently. A visually balanced design enhances professionalism. Color accuracy: If matching to a specific wedding palette or theme, confirm that the CMYK values are producing the expected results. If in doubt, share a small printed sample with the client. Font size and legibility: Especially for banners meant to be viewed from a distance, test readability and contrast. Before heading into final production, the proofing stage is crucial—it’s the last checkpoint to ensure the wedding banner meets all expectations and eliminates any chance of errors. A clean, accurate proof not only reflects your professionalism but also gives clients peace of mind. Start by sending the client a digital proof or a scaled-down printed mockup, especially if the design involves intricate details or color accuracy. This allows them to see the layout, fonts, spacing, and image placement in context before the final print. 25 20 15 10 5 0 Item 1 Item 2 Item 3 Item 4 Item 5
Print and Finish Once the design is approved, proceed to production with attention to detail. Key tips include: Calibrate Printers: Regular calibration ensures accurate and consistent color output across every banner. Use Durable Inks: High-quality, fade-resistant inks increase longevity, especially for outdoor use. Add Grommets or Pockets: These features allow for easy and secure hanging in various settings. Hem the Edges: Hemming gives a clean, professional look while preventing fraying and tearing.
Packaging and Delivery Roll the banner carefully to avoid creases and place it in protective packaging. Include care instructions if needed (especially for fabric banners) and ensure timely delivery, particularly for destination weddings or event planners. 1000+ Clients Served 50+ Industry Awards
Thank You So Much! Creating wedding banners in the printing industry is more than just putting ink on material—it’s about capturing a couple’s vision and delivering a piece of their love story. By focusing on quality, customization, and client communication, print professionals can become a go-to source for beautiful and memorable wedding signage. MESSAGE info@mrprinter.ca WEBSITE www.mrprinter.ca CONTACT US +1 416-252-3341