Download
1 / 41
410 likes | 903 Views
PowerPoint Presentations Text and Graphics Techniques Tips What we’ll look at…. Uses for PowerPoint Starting out Blank or design Choosing slide layouts Inserting & Formatting Text Inserting Graphics Viewing and arranging slides Creating/Printing notes and handouts

E N D
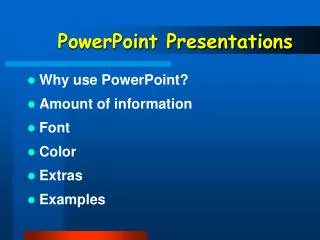
PowerPoint Presentations Text and Graphics Techniques Tips
What we’ll look at…. • Uses for PowerPoint • Starting out • Blank or design • Choosing slide layouts • Inserting & Formatting Text • Inserting Graphics • Viewing and arranging slides • Creating/Printing notes and handouts
PowerPoint Presentations • Presentations at conferences or committees • Classroom modules
Presentations • Text and illustrations • Pictures • Graphs • Cartoons for color and variety • Presentation + space for notes = Ready-made handouts
Classroom modules • Outline notes • Basis of your lecture segment • Photos/Sounds/Videos/Diagrams/Charts • Illustrate points • Language learning • Processes (Physics, Chemistry) • Business trends, stats
Starting a new presentation • Open PowerPoint • Start Button All Programs Microsoft PowerPoint • If a blank presentation doesn’t appear • On the menu bar, click File New • The New presentation pane appears at the right
Starting choices • On the New Presentation pane choose:
Starting choices: Blank • On the New Presentation pane choose • Blank presentation for a simple white or colored background • (Add design later)
Starting choices: Design Template • On the New Presentation pane choose • Blank presentation for a simple white or colored background • (Add design later) • From Design Template to choose from pre-designed graphic backgrounds
Starting choices: AutoContent • On the New Presentation pane choose • Blank presentation for a simple white or colored background • (Add design later) • From Design Template to choose from pre-designed graphic backgrounds From AutoContent Wizard to get help with content for standard business presentations
Blank presentation screen Slide Thumbnails: Click to move to slides Task pane: Changes with your Insert menu choices
Blank presentation • Add slide layout later Easy! • Format Slide Design
Starting from Design template • New From Design Template • Or: Format > Slide Design • Template pane opens to the right • Click a graphic scheme to choose a design for your presentation • Change Templates anytime • Remove background pictures from individual slides
Title Slide • First slide = Title slide • Different format from remainder • Enter title and subtitle text • Subtitle can be: • Topic areas • Short description • Blank
Adding more slides • On the menu bar, click Insert New Slide • OR: Click the New Slide icon • Or: Press Control-M
Choosing a slide layout When you add a new slide: • Apply slide layout pane appears at right • Click to apply your choice • Text = Bullets • Graphics: Easily add clip art or images saved on your computer • Combinations: Text and Graphics frames • Always add a title • Everything easily changed!
Frames • Selecting a layout inserts movable containers (frames) to hold text or graphics • Graphics don’t have to be in a graphics box • Frames are movable and resizable Text and graphics layouts
Text frames • Text normally in levels of bullets (Here’s level 1 in this Slide Design) • Level two • Level three To get rid of a bullet, backspace at the beginning of a line • Bullet and text styles are set in the Slide Design • You can change the Master slide (View > Master > Slide Master)
Adding Text • Type text in a text frame • To go down to the next level of bullet: • Press Tab at the beginning of a line or • Click the Increase Indent icon on Formatting toolbar • To go back to a higher level bullet: • Press Shift-Tab at the beginning of a line or • Click the Decrease Indent icon on Formatting toolbar
Change Text Color:Click down arrow to see more choices Bold ItalicUnderline Shadow Add or take away numbering or bullets Align: Left Center Right Make text Bigger/Smaller Text: Other formatting • Highlight text to format • Use toolbar button to format • Use sparingly!
Techniques: Text • Clear Titles • Nothing below 18/20 pt • Short bullets • Explicate as you present • Not full text • San Serif Fonts • Arial, Helvetica, Verdana, Tahoma • Best Serif font: Georgia • This text: Verdana (Sans Serif top and brown) and Georgia (smaller black)
Tips: Text and graphics • Appropriate graphic style • Serious and subdued • Playful and cartoony • Illustrative photos • Consistent style, colors • Drawings with similar look • Not too busy • Not even 1 graphic per page unless illustrating a point
Tips: Consistency • Text as well as Graphics styles set in the Slide Design you choose • Styles include: • Type Face sizes and colors • Bullet styles and colors • Background graphics
Master slides • Presentation designs set by Master slides • To view and change • View > Slide Master • Changing an aspect of the master changes your whole presentation - consistently
Graphic frames • Select a layout that includes a graphics frame • Click an icon to insert a graphic type Or insert graphics from the menu: Insert Picture • Pictures don’t have to be in a graphics frame
Pictures • Before PowerPoint: • Assemble your pix from camera/scan/Web • Web: Search with Google―Image tab • Click thumbnail of picture • Then click See full-sized image • Right-click (Control-click on Mac) • Click Save Picture as: to download • Remember where you saved the picture!
Choosing Pictures • Choose Pictures like shoes • Are they the right fit? • Size: Dimensions and File Size • Can resize (some) in PowerPoint • Do they go with your presentation? • Relevance • Do they go with each other? • Consistency, style
Techniques: Inserting pictures • Insert Picture • Clip art • for supplied art • From File • for your pictures on disk
Techniques: Tweaking pictures • Use the Picture toolbar • View Toolbars, Picture • Quickly add lines, change brightness, contrast, even color (sometimes) • Size, position, tilt graphic • Don’t make it (much) larger
Choose transparent color Change to shades of grey Change contrast Crop (get rid of part of picture) Add lines Re-color (sometimes) Reset to original Change brightness Flip Compress Open Format picture window The picture toolbar To show toolbar: Click a picture If the toolbar doesn’t appear: Right-click picture and choose “Show Picture toolbar” • Click to select picture before you choose an option
Manipulating Pictures Drag to rotate • Don’t make pictures larger • Bigger = Fuzzier • Control in PowerPoint: • Placement • Size • Rotation Drag corner bubble to resize Click and drag to move
Getting Fancy • You can: • Add transitions between slides • Animate text • Make graphics appear and disappear • See the PowerPoint Animations presentation for more information.
Getting Fancy • You can: • Add transitions between slides • Animate text • Make graphics appear and disappear • See the PowerPoint Animations presentation for more information. Don’t Overuse!
Getting Fancy • You can: • Add transitions between slides • Animate text • Make graphics appear and disappear • See the PowerPoint Animations presentation for more information. Can be annoying! Don’t Overuse!
Ways to View your slides • View menu: changes slide display • Normal: • Create/Edit • Slide Sorter • Thumbnails to move around or delete • Slide Show • Full-Screen presentation • Notes Page • Type in notes for presenter or for handouts
Slide Sorter View • Open from • View menu • View icons (lower left) • Click slide to select • Drag to move • Press Delete to remove
Notes View • Open from • View menu • Bottom section for text • Notes to print for presenter or for distribution Type your notes here
Printing Click down-arrow to see print choices From Menu bar: File > Print • In lower left, use the Print what pulldown to choose: • Slides―1 slide /page • Handouts―several slides/page • 3 per page prints lines for notes to right • Notes pages―like Notes view • Slide with your notes • Outline View―Text only
Printing Handouts Click down-arrow to set slides/page • Choose 3 slides per page to get lines for notes • Check Frame slides for line around slide images
Printing Headers/Footers Click preview button to set print options • On the menu bar, click File > Print, and then click Preview • OR: On the menu bar, click View > Header and Footer • Add Date, Name of presentation, etc.
Summary • Use PowerPoint for • Conferences • Meetings • Classroom modules • Start from blank or design template • Add or change design template at will • Add text • Bullet form primarily: Promote and demote bullets • Insert pictures • Insert saved pictures or clip art • Print Handouts, Notes pages or text outline