Download
1 / 36
1.19k likes | 4.06k Views
Autoclave Training. November 16, 2005 University of Kentucky Department of Biosafety. Learning Objectives. What materials can be autoclaved? What Personal Protective Equipment (PPE) is necessary for autoclave use? How does one properly load the autoclave?

E N D
Autoclave Training November 16, 2005 University of Kentucky Department of Biosafety
Learning Objectives • What materials can be autoclaved? • What Personal Protective Equipment (PPE) is necessary for autoclave use? • How does one properly load the autoclave? • What steps assist in efficient decontamination of biohazardous waste? • How does one verify autoclave performance for decontamination of biohazardous waste?
Importance of Proper Autoclave Use • Tremendous pressure from steam in chamber provides explosive potential • High temperatures and presence of extremely hot water creates potential for burns and scalding • Inadequate decontamination allows for the potential of biological hazards and personnel and environmental contamination
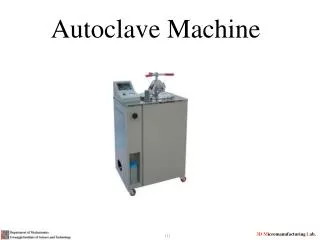
What can be autoclaved • Surgical Instruments • Glassware • Plastic tubes and pipette tips • Solutions and water • Animal food and bedding • Waste
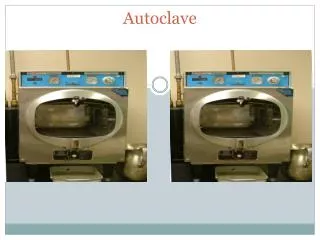
Principles of Autoclave Operation • Steam penetrates objects in the autoclave • Condensation creates negative pressure and draws in additional steam • Moist heat kills microorganisms via coagulation of proteins • Two types of autoclaves • Gravity Displacement • Vacuum Assisted
Autoclave Use Basics • Personal Protective Equipment (PPE) • Packaging • Loading • Operating • User logs • Maintenance logs • Unloading • Improper Autoclave Practices
PPE for Autoclave Users • Eye Protection • Lab Coat, Buttoned • Closed-toed Shoes • Heat-resistant Gloves
Packaging for Autoclaving • Be sure the material should be autoclaved • No volatile chemicals, sharps, red bag waste, radioactivity • Utilize containers and autoclave bags appropriate for autoclaving • Clear or orange bags • UK Stores 6532-0046 • Do not overfill containers
Packaging for Autoclaving • Carefully add water to autoclave bags • Add approximately 1 liter of water to 24” x 30” bag • Aids in reaching appropriate temperature quickly • Creates steam in the autoclave bag to replace cold air • Prepare packaging to allow steam penetration • Check that all containers including bags are vented • Loosely close autoclave bags • Vent lids on bottles containing solutions • Place packaged material in a secondary container • Stainless steel tray or autoclavable polypropylene bin
Loading the Autoclave • Load material to allow efficient steam penetration • Autoclave clean items and waste separately • Do not allow material to be autoclaved to touch the sides or top of the chamber
Operating the Autoclave • Be sure the autoclave is functioning properly before use • Record information in User Log • Close door properly and securely • Choose the correct conditions for your material • For decontamination: • Temperatures between 121-124°C • Total processing time 60-120 minutes • Exposure time greater than 20 minutes • Pressure minimum 15 PSI • Select liquid cycle or slow exhaust cycle
Autoclave User Log • Maintain User Logs for Two Years • Complete User Log with Every Use
Autoclave Maintenance Log • Maintain Maintenance Logs for Five Years • Complete Maintenance Log for Every Repair • Maintain records of Yearly Calibration
Unloading the Autoclave • Put on Personal Protective Equipment • Allow the autoclave to completely finish cycle • Pressure gauge must read zero • Verify cycle conditions were met • Open door slightly to allow steam to escape • Allow contents to cool before removal • Carefully remove items • Be especially careful with fluids and plastic bins
Autoclave Verification Program • Program will ensure that all potentially hazardous biological waste is properly decontaminated prior to deposition in landfill • Program requires testing of the ability of campus autoclaves to kill microorganisms • There are over 50 autoclaves on campus which require this verification program
Autoclave Verification • Each Load of Biohazardous Waste • Autoclaves with automatic documentation • Review the printed report • If conditions were met, initial, date, and place User Log number on printed report • If conditions were not met, do not remove the load, repeat autoclave cycle. • If conditions are not met again, autoclave must be labeled out of order. • Contact responsible individual posted on autoclave. • Responsible individual contacts service company to schedule repairs.
Autoclave Verification • Each Load of Biohazardous Waste • Autoclaves without automatic documentation • A Chemical Integrator Test Pack (CITP) must be incorporated in each load. • Based on color change the performance of the autoclave will be evaluated. • Tape the autoclaved CITP strip in the appropriate section of the User Log for your load.
Autoclave Verification • Monthly Verification for Biological Waste Autoclaves • Biological Indicator Test • Checks all conditions of autoclave cycle, time, temperature, and pressure • Verifies ability of autoclave to kill a microorganism • Utilize the 3M Attest Biological Indicator Monitoring Kit • Record results in Biological Indicator Results Log
Biological Indicator Results Log • Maintain Results Logs for Five Years • Complete Results Log with Every Monthly Test
Biological Indicator Test Procedure • Label Attest package containing biological indicator vial with date, autoclave ID, and load number from user log • Place the indicator vial package in the autoclave with the biohazard waste load • Run the autoclave cycle as usual • Using proper unloading procedures, remove the indicator package from the autoclave
Biological Indicator Test Procedure • Label the indicator vial with all information from package • Check indicator vial label for color change from rose to brown • Place the biological indicator vial into the 56°C incubator
Biological Indicator Test Procedure • Place a non-autoclaved, labeled control tube in the incubator • Examine the indicator tube at 8, 12, 24, and 48 hours for any color change • Yellow color change indicates bacterial growth • Compare to non-autoclaved control at each time point • Record 48 hour test results in Results Log
Unprocessed Positive Control Processed Biological Indicator Test Results
Learning Objectives Review • What materials can be autoclaved? Surgical Instruments Glassware Plastic tubes and pipette tips Solutions and water Animal food and bedding Waste
Learning Objectives Review • What Personal Protective Equipment (PPE) is necessary for autoclave use?
Learning Objectives Review • How does one properly load the autoclave? Load material to allow efficient steam penetration Autoclave clean items and waste separately Do not allow material to be autoclaved to touch the sides or top of the chamber
Learning Objectives Review • What steps assist in efficient decontamination of biohazardous waste? Add approximately 1 liter of water to 24” x 30” bag Loosely close autoclave bags Place packaged material in an approved 2° container
Learning Objectives Review • How does one verify autoclave performance for decontamination of biohazardous waste? Each Load Verify cycle conditions via autoclave printout CITP indicator use Monthly Utilize Attest Biological Indicator Vial
References and Links • http://ehs.uky.edu/biosafety/autoclave.html • http://www.uottawa.ca/services/ehss/autoclaves.htm • http://www.3m.com/ • http://www2.umdnj.edu/eohssweb/aiha/technical/labequipment.htm#Autoclave • http://ehs.uky.edu/em/ Environmental Management 323-6280
Questions or Additional Information Brandy Nelson Sr. Biological Safety Specialist Department of Biological Safety 252 East Maxwell Street Lexington, KY 40506-0314 Phone: 859-257-3753 Cell: 859-699-6082 bnels3@email.uky.edu http://ehs.uky.edu