Download
1 / 12
130 likes | 497 Views
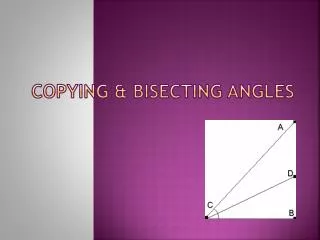
Copying & Bisecting Angles. Parts of an angle. How to name Angles. After the Vertex - A After the rays that form the angle BAD After the letter or number inside the angle 1. Compass . Tool used to draw circles and parts of circles called arcs. Construction.

E N D
How to name Angles • After the Vertex - A • After the rays that form the angle BAD • After the letter or number inside the angle 1
Compass • Tool used to draw circles and parts of circles called arcs.
Construction • Process of making a line, angle or figure according to a specific requirement.
Bisect Angle Bisector • To divide into equal parts Ray that divides an angle into two equal parts
Thebisector of an angle is a ray whose end point is the vertex of the angle and which divides the angle into two equal angles. In the diagram to the right, the ray CD is the bisector of the angle ACB if and only if the angles ACD and BCD have equal measures.
Bisect Angle • To construct the Angle Bisector of an angle follow the following steps. • Given an angle to bisect, for this example, angle ABC.
Step 1. • Draw an arc that is centered at the vertex of the angle. This arc can have a radius of any length. However, it must intersect both sides of the angle. We will call these intersection points P and Q This provides a point on each line that is an equal distance from the vertex of the angle.
Step 2. • Draw two more arcs. The first arc must be centered on one of the two points P or Q. It can have any length radius. The second arc must be centered on whichever point (P or Q) you did NOT choose for the first arc. The radius for the second arc MUST be the same as the first arc. Make sure you make the arcs long enough so that these two arcs intersect in at least one point. We will call this intersection point X. Every intersection point between these arcs (there can be at most 2) will lie on the angle bisector.
Step 3. • Draw a line that contains both the vertex and X. Since the intersection points and the vertex all lie on the angle bisector, we know that the line which passes through these points must be the angle bisector.