Download
1 / 28
280 likes | 464 Views
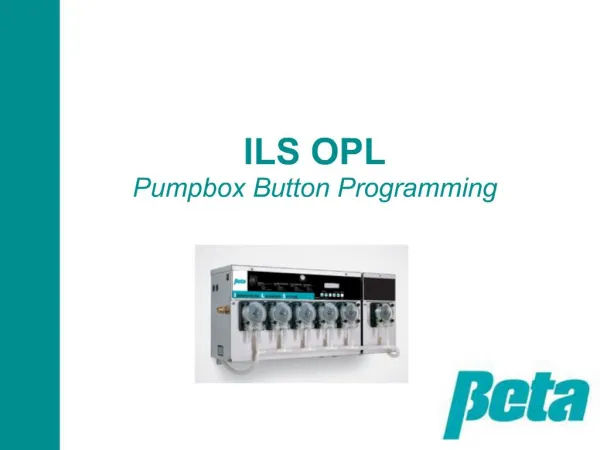
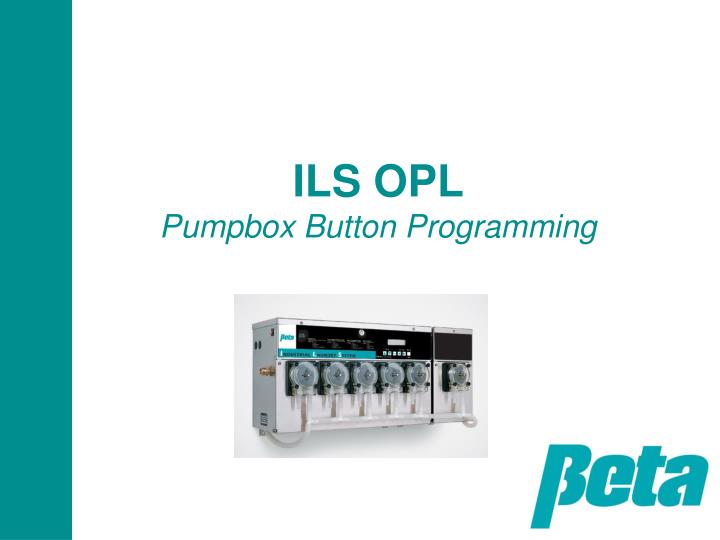
ILS OPL Pumpbox Button Programming. Scope of Presentation. Programming options: computer vs. direct with pumpbox buttons Programming ILS OPL compared to Summit E Loop summary (sticker on dispenser lid) Loop logic: Run, Print, Interrogation, Pump Setup, Washer Setup Pump setup sub loop

E N D
Scope of Presentation • Programming options: computer vs. direct with pumpbox buttons • Programming ILS OPL compared to Summit E • Loop summary (sticker on dispenser lid) • Loop logic: Run, Print, Interrogation, Pump Setup, Washer Setup • Pump setup sub loop • Washer setup sub loop • Troubleshooting
Programming: Computer vs. Pumpbox Buttons The ILS OPL is programmed either at the pumpbox, or from a computer PC using Beta software. We recommend programming using a computer if you want to offer your customer detailed report printouts, since it’s faster to enter the information using a keyboard. Please refer to the main installation presentation for a basic guide to programming via a computer. This presentation reviews how to program at the pumpbox without using a computer. Many installers use the data features with ILS Max and ILS, but don’t with ILS OPL, since the accounts are often smaller. For these installers, programming via the pumpbox screens and buttons is simple and fast, because they don’t need to program in formula names, chemical costs, and other data which is used in reports. This presentation details how to quickly program an ILS Max to run in the basic modes, formula and relay. We recommend learning these basic modes, which are very similar to our other dispensers such as Summit E and Summit XL, before learning any advanced modes such as PDCI, enhanced relay, or automatic. Many screens are “optional, needed only if you’ll print out reports later.” If you avoid programming this optional data, you’ll finish programming quickly. The ability to input this data directly was included since you could also print reports directly from the pumpbox via a briefcase printer, which became obsolete several years ago.
Comparison with Summit E • Programming • Summit E is programmed using the programmer/formula selector. Since Summit E only serves one washer, you program the dispenser for each washer seperately. It is possible to program one dispenser, make a copy of the program, and then copy it onto other dispensers • ILS OPL can be programmed either direct from the pumpbox, or by PC software. • Loops • Summit E has one menu “loop”. If you scroll through the menus, you see them all and return to the first menu, so you can scroll through them repeatedly. • ILS OPL uses 5 menu “subloops”. You press the left and right arrows on the front of the dispenser to switch from 1-5. You have to also be holding down the blue button on the main PCB (ensuring you have a key to access unit) to access 4 & 5 • Run screen • Print reports • Interrogation (check washer/POF status) • Pump setup • Washer setup • Use the menu button to go through the various screens in each ILS Max subloop • A programming screen flowchart is located under the dispenser lid, and is shown on the next page
Menu Loop Logic • Run screen: Displayed in normal operation • Print reports: This function isn’t used much; printing is done from DNet instead of direct from the ILS OPL USB port. • Interrogation: Used to check system status. Can be accessed without using a key to the dispenser. • Pump setup: Programs settings for the pumps, which are applicable for all washers, such as chemical cost, chemical names, & POF calibration. • Washer setup: Washer specific info such as washer name, trigger mode per washer, transport time to each washer To go from loop to loop, press the left and right arrows simultaneously. Note that you have to open the dispenser lid with a key and hold down the blue button on the PCB while pushing the left and right arrows to get into the pump setup and washer setup screens. Once you’ve reached one of these screens, you cycle through the sub loop of menus with the menu button.
Menu Loop Logic: Run Screen Run screen: Displayed in normal operation
Menu Loop Logic: Print Reports Print reports: • This function isn’t used; printing is done from DNet instead of direct from the ILS OPL USB port.
Menu Loop Logic: Interrogation Interrogation: • Used to check system status. Can be accessed without using a key to the dispenser. • Interrogation is used principally for troubleshooting, and will be covered in the troubleshooting section of this presentation.
Pump Setup Pump setup: Loop begins with the language screen • Programs settings for the pumps, which are applicable for all washers, such as chemical cost, chemical names, & POF calibration. • Use the menu key to cycle through the screens • Entering the dispenser name is optional, only needed if you’ll be creating report printouts later • On the next screen, set the time and date. It’s vital to have this info correctly set so you can track parts life and perform troubleshooting • Select whether you want liters or US gallons as the unit of measurement by using the up or down arrow to make your selection flash on/off
Pump Setup 2 • Setting shift times is optional, needed only if you’ll print out data later for the account • Setting chemical cost is optional, needed only if you’ll print out chemical cost reports later • POF & Pump Speed • It’s critical to turn POF (proof of flow) off for non conductive chemicals such as hydrogen peroxide, or the system will report “POF failure” • Keep POF on low, medium, or high for all other chemicals (Highlight OFF & press up arrow to change to these settings) • When in doubt, set to LOW, with OFF for peroxide Low = 150 uS over baseline: softener, starch, non-built det Medium = 5,000 uS over baseline: built detergent, sour/soft High=30,000 uS over baseline: alkali, bleach, sour
Pump Setup 3 Pump setup calibration • You can pick auto calibration or manual • Select auto calibration so the system will constantly auto-calibrate, boosting accuracy and performance • When set to ‘auto’ the screen shows the most recent values • The manual calibration screen appears when doing a manual calibration from the screen above; the need to manually calibrate is rare, and occurs when dose sizes are under the minimum for autocal, chem is very very thick, and/or delivery distances are extremely long Flow meter calibration: • Enter the value in ml on the tag from the flow meter manufacturer, located on the break tank bracket • Generally you only have to recalibrate when replacing a float switch, which is rare
Pump Setup 4: System component life tracking These screens let you track component life. • The factory programming date is automatically logged as the initial “replaced” date • Tracking life on motors and tubes will let you establish a maintenance schedule, so you can replace parts before failure and thereby reduce system downtime and trouble calls • After replacing a part, push the up arrow to reset the date
Washer Setup Washer setup screens: These are for programming washer specific info such as washer name, trigger mode per washer, transport time to each washer First screen • Turn each washer you’ll pump to on • Select trigger module configuration: • Basic= Single trigger module for relay mode • Basic+ Formula Sel: Single trigger module for formula mode • Washer interface: Used in ILS Max emulation mode to allow POD, or Proof of Delivery • Washer name: entering this is only needed if you’ll be using data to print reports Transport time screen: enter a transport time in seconds for each washer Transport rate screen: leave the default settings on this screen as-is, unless you’re doing advanced programming or troubleshooting
Washer Setup Mode screen: Select the dose mode for each washer. This presentation provides an introduction to the basic two modes only: • Formula • Rely Trigger polarity: Generally you don’t need to alter trigger polarity. Exceptions: • Using a drain signal • No washer on signal available, so you set washer on input to “Reverse”, so that signal isn’t required Cycle name: entering this is only needed if you’ll be using data to print reports (reports will use the cycle name, not the formula name when they print)
Washer Setup Cycle qualifiers: Optional screen, allows system to identify cycle names for reporting Cycle time & weight: Optional, only required for reports.
Washer Setup: Relay Mode Call Rate & Time Limit: • Relay mode on ILS OPL is the same as Summit E: • Chemical dose size=trigger seconds x call rate • So, for a 0.5 liter dose using the 0.1 L/sec call rate shown in the example on the right, you’d use a 5 second trigger. • For USA users, note the call rate will be in oz/sec if you’ve picked “US Gal & oz” instead of liters • Set time limit for the trigger, so if it’s stuck on the dispenser will limit the dose amount and trigger an error message Smart relay mode reduces installation time vs. normal relay mode which just runs the pump while the trigger is on, by allowing the installer to program in target volumes, rather than check flow rates for each pump and then calculate the trigger times they need per pump per formula.
Washer Setup: Formula Mode Formula name: Optional screen only required for reports. (if you enter cycle names and formula names, keep them the same to avoid confusion, and not the cycle names will show up on reports) Formula programming screen: • Program up to three doses per trigger • Select trigger number, then pump number (shown as 00 no selection in the example), and then the dose volume in liters or oz on the bottom line • If you want more than one dose for the trigger, change to “Dose #2” and program the second dose • Repeat for all triggers, for all formula mode washers
Washer Setup Washer Hold: This screen is only used in ILS Max emulation mode: • Normal=Hold until other doses complete • Hold until POD=Hold until confirmation of chemical delivery • Hold until alarm=Puts any washer experiencing an alarm on hold until the error is fixed Strip Chart: • Holds 1400 lines of even data for all washers. • Keep this on for all washers during installation. • If you have trouble with any washer(s), turn it off for those which are not having trouble, so more data can be stored on the washers needing troubleshooting Copy Washer Setups: This screen allows you to copy setups from one washer to another. So, if you’re setting up 3x100 lbs machines in formula mode, you can just set up one and make two copies, to reduce programming time by 2/3.
Troubleshooting We’ve reviewed programming, and hopefully taken the mystery out of how to quickly program an ILS Max without using a computer. Computers can also be useful for viewing a lot of system performance data quickly, for troubleshooting. It’s important to know a few troubleshooting tips, though, so you can troubleshoot without having to pack a laptop. The interrogation menus, which we skimmed over without reviewing in learning programming, are your troubleshooting tools. As with the other subloops, you pick the first screen shown below with the left and right arrow keys, and then use the menu button to cycle through the sub loop. • POF Status & Flow Rate: • This screen allows you to monitor the “uS” (or conductivity in microsiemens). • For best results, the minimum conductivity reading during the feed should be at least 10% higher than the threshold setting for the particular chemical. • When the conductivity exceeds the level programmed, such that proof of flow is positive, the “POF: -” will change to “POF: +”
Troubleshooting Washer Status: • Line 2 shows whether POD is on or off • Line 3 shows TR7 #1 is online, all triggers off “-” • Line 4 shows • bleach defeat (BD) off • Formula selected: If none shown and you’re in formula mode, reset FS1600 address to ensure it’s set correctly • Sequence start light on or off Network status: The bottom line shows which washers are on and communicating with the pumpbox. • If “X”, enable the washer in the setup screen • If “-”, the washer’s enabled, but the modules aren’t communicating, so check TR7 module addressing and wiring • If “-” for a non-existent washer, turn the washer off in the setup screen to prevent error messages
Troubleshooting Pump Stored Strip: • Use the up and down arrows to scroll through washer events. • These allow you to see a record trigger events and error messages, to verify correct system operation and see history for troubleshooting purposes. • The next screen shows the messages, which are displayed on the screen during operation, and logged as data on the pump stored strip
Troubleshooting Status Messages . Be sure to fix the source of an alarm before clearing the alarm; clearing the alarm first may result in missed chemical feeds or compromised system performance. To clear an alarm, press the up arrow.