Download

1 / 11
110 likes | 608 Views
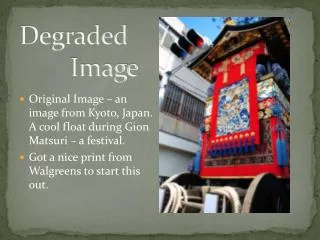
Degraded Image. Image One: Contact Print from 35mm Black and White Negative. The contact print was scanned and cropped using Photoshop. Image Two: Digitally Printed Pattern.

E N D
Image One: Contact Print from 35mm Black and White Negative The contact print was scanned and cropped using Photoshop.
Image Two: Digitally Printed Pattern The Image was horizontally and vertically manipulated in Photoshop to make the pattern below, which was digitally printed on photo paper.
Image Three: Pattern Cut and Adjusted The printed pattern was hand cut, and a single motif was chosen and scanned into Photoshop for brightness and contrast adjustments.
Image Four: Addition of Overlay Handwriting was scanned into Photoshop and positioned over the original motif. The opacity of the overlay was adjusted in order to view the motif underneath.
Image Five: Transfer to Fabric The image was reversed and printed on a sheet of heat-sensitive paper using an Inkjet printer. Once trimmed, image was ironed onto a piece of muslin.
Image six: Wrinkled Fabric The fabric was crushed into a ball and unrolled, producing a wrinkled effect.
Image Seven:Deleted Word The word Gate was cut from the image, leaving holes in the fabric.
Image Eight: Additional Fabric Manipulations Using a sewing machine and another piece of Fabric, the holes were replaced. The piece was cut into segments and sewn together Once again.
Image Nine: Embroidery Using needle and thread, some simple stitches were applied to the fabric To create a small scene.
Image Ten: Digital Photograph The fabric collage was photographed using a digital camera and appears below.