Download
1 / 86
860 likes | 1.38k Views
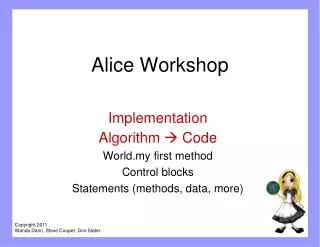
Teaching With Alice First Bytes Teachers Workshop July 2008. Topics. What is Alice? What resources are available? How is Alice used in teaching? Demo of Alice programming. What is Alice?. Alice is a visual programming language.

E N D
Topics • What is Alice? • What resources are available? • How is Alice used in teaching? • Demo of Alice programming
What is Alice? • Alice is a visual programming language. • Alice is an object based language. The objects in Alice are 3 dimensional models. • The output of Alice programs are 3 dimensional movies.
Visual Programming • Programming is done by pointing and clicking, dragging and dropping, selecting from menus, and some typing • Syntax errors removed from the equation • no braces, no semi colons
World View Object Tree Event Editor Details Panel Control Primitives Code Editor
Object Based Programming • Built in library of models. • More available on the web. • All objects have certain methods and behaviors • move, turn, say, roll, resize • New methods can be added to an object • object can be saved as a new class • Polymorphism is not supported.
Alice Models • Main programming data are 3d models • Many built in and more on web
Output • Output are 3d movies • run the program, play a movie • can also add sound to programs • A lot easier to recognize logic errors • "Why do myninja's armskeep flyingaway?"
Alice Resources • Main page • www.alice.org • download Alice 2.0 for free • story telling Alice for middle school • Models gallery • Forums • Textbooks list
Instructional Materials • www.aliceprogramming.net • Password protected • userid: • password: • Workshop schedule • Example course calendars / syllabi • Slides and sample worlds • Solutions to chapter exercises and projects (Dann, Cooper, Pausch book) • Sample exams and test bank questions
Even More Materials • Dick Baldwin, ACC teacher • www.dickbaldwin.com • www.dickbaldwin.com/tocalice.htm • Lots of materials and "how to's" • Alice newsletter. To sign up contact Barbara Conover • bconover@sju.edu
How is Alice Used in Teaching • Originally designed for students in middle school • Has been successful with older students • Used in lots of types of courses • computer literacy • pre cs or pre AP • cs1 or APCS • programming for non CS majors
Approaches • Cover basics, chapters 1 and 2 quickly • learning the tool • Paths through intro programming • objects early (control structures first) • objects first • objects first, recursion early • Interactivity • can create animations / movies only • OR introduce events and interactivity
Projects • Closed-ended • write a program to meet specified criteria • allows focusing on some aspect of programming • closed-ended with options - charades • Open-ended • some students show great creativity here • some make very skimpy programs • chance to require storyboarding and planning
Demo of Alice Programming • Follow along! • Problem solving and programming in Alice • given a scenario create program to enact the story • A bunny is sitting in a field. Around the bunny broccoli sprouts and grows. The bunny hops over to the closest broccoli plant and eats it.
Beware the Scene Editor • Students can spend A LOT of time in the scene editor setting up and tweaking a world • Is that really programming? Or computer science?Or Computational thinking?
Add Objects • Drag and Drop • Click on picture then click on Add Instance
Objects in The World • Objects in Alice • Have their own frame of reference • forward – backwards • up – down • left – right
Frame of Reference • Clicking on object bring sup its bounding box • Can also see center point • .. and axes
Frame of Reference UP CENTERPOINT RIGHT FORWARD
Camera Controls Alter position of camera with these controls.
Mouse Control Tools Kit Default. Move selectedobject left, right, forward, backwards. Copy objects. Move selectedobject up and down. Resize objects. Tumble objects. Turn object forwards andbackwards. Turn object left and right. CTRL Z or Undo Button to undo mistakes!
Subparts • Objects often have sub parts • may have their own frame of reference • Clicking affect subparts box allows selection and movement of subparts
Subparts • Bigger ear
Alternate Positioning Techniques • Right click on object in world on object tree and select method • Drag and drop method from the details panel.
Quad View • Use world's absolute frame of reference to view relative position of objects
Finding Objects • To reposition in a quad view • select zoom in and out from mouse controls • zoom way out • select scroll from mouse controls to center objects • zoom back in
Setting Up Initial Scene • Add bunny • Add broccoli • local gallery -> kitchen -> food • Make broccoli bigger • Move broccoli below the ground • How to simulate "growing"? • move down exactly 1/2 meter usingdrop down menus or drag and drop
Moving Broccoli Down Option 1 Option 2
Making Broccoli Invisible • In our program we want the broccoli to grow. • We will do this by having it • move up • get bigger • become visible • Need to make the broccoli invisible • Select each broccoli from the object tree and click the properties tab • Change opacityfrom 100% to 0%
Back to Programming View • When setup complete click the green done button to go back to the programming view.
Programming the World From a storyboard to a program.
Recall the Storyboard • A bunny is sitting in a field. Around the bunny broccoli sprouts and grows. The bunny hops over to the closest broccoli plant and eats it. • Let's add some detail at the start of the movie. • The bunny first turns to fast the camera. Then the broccoli start to grow and while it grows the bunny hops up and down.
Methods • Select the world object from the object tree and the methods tab in the details panel. • The world starts with a single method, "my first method" • Like main in a Java or C++ program.
Adding Commands to Methods • If the "my first method" is not displayed in the code editor click the edit button next to the method in the detail panel. • Commands are added by dragging and dropping them into a method. • Select the bunny from the object tree. • Drag the turn to face command into the code editor.
Adding Commands • turn to face is a method • When adding a method to the code editor if any parameters are required a menu pops up to select the arguments. • Select thecamera.
More Parameters • After adding the bunny.turn to face command the "my first method" will look like this: • Click on the "more" option to see what other parameters can be changed • duration, style, asSeenBy • change duration to 3 seconds
Test • Click the play button to see the movie / output of the program. • "my first method" will execute because of the only event in the program at this point.
Adding Behaviors • Next we want the bunny to hop while the broccoli grows. • Methods can be world level or class level. • world level methods belong to the world. • a method should be world level method if it involves two or more objects • class level methods belong to a particular class / object. • a method should be a class level method if it involves only one object
Creating a Hop Method • The bunny does not have a hop method so we will create one. • Select the bunny from the object tree and click on the create new method button in the details panel.
Creating a Hop Method • A window pops up asking for the name of the method • try various names to see what is a legal identifier and what is not • After giving the new method a name a new tab pops up in the code editor • Should hop be one hop or parameterized? • Should parameter be time to hop or number of hops to make? • Any other way to make it more general?
Adding Parameters • Let's add parameters for distance to hop up and the time to do the hop • Click the create new parameterbutton in the code editor.
Adding Parameters • Give the parameter a name and pick the data type • distance -> a Number • time -> a Number • When called the hop method now requires two parameters
Adding Commands to Hop • To hop the bunny will move up and then down. • Drag the move command into hop and fill in the parameters. • Drag another move command into hop and fill in the parameters.
Adding Commands to Hop • To change the duration of moving up select the more option from the move command. • Select duration then expressions then time (or the name of your parameter for time)