Download
1 / 31
340 likes | 569 Views
Space. Space is basically divided into 3 parts: Foreground, Middle Ground and Background

E N D
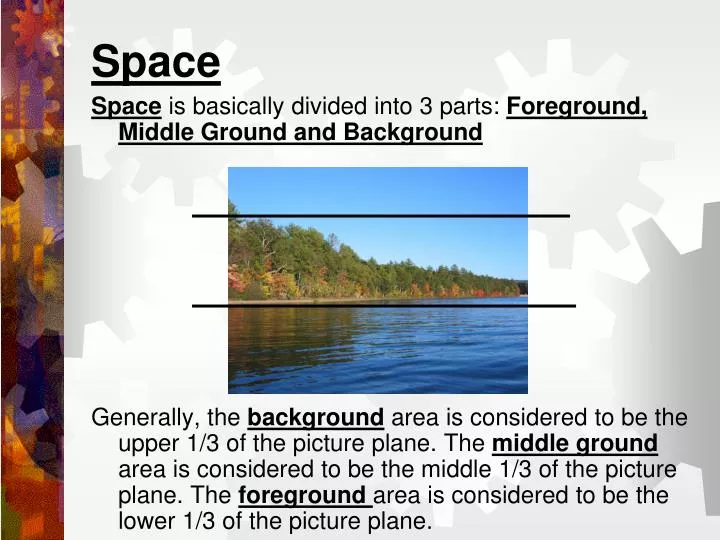
Space Space is basically divided into 3 parts: Foreground, Middle Ground and Background Generally, the background area is considered to be the upper 1/3 of the picture plane. The middle ground area is considered to be the middle 1/3 of the picture plane. The foreground area is considered to be the lower 1/3 of the picture plane.
Space Space can be shallow or deep depending on what the artist wants to use. Shallow space is used when the artist has objects very close to the viewer.
Space Deep Space may show objects up close but objects are shown far away too.
Space Positive and Negative space is a way that an artwork is divided. When planning a work of art, both areas must be examined so that they balance one another. Drawing items running off the page and zooming in on objects are ways to create visual interest within a work.
Space Positive space is the actual object(s) within the artwork Negative Space is the area in and around the objects. It is the “background” and it contributes to the work of art---you can’t have positive space without negative space
Space Perspective is also a way of showing space in a work of art. Perspective is when the artist uses a vanishing point on the horizon and then creates a sense of deep space by showing objects getting progressively smaller as they get closer to the vanishing point.
Space Objects may overlap as well. When objects are overlapped it is obvious that enough space had to be in the picture to contain all the objects that have been included
Linear Perspective During the Middle Ages, European artists painted in a way that emphasized religious images and symbolism rather than realism. Most paintings depicted scenes holy figures and people important in the Christian religion. Even the most talented painters of the Middle Ages paid little attention to making humans and animals look lifelike, creating natural looking landscapes, or creating a sense of depth and space in their paintings.
Linear Perspective • Questions: What parts of these paintings look most realistic to you? • What parts look least lifelike? • Which objects or people seem closest and most distant in each painting? • What clues does the artist give that one object is further away than another?
Linear Perspective During the Renaissance, European artists began to study the model of nature more closely and to paint with the goal of greater realism. They learned to create lifelike people and animals, and they became skilled at creating the illusion of depth and distance on flat walls and canvases by using the techniques of linear perspective.
Exploring Linear Perspective Linear perspective is a mathematical system for creating the illusion of space and distance on a flat surface. The system originated in Florence, Italy in the early 1400s. The artist and architect Brunelleschi demonstrated its principles, but another architect and writer, Leon Battista Alberti was first to write down rules of linear perspective for artists to follow. Leonardo da Vinci probably learned Alberti's system while serving as an apprentice to the artist Verrocchio in Florence.
Exploring Linear Perspective To use linear perspective an artist must first imagine the picture surface as an "open window" through which to see the painted world. Straight lines are then drawn on the canvas to represent the horizon and "visual rays" connecting the viewer's eye to a point in the distance.The horizon line runs across the canvas at the eye level of the viewer. The horizon line is where the sky appears to meet the ground.
Exploring Linear Perspective The vanishing point should be located near the center of the horizon line. The vanishing point is where all parallel lines (orthogonals) that run towards the horizon line appear to come together like train tracks in the distance.Orthogonal lines are "visual rays" helping the viewer's eye to connect points around the edges of the canvas to the vanishing point. An artist uses them to align the edges of walls and paving stones. Orthogonal lines
Draw a room using perspective http://www.youtube.com/watch?v=7ZYBWA-ifEs OPTION 2 http://www.youtube.com/watch?v=Xv1LFjApbKk&NR=1
Two point perspective • Two-point perspective is used when you look at or into the corner of an object. There are two vanishing points since the two sets of sides are receding in two different directions.
Step 1 • Determine the horizon in your drawing. Sketch a horizontal line for the horizon as in the first method.
Step 2 • Determine the point of view, which is the approximate location of the eye of the person viewing the drawing. This point may be located below the bottom of the paper (outside the paper.) You don't need to actually mark the point.
Step 3 • Determine your first vanishing point. The usual method for this is to sketch a first line from the point of view in a 60 degree angle to the left and mark your vanishing point where this line intersects the horizon.
Step 4 • Determine your second vanishing point. For this you will draw a second line from the point of view in a 30 degree angle to the right. Again, the vanishing point will be the intersection of this line and the horizon. The 60 and 30 degree angles can be different, but the angle between the lines that go from the eye of the observer to the vanishing points have to form a 90 degree angle.
Step 5 • Sketch your main objects drawing the vertical lines perfectly vertical, the horizontal lines moving to the left at an angle towards the left vanishing point and the horizontal lines moving to the right at an angle towards the right vanishing point (all the horizontal lines should converge in one or the other of the vanishing points if extended far enough).
Three point perspective • Notice that the three point perspective includes the two point perspective or perspective with two vanishing points plus it also has a third perspective point or third vanishing point in the vertical perspective aspect as from near the ground for instance looking up at a tower -- as the viewer is facing a vertical corner (edge) of the object.
Multiple point perspective Consider that the third point can be any fourth, fifth,... view for an angular, tilted or rotated part of a drawing, but it is usually based on parallel lines in each part and relates those parts that are actually parallel to each other.