Download
1 / 25
250 likes | 393 Views
Lesson 15 Working with Tables. Computer Literacy BASICS: A Comprehensive Guide to IC 3 , 4 th Edition. Morrison / Wells. Objectives. Create a table and insert text. Insert and delete rows and columns. Adjust column width and row height.

E N D
Lesson 15Working with Tables Computer Literacy BASICS: A Comprehensive Guide to IC3, 4th Edition Morrison / Wells
Objectives • Create a table and insert text. • Insert and delete rows and columns. • Adjust column width and row height. • Use the Draw Table and Eraser tools to create and edit a table grid. • Format text alignment and direction within a table cell. 2 2
Objectives (continued) • Format borders and shading and apply table styles. • Sort data in a table. • Convert text to a table and vice versa. 3 3
ascending order cell descending order gridlines header row merging cells Quick Tables splitting cells Vocabulary 4 4
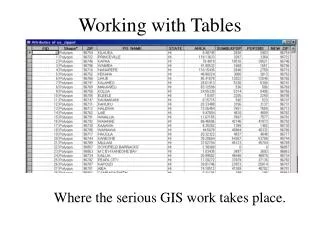
Creating a Table • A table consists of cells that you add content to. • A cell represents one intersection of a row and a column in a table. • Rows go across and columns go down. • The first row in a table or data source with the column headings is referred to as the header row. 5 5
Creating a Table (continued) • To create a table, you must first decide how many columns and rows you want in the table. You can then create a table grid and enter the data. 6 6
Creating a Table (continued) • To move the insertion point from one cell to another, you can press Tab or the arrow keys. • When you reach the end of a row and press Tab, the insertion point moves to the first cell in the next row. 7 7
Modifying the Table Structure • Inserting Rows and Columns • To insert a new row at the end of the table, you can position the insertion point in the last table cell and press Tab. • To insert a new row anywhere else in the table, or to insert new columns, you can use the Insert commands on the Table Tools Layout tab. 8 8
Modifying the Table Structure (continued) • Deleting Rows and Columns • When you select cells and use Delete to remove content, only the cell contents are removed. • To remove rows or columns, you must use the Delete commands on the Table Tools Layout tab or in a shortcut menu. • When you delete a row or column, the text in the cells is also deleted. 9 9
Modifying the Table Structure (continued) • Adjusting Column Width and Row Height • You can choose to automatically adjust the width of one or more columns to accommodate the contents within the cells, or you can automatically resize the table to fit in the document window. • When text wraps to a second line within a cell, the height of all the cells in that row is automatically increased. 10 10
Modifying the Table Structure (continued) • Merging and Splitting Table Cells • When you remove the boundary between two cells, it is called merging cells. • When you convert a cell into multiple cells, it is called splitting cells. 11 11
Drawing a Table • The Draw Table tool enables you to use the mouse to draw the table grid on the screen, the same way you would use a pen to draw the grid on a sheet of paper. 12 12
Drawing a Table (continued) • Formatting Tables • You can make a table easier to read by enhancing its appearance. • Aligning numbers within a cell can make the data easier to read. • Changing border colors and adding shading can help the reader quickly identify different types of data. 13 13
Drawing a Table (continued) • Aligning Data Within Table Cells • The Alignment group in the Table Tools Layout tab provides several commands to align text within cells. • You can align text at the top, center, or bottom of a cell, as well as to the left or right. • You can change the direction of text: top to bottom, bottom to top, and horizontal. 14 14
Drawing a Table (continued) • Formatting Borders and Shading • Boundary lines in a table are called gridlines. • Gridlines are displayed on the screen, but they do not print. 15 15
Drawing a Table (continued) • Applying Table Styles • Word provides several table designs that enable you to apply multiple table formats with a single click. 16 16
Drawing a Table (continued) • Using Quick Tables • Quick Tables include a table grid with sample data and table formats. • To save time creating a table, you insert a Quick Table in a document and then you replace the sample data with your own data. 17 17
Drawing a Table (continued) • Using Quick Tables (continued) • Editing text in the cells of a table is similar to entering text in a document. • When you show nonprinting characters, you can see that every row ends with a marker. 18 18
Drawing a Table (continued) • Aligning and Resizing Tables on the Document Page • To align a table horizontally, you must select the table, then you can format the alignment the same way you align text paragraphs. • The table move handle can be used to reposition the table on the page or to select the entire table. • The resize handle sometimes appears in the lower-right corner of a table. Drag this marker to resize the table. 19 19
Sorting Data in a Table • Ascending order arranges data in alphabetical order from A to Z, or in numerical order from lowest to highest. • Descending order rearranges data in alphabetical order from Z to A, or numbers from highest to lowest. 20 20
Converting Text to a Table and a Table to Text • Word can quickly convert text separated by paragraph markers, commas, tabs, or other characters into a table with cells. 21 21
Converting Text to a Table and a Table to Text (continued) • Word also converts a table to text. 22 22
Summary In this lesson, you learned: • The table feature in Word enables you to organize and arrange text and numbers easily. • To change the layout of information after you create a table, you can insert and delete rows and columns. • The AutoFit feature automatically adjusts the width of a column based on the contents of the cells in a column. 23 23
Summary (continued) • The Draw Table tool and the Eraser tool are especially useful when you need to create a complex table. • You can format text alignment in table cells the same way you apply those formats in other Word documents. • Borders and shading greatly enhance the appearance of a table and often make the table easier to read. Word provides several built-in styles to make it fast and easy to apply borders and shading to a table. 24 24
Summary (continued) • Word provides Quick Tables that are already formatted and contain sample data, so you can quickly create a table. • You can copy, cut, paste, and move contents within a table. • You can use the Sort feature to reorganize the table contents to emphasize data in different ways. • Word can convert text to a table or vice versa. 25 25