Download
1 / 22
2.61k likes | 4.7k Views
Introduction to Publisher. Flyers. Opening Microsoft Office Publisher. Click on the start Menu. Move your cursor over “All Programs”. Select “Microsoft Office” from the panel to the right. select “Microsoft Office Publisher” from the panel to the right. . Getting Started.

E N D
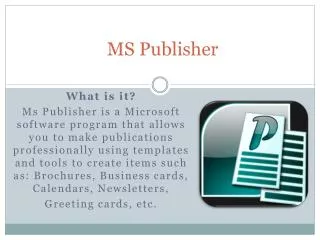
Introduction to Publisher Flyers
Opening Microsoft Office Publisher • Click on the start Menu. • Move your cursor over “All Programs”. • Select “Microsoft Office” from the panel to the right. • select “Microsoft Office Publisher” from the panel to the right.
Getting Started • “Getting Started” • “Flyers”. • Either through • Home Screen or • “Publication types”
Flyers • Standard Letter size. • “8.5 x 11” Makes sure to keep Portrait (Tall) and Landscape (wide) In mind when creating your Flyer.
Adding Text • Click on “Insert” • From the drop down menu , click on “Text box”
Adding Text • click and hold your mouse to drag. • Make a large box on your screen. • You may begin typing in this box.
Adding Text • You can alter text • Fonts • Size • Bold • Italic • underline
Adding Text • further edit your text • Box • Background • Highlight • Font Color
Adding Images • Insert • Picture • Clip Art or • From File
Adding Images • Side Window • Search Bar • Type in object or event • * You may also search for more images using the Clip art on Microsoft office online.
Adding Images • “From File” a box will pop up. • Typing in the filename/searching for image • * It is easier to have your image saved on the desktop and click on the “desktop” icon on to the left of the drop down menu.
Adding Images • Picture Tool Bar • * If you can’t find your tool bar: just click on your image.
Adding Borders • Insert • “Design Gallery Object”
Adding Borders Side menu • Borders • Select one of the defaults
Adding Borders Side menu • Borders • Select one of the defaults • Sizing • Moving
Adding Borders Changing color schemes • Format • Color scheme • Left hand side and select • Creating a color scheme
Project You will be creating a flyer promoting an event. You will be promoting a book sale that will take place at Central Make sure to include • Title • Date • Time • Address • any other important information • Graphics
Microsoft Office online • How to get to it • Insert-Clip art • What to search for • How to save/add image
Microsoft Office online • How to get to it • Insert-Clip art • Clip art on Office Online • What to search for • How to save/add image
Microsoft Office online • How to get to it • Insert-Clip art • Clip art on Office Online • What to search for • Search Bar • Broad search topic • How to save/add image
Microsoft Office online • How to get to it • Insert-Clip art • Clip art on Office Online • What to search for • Search Bar • Broad search topic • How to save/add image
Microsoft Office online • How to get to it • Insert-Clip art • Clip art on Office Online • What to search for • Search Bar • Broad search topic • How to save/add image • Select an image • Right Click • Copy/Paste • Save Image as “__” - Desktop