Download
1 / 49
500 likes | 725 Views
Making your PowerPoint presentation shine. Making your PowerPoint presentation shine. Things to Consider: Font : style, size , colour, contrast or contrast Content : notes, headings, bulleted list Design Use of images. Making your PowerPoint presentation shine.

E N D
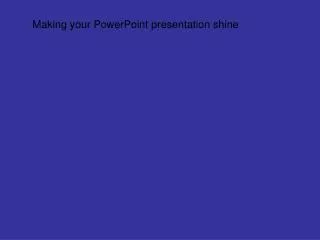
Making your PowerPoint presentation shine Things to Consider: Font : style, size, colour, contrast or contrast Content : notes, headings, bulleted list Design Use of images
Making your PowerPoint presentation shine Font : style, size, colour,contrast or contrast Content : notes, headings, bulleted list Design Use of images Wait!! The background? The purple is a nice colour but there’s not much contrast between the background colour and the text colour. It’s hard to read, doesn’t grab your attention.
Making your PowerPoint presentation shine Font : style, size, colour,contrast or contrast Content : notes, headings, bulleted list Design Use of images OK, with a right click on the slide and click Slide Background, you can change the colour and fill effects so that the text stands out a bit more. What about the list? The title? The design? The size of the text? Work needs to be done.
A shadow has been added to this text box. To do this, select a text box and in the Picture Toolbar, click the Shadow icon and try different shadow effects. The colour, transparency and border have been changed in this text box. To make these changes, click the Picture Toolbar and Format AutoShape.
Bomb : an explosive device fused to detonate under specified condition Detonate : to explode with sudden violence Weapon : something (as a club, knife, or gun) used to injure, defeat, or destroy Shell : a metal or paper case which holds the charge of powder and shot or bullet used with breech-loading small arms Explode : to burst violently as a result of pressure from within Missile : an object (as a weapon) thrown or projected usually so as to strike something at a distance Let’s now redesign a list of terms which could be used in a presentation -
Bomb : an explosive device fused to detonate under specified condition Detonate : to explode with sudden violence Weapon : something (as a club, knife, or gun) used to injure, defeat, or destroy Shell : a metal or paper case which holds the charge of powder and shot or bullet used with breech-loading small arms Explode : to burst violently as a result of pressure from within Missile : an object (as a weapon) thrown or projected usually so as to strike something at a distance
There’s a lot of reading here. You risk losing the attention of the audience. Bomb : an explosive device fused to detonate under specified condition Detonate : to explode with sudden violence Weapon : something (as a club, knife, or gun) used to injure, defeat, or destroy Shell : a metal or paper case which holds the charge of powder and shot or bullet used with breech-loading small arms Explode : to burst violently as a result of pressure from within Missile : an object (as a weapon) thrown or projected usually so as to strike something at a distance
Keep it simple - perhaps in this case we could just use the headings we are planning to talk about. Bomb Detonate Weapon Shell Explode Missile
We could change the size of the text so that the words grab the audience. Bomb Detonate Weapons Shell Explode Missile
We could add bullets or numbers. This arrow was found in Zapf Dingbats. Bomb • Detonate Weapons Shell Explode Missile
We could lessen the amount of information to read by just including one definition at a time. Bomb Detonate Weapon Shell Explode Missile an explosive device fused to detonate under specified condition
We could lessen the amount of information to read by just including one definition at a time. Bomb Detonate Weapon Shell Explode Missile to explode with sudden violence
We could lessen the amount of information to read by just including one definition at a time. Bomb Detonate Weapon Shell Explode Missile something (as a club, knife, or gun) used to injure, defeat, or destroy
We could add a definition to each slide in turn - a new slide for each as the terms are being discussed - Bomb Detonate Weapon Shell Explode Missile an explosive device fused to detonate under specified condition to explode with sudden violence something (as a club, knife, or gun) used to injure, defeat, or destroy
The audience then has time to write down information about a previous one, and knows exactly where the discussion is up to. Bomb Detonate Weapon Shell Explode Missile an explosive device fused to detonate under specified condition to explode with sudden violence something (as a club, knife, or gun) used to injure, defeat, or destroy a metal or paper case which holds the charge of powder and shot or bullet.
Think of designs other than lists, too. E.g. Add an Explosion with the words around the edge. To do this, click on AutoShapes in the Drawing Toolbar. Click Stars and Banners, then Explosion 1.
On the slide, click and drag the explosion, to the size you want, and the position you want it to be in. Double click the explosion to change its fill colour and line.
Right click the slide background and click Slide background to change its effects. Add text -
bomb mortar shell weapons explode detonate
This style has a pattern found in the Fill Effects in the Slide Background choice. The text is the most important part but doesn’t seem to stand out enough. bomb mortar shell weapons TNT explode detonate
This Explosion has a quieter fill and stronger outline. The text isn’t quite so lost. The background could be improved - bomb mortar shell weapons explode detonate
bomb mortar shell weapons explode detonate
This background was found in Slide Background, Fill Effects, Diagonal Down and 2 colours. Still the text could be more dominant - bomb mortar shell weapons explode detonate
bomb mortar shell weapons explode detonate
bomb mortar shell weapons explode detonate
Depending on the audience, a couple of slides to introduce this could be added, too - bomb mortar shell weapons explode detonate
bomb mortar shell weapons explode detonate
Using Clip Art: Insert / Picture / Clip Art Choose an image from the clip art files and click Insert. Select the image and move it to where you would like it to be placed. Change its size by moving the corner handles.
Using Clip Art: Insert / Picture / Clip Art Use the crop tool in the Picture Toolbar to keep what is important only - what looks best.
Using Clip Art: Insert / Picture / Clip Art Try experimenting with different tools in the Picture Toolbar. Black & White in the Image Control has been used to change the image here.
Using the Picture Toolbar: What to do if some text is hidden.
Using the Picture Toolbar: To send an image to the back: click the object with your right mouse button, then click Arrange and Send to back.
Using the Picture Toolbar: Change the contrast and brightness of an image.
Using the Picture Toolbar: This can be useful as a background running through your slides.
Using the Picture Toolbar: Then try changing the effects by clicking Picture/Effects/Chalk Charcoal
Using the Picture Toolbar: Try some of the other effects, this one uses Fresco.It has been cropped a bit more, too.
For this text box, a white fill has been added which is partly transparent. You can see some of the image through it.
Tables are next This one was made using Insert Table, 1 row, 4 columns.
Change the lines and fill:Click Format AutoShape to add the Fill Effects in Colours and Lines. Select the table and right click its border to set white and purple lines.We’ll go through the steps more slowly.
Inserting a table:Click Insert / Table. Choose 4 columns and 1 row. Select the table and drag it to the position you want it in.Click a corner handle to change its size.
Adding text:Put the cursor in the first cell and type in the text you want.Use the Formatting Toolbar to change its font, size, style, colour, left/centre/right adjustment and increase or decrease space between paragraphs.In the Picture Toolbar click Format Table and Text Box. Change the text alignment to the Top, Middle or Bottom and add space to the cell margins.
Adding the background:Select the table. In the Table Toolbar, click the Fill Colour down arrow and Fill Effects. Choose Horizontal, the 1st variant, 2 colours: white and purple, 0% and 70%, say.
Adding lines:Select the table, click Format Table and open Borders.Click the left and right border lines to delete them.Choose purple and a line size of 1 point. Click the top and bottom table lines.Change the colour to white and the width to 3 points. Click the icon with the vertical line in the centre of the table.
Do you want to go further? There are lots of good tutorials on the web. One excellent one is at: http://www.awesomebackgrounds.com/powerpointtutorials.htm
What do you think of black text on a purple background? Ah! We’re back where we started. Ah! We’re back where we started.