Paint Program Assignment Help Session Overview
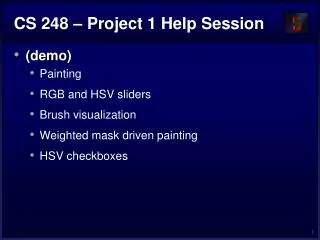
Learn how to create a paint program implementing 2D raster graphics concepts. Step-by-step instructions for brush visualization, overpainting, tinting, and compositing techniques. Get started, follow the guidelines, and unleash your creativity.

Paint Program Assignment Help Session Overview
E N D
Presentation Transcript
CS 248 Assignment 1Paint Program Introduction to Computer Graphics Help Session presented by Georg Petschnigg Stanford University October 4, 2002
Session Overview • Getting Started • Assignment Discussion • Overpainting Brush • Tinting Brush • Brush Visualization • Grading Details • Extra Credit • Questions
Getting Started • Read assignment carefully • Go to review session • Familiarize yourself with Sweet Hall LabLocated in the Basement of Sweet Hall
Development Environment • Ways to work with TA Support • Go to Sweet Hall Lab (Best Way – 5 Minutes) • Work Remotely (Good Way – 5 Minutes) • Ways to work without TA support • Reproduce Sweet Hall Lab development environment on you own Machine (1 Hour) • Your code still has to work on the Sweet Hall machines (more risk for you)
Sweet Hall • Pick a free computer, Log on • Copy assignment from usr/class/cs248/assignments/assignment1/to local directory • Run ‘make’ • Run ‘./paint.i386-linux’
Working Remotely • ssh to firebird, raptor or leland • Export the display • Follow instructions on previous slide >ssh raptor1.stanford.edu>setenv DISPLAY yourIP:0.0>xterm & Demo: Using Sampson, PC-Leland, X-Win32, AFS Service on WindowsXP, make an run assignment..
Assignment Discussion • You are going to write a paint program • Teaches you 2D Raster Graphics • Visualize concepts learned in Class (Brushes, HSV) • This assignment is a lot of fun • Be creative with extra credit • The next slides follow the Assignment (Handout #3) step by step • Reminder: Read the assignment
Part 1: Over Painting Brush • Rectangular Overpainting Brush • Like Microsoft Paint or “Pencil Tool” in PhotoShop • Color Picker for RGB, HSV • See http://www.ewertb.com/java/Java_ColorPicker.htmlor any commercial Paint Program • Value (1.0 bright, 0.0 black) • Saturation (1.0 strong hue, 0.0 faded hue) • Size Control for BrushDemo: Painting, Picking Colors in PhotoShop
Part 1: Basic Painting Loop Brush region Brush region
Part 1: Over Painting Brush • Once you are done with Part 1 you should be able to draw some basic images • Notice the hard edges and jaggies around the stroke… this is what Part 2 will fixDemo: Show Jaggies using Snoop
Part 2: Tinting Brush • Implement Weighted Mask Driven Brush as described in Handout #4 • Instead of a rectangular brush, have it gently “blend” to its surroundings. Use HSV interpolation • Checkboxes for interpolating along H,S,V axis • Allow all permutations HSV, HS, HV, SV, H, S, V • Choose a mask function an give use control over it • Make sure it gradually falls of to zero at the edge!
Compositing equation Cnew = (1-) Cold + Cpaint Part 2: Weighted Blending Like painting with partially transparent paint. Commonly referred to as “alpha” blending.
Part 2: Mask driven painting Lookup array determines how each pixel in the brush is affected. Paint every pixel in the brush region Paint only some of the pixels
Part 2: Weighted mask driven painting Mask contains alpha/weight for each pixel in brush
Part 2: RGB vs. HSV interpolation RGBinterpolation NewR = (1-) CanvasR + PaintR NewG = (1-) CanvasG + PaintG NewB = (1-) CanvasB + PaintB HSV interpolation NewH = (1-) CanvasH + PaintH NewS = (1-) CanvasS + PaintS NewV = (1-) CanvasV + PaintV
Hue Saturation Part 2: RGB vs. HSV interpolation
Hue Saturation Part 2: RGB vs. HSV interpolation HSV RGB
Part 2: Math Example • Interpolating half way between Red and Cyan ( = 0.5) • NewColor = 0.5 Cyan + 0.5 Red 50% Gray Greenish
Part 2: HSV Checkboxes • Choose which HSV components to affect. • Allow for any combination.if (H_check) { NewH = (1-) CH + PaintH }if (S_check) { NewS = (1-) CS + PaintS }if (V_check) { NewV = (1-) CV + PaintV }
Part 2: Sample Images Overpainting #1 vs. Weighted Mask driven painting #2 Image showing H, S, and V Tinting
Part 3: Brush Visualization • Brush Visualization should tell user what its color, falloff and size is • Brush should always be visible regardless of color • Draw 1x (actual size) and 4x (four times larger in x and y) versions of the brush • Make the larger version discretized – that is it should be a choppy/chunky/pixel replicated version of the actual brush (think xmag, snoop) • Make sure this visualization will help you explain to user, TAs, Professor and yourself how the brush weights affect drawing
Requirements • Correctness (40%) • Don’t crash • Implement all required features • (Read the directions like a lawyer) • Efficiency (20 %) • No noticeable lag while using your application • User Interface (20%) • Programming Style (20%) • Copying code (Don’t do it) • Submitting with ‘/usr/class/cs248/bin/submit’
Paint Program 1973 Source: Dick Shoup “SuperPaint: An Early Frame Buffer Graphics System” IEEE Annals of the History of Computing, Vol 23, No 2, Apr-Jun 2001
Extra credit example Blurring the image under the brush.
Extra credit inspiration • Demo of Painter’s fancy brushes • Download Trial from www.procreate.com
Questions? • Ask now • Come to Office Hours • Email: cs248-tas@graphics.stanford.edu • Remember: Computer Graphics is fun - if you are not having fun ask TAs for help