Download
1 / 27
270 likes | 1.41k Views
Regal resonator guitar Modifications performed by Mitch Nelson, Chicago, IL Mitch is a player/luthier/repairman and available for mod-jobs Contact: mitchll_nelson@yahoo.com. Regal – before modifications Saddle is critical to transferring string vibration/energy to cone!

E N D
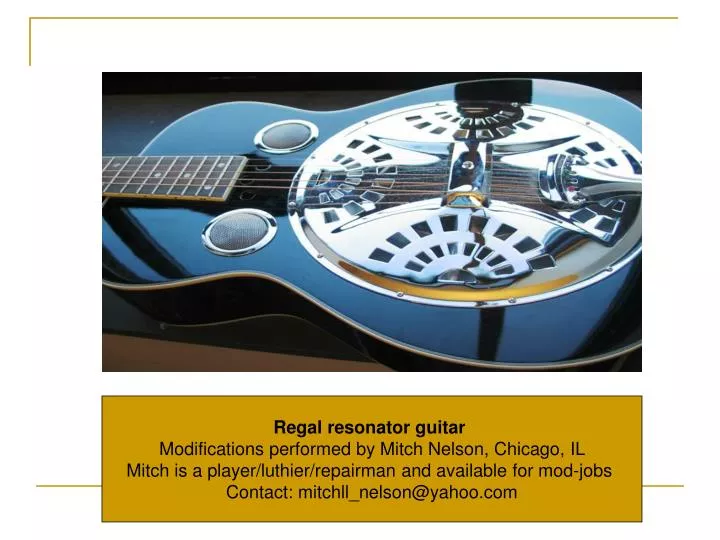
Regal resonator guitar Modifications performed by Mitch Nelson, Chicago, IL Mitch is a player/luthier/repairman and available for mod-jobs Contact: mitchll_nelson@yahoo.com
Regal – before modifications Saddle is critical to transferring string vibration/energy to cone! Note the relatively low height of the maple saddle which results in less than ideal string tension and does not maximize the load on the cone. Saddles with an ebony or synthetic cap (e.g. ebonex) are harder and more consistent than the maple saddle used here and improve transfer of string vibration to the cone resulting in better sound.
Regal before modifications: notice relatively low action at nut; s/b 3/8” or 7/16” from underside of strings. Low action makes it difficult or impossible to use dobro capo!
Upgrade components Quarterman cone, ebony capped saddle, bone nut Remember – it’s not all about the parts! Attention to detail is critical. Assuming a professional set up costs around $225, it’s around $75 for parts and $150 for knowing how to put them together!
Regal before modifications – think of the cone as a speaker which operates most efficiently when it receives maximum energy via string vibrations. Both the height and composition of the saddle play a critical role in “loading” the cone.
Regal before modifications Notice that the soundwell (made of plywood) on this guitar was delaminating
Regal before modifications – relatively low height of nut results in less-than-ideal playability and responsiveness; action best described as “mushy”
Sanding down new nut for a snug fit into guitar. Note – the sanding process is not the most pleasant experience. Sanding down a bone nut creates a strong odor which is unmistakable! It’s a time consuming process to get just the right fit for a bone nut!
New bone nut is snug fit and 3/8” high, which reduces the “mush” factor! The next step in the process is cutting string slots. Cutting a good string slot is not as easy as it might seem! Attention to detail is absolutely critical; requires “know how” and the right set of tools
before/after - ebony capped saddle (on right). Ebony is harder/more consistent wood than the original maple saddle. Improved height dramatically increases angle/tension of strings going to the bridge which effectively “loads” the cone
Final assembly – it is absolutely critical that the edges of the cone be in a relaxed state, and sit on the internal ledge of the guitar without being too snug – and that each of the spider legs lay perfectly flat on the cone. The edges of this guitar had to be routed in order to fit the Quarterman cone!
Regal – post mod-job Results are vastly improved playability and responsiveness, as well as significant improvements in volume & tone, especially clarity and definition of notes