Download
1 / 1
10 likes | 20 Views
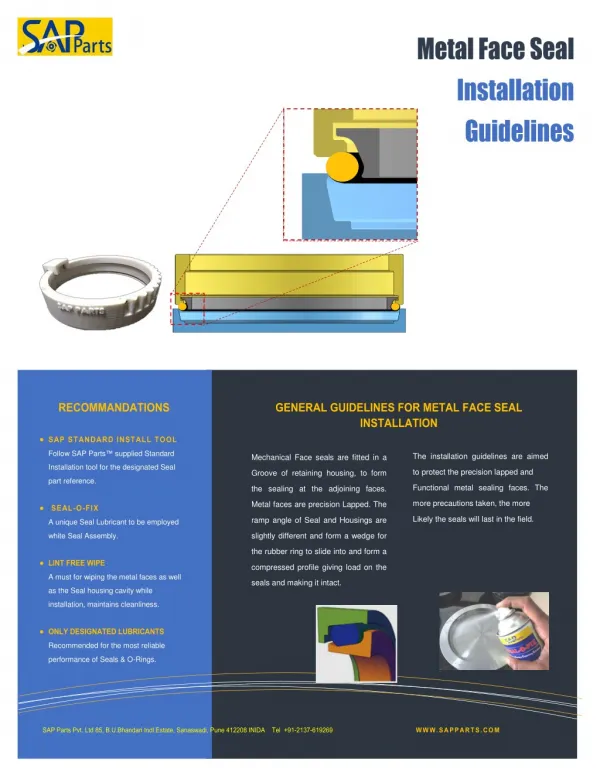
Cal Am Wedge Seals provides a quick and easy-to-use system to protect and organize ducts and cables for fiber optic, telecommunications and electrical applications. Download this PDF to read about installation instructions of simplex wedge seal.

E N D
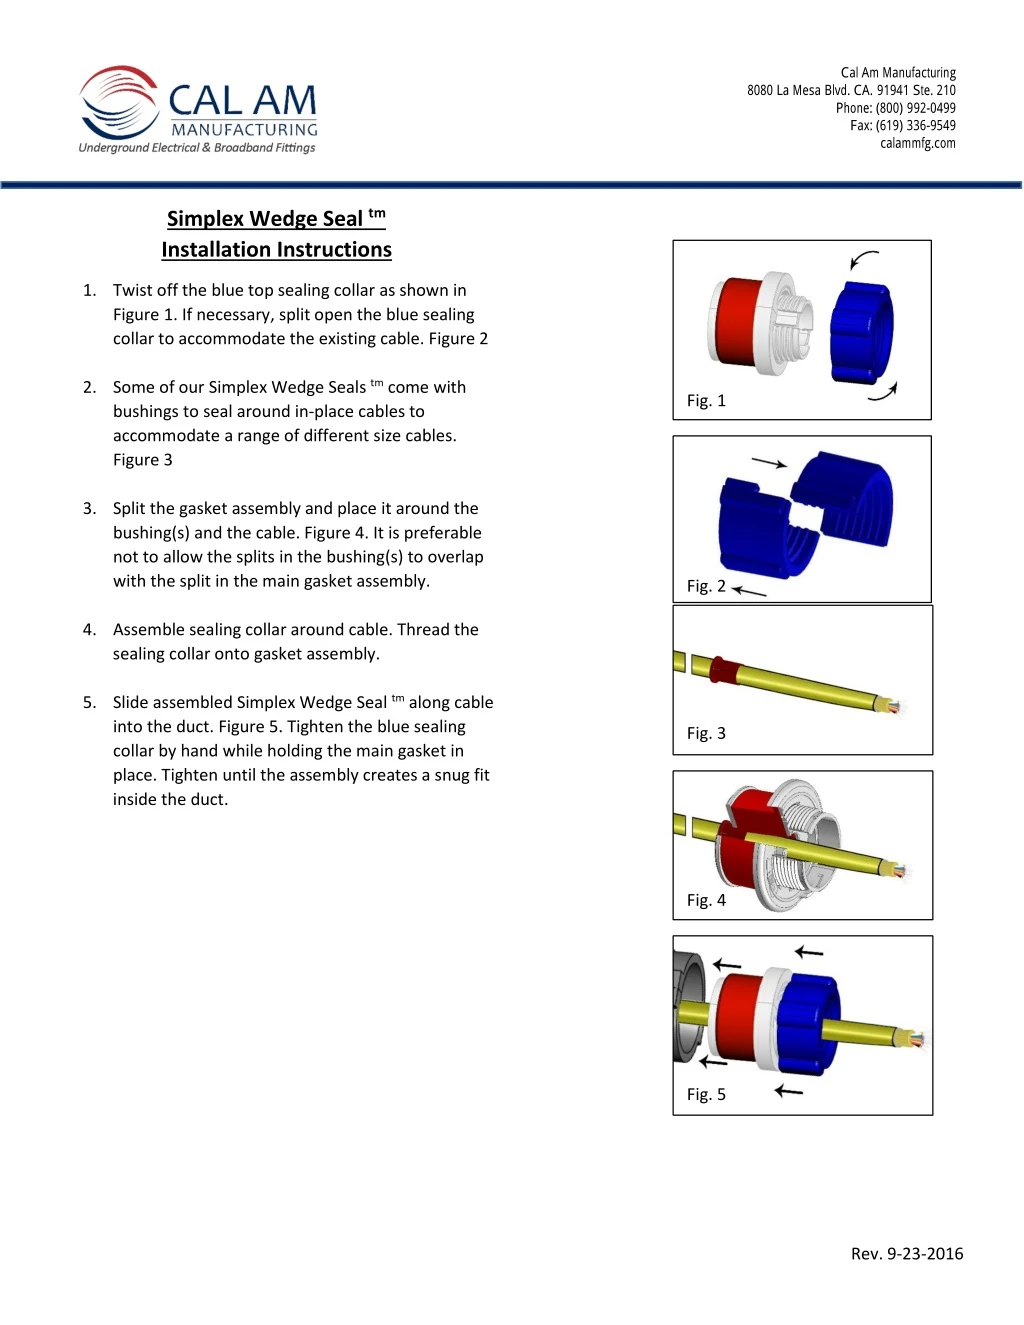
Cal Am Manufacturing 8080 La Mesa Blvd. CA. 91941 Ste. 210 Phone: (800) 992-0499 Fax: (619) 336-9549 calam m fg.com Simplex Wedge Seal tm Installation Instructions 1.Twist off the blue top sealing collar as shown in Figure 1. If necessary, split open the blue sealing collar to accommodate the existing cable. Figure 2 2.Some of our Simplex Wedge Seals tm come with bushings to seal around in-place cables to accommodate a range of different size cables. Figure 3 3.Split the gasket assembly and place it around the bushing(s) and the cable. Figure 4. It is preferable not to allow the splits in the bushing(s) to overlap with the split in the main gasket assembly. 4.Assemble sealing collar around cable. Thread the sealing collar onto gasket assembly. 5.Slide assembled Simplex Wedge Seal tm along cable into the duct. Figure 5. Tighten the blue sealing collar by hand while holding the main gasket in place. Tighten until the assembly creates a snug fit inside the duct. Fig. 1 Fig. 2 Fig. 3 Fig. 4 Fig. 5 Rev. 9-23-2016