Download
1 / 9
90 likes | 202 Views
Installing and configuring Tomcat. IMPORTANT NOTE

E N D
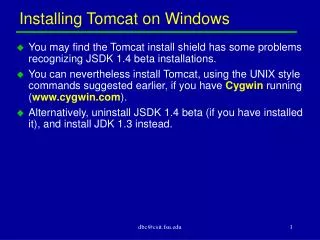
Installing and configuring Tomcat IMPORTANT NOTE • As of this writing the default project you will download, import and use in this class is not enabled for Tomcat. If you truly need to use Tomcat for this course – please contact your IBM representative, and they will see if there is a Tomcat-specific project you can obtain. • That said – in general, you may wish to install and configure Tomcat as your application server, in order to run (test) your development work using RBDe. You actually have your choice of a number of application servers to run with, including: WebSphere Application Server, Tomcat, BEA’s WebLogic, etc. • Someone may already have installed and configured the Tomcat application server for you. If this is the case, or if you’re going to use WebSphere Application Server (WAS) you should skip ahead to the next step in this process. If not, we recommend you use Tomcat. Please follow the steps below to install and configure. • In a Web browser, go to the Apache Tomcat Web page: http://tomcat.apache.org. • Click the Download link for Tomcat 5.x. • On the download page, find the most recent version of Tomcat with a version number like 5.5.x, such as 5.5.23. Several downloads are available for each version. Do not use versions marked as ″alpha″ or ″beta.″ • Under the 5.5.x version of Tomcat, look under Binary Distributions and then under Core. • Download the Core version of Tomcat 5.5.x for your operating system. For Windows, select the ZIP file. For Linux, select the TAR.GZ file.
Installing and configuring Tomcat • Unzip the file you downloaded and place the server files in an appropriate location on your computer. It isn’t important where you put the server files as long as you can find them again later. • You must now give Tomcat the proper driver file for the database. Find a file named derby.jar located at: • <Product_Install_Directory>\SDP70\runtimes\base_v61\derby\lib\ • Copy/paste this derby.jar file to • <Tomcat_Install_Directory>\common\lib
Installing and configuring Tomcat • In the workbench, click Window → Preferences. The Preferences window opens. • At the left side of the Preferences window, expand Server. • Under Server, click Installed Runtimes. The right side of the Preferences window now shows a list of all of the server runtimes installed in the workbench. • Click Add. The New Server Runtime window opens. • In the New Server Runtime window, expand Apache. • Under Apache, click Tomcat v5.5. 13. Click Next. 14. Under Tomcat installation directory, click Browse. • Locate the folder that contains the Tomcat installation files and then click OK. • Click Finish. Tomcat is added to the list of installed runtimes. The Preferences window looks like this • Click OK.
Import the Tutorial Project • From the RBDe Workbench • Open the File menu, and select Import… • Expand the Other folder (at the bottom of the list) and select: Project Interchange • Click Next – this opens the Import Project window • From Import Project • Click the top Browse… button, next to From zip file, and browse to, and select v7Project_Tomcat.zip • The file you down-loaded in a previous step • Selecting the zip file will open its contents in the window, and two resource folders will appear • Click Select All • Click Finish • This will import the Project into your Workspace
Configure Preferences – 1 of 2 • You will need to configure your preferences, in order to complete the labs in this course. • From the RBDe Workbench menu • Pull down the Window menu, and select Preferences… • Expand the EGL folder and from within the EGL folder… • Click Generation • Check Handler • Click APPLY • Do not leave Preferences yet
Configure Preferences – 2 of 2 • Still from within the Preferences Window • Click Validation • Click Disable All • Click OK
Clean the Tutorial Project and Run an Installation Verification Page • From the RBDe Workbench • Open the Project menu, select Clean… • At the Clean window, press OK • To run the installation verification page (from the Project Explorer): • Expand the EGLWeb folder • Expand the WebContent folder • Right-click over allcustomers.jsp • Select Run As • Run on Server… • You will be prompted to choose a Server • (see the next slide)
Installing and configuring Tomcat • When prompted to Define a New Server • Manually define a new server • Expand the Apache folder • Select “Tomcat v5.5 Server with EGL debugging support • Set server as project default (do not ask again) • Click Finish!
Your First Page • You should see something that looks like this!