Download
1 / 85
930 likes | 1.11k Views
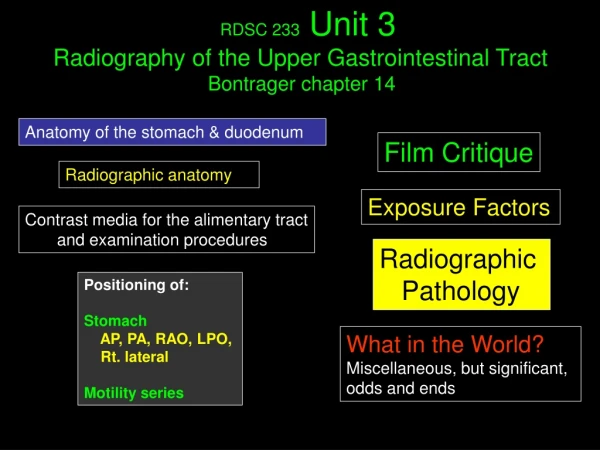
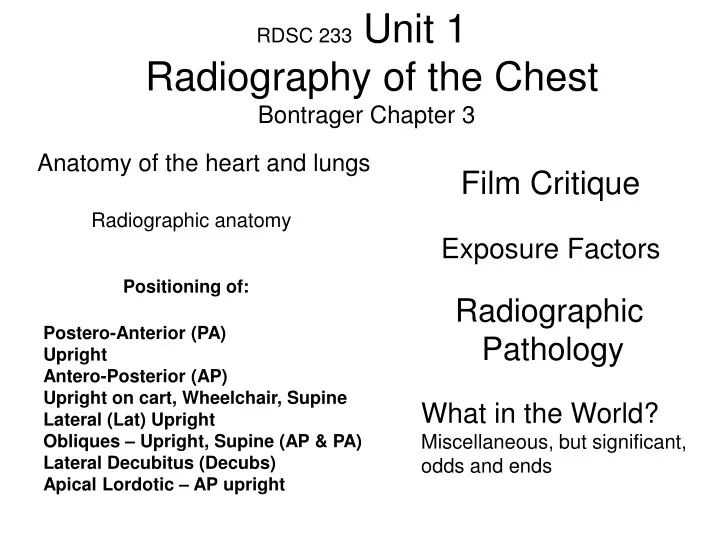
RDSC 233 Unit 1 Radiography of the Chest Bontrager Chapter 3. Anatomy of the heart and lungs. Film Critique. Radiographic anatomy. Exposure Factors. Positioning of: Postero-Anterior (PA) Upright Antero-Posterior (AP) Upright on cart, Wheelchair, Supine

E N D
RDSC 233 Unit 1 Radiography of the Chest Bontrager Chapter 3 Anatomy of the heart and lungs Film Critique Radiographic anatomy Exposure Factors Positioning of: Postero-Anterior (PA) Upright Antero-Posterior (AP) Upright on cart, Wheelchair, Supine Lateral (Lat) Upright Obliques – Upright, Supine (AP & PA) Lateral Decubitus (Decubs) Apical Lordotic – AP upright Radiographic Pathology What in the World? Miscellaneous, but significant, odds and ends
Atlas of Human Anatomy Third edition (194) Need to know Parietal and visceral pleura Diaphragmatic pleura Costal pleura Mediastinal pleura Clavicles & sternoclavicular joints Manubrium of the sternum
Atlas of Human Anatomy Third edition (198) Need to know Trachea Rt & Lt main (stem) bronchi Carina Lobar and segmental bronchi Mucosa Bronchogram/ bronchography Oil based contrast introduced through NG tube. For investigation of tumors, cysts, hemoptysis, bronchiectasis, obstruction Replaced by CT and bronchoscopy
Need to know Atlas of Human Anatomy Third edition (195-197) Rt lobes: superior, middle, inferior Lt lobes: superior, inferior Segments (10 each) named by position Fissures Hilum: main/lobar bronchi, pulmonary arteries, pulmonary veins
Need to know Atlas of Human Anatomy Third edition (200-201) Elastic fibers & smooth muscles Terminal & respiratory bronchioles Alveolar sacs & alveoli Pulmonary veins & arteries Capillary bed (arterioles & venules) Visceral pleura
Atlas of Human Anatomy Third edition (208 - 202 without heart) Need to know Mediastinum: heart & great vessels Superior vena cava (to Rt atrium) Ascending, descending, & arch of aorta (from Lt ventricle) Pulmonary trunk (from Rt ventricle) Rt and Lt hemidiaphragm (domes of)
Atlas of Human Anatomy Second edition (194) Need to know same as previous, and Mediastinum: heart & great vessels Superior & inferior vena cava: Rt atrium Ascending, descending, & arch of aorta: Lt ventricle Pulmonary trunk: Rt ventricle) Pulmonary veins: Lt atrium LPO position Pulmonary arteriogram 3D, CT reconstruction of lungs and bronchial tree, with heart and great vessels extracted How did the catheter get here?
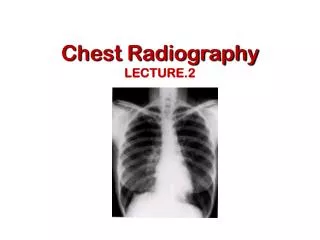
Radiographic Anatomy These are the anatomical structures we will identify in lab. Plate 209 in Netter is a nice PA
Radiographic Anatomy of PA Chest Rt. Clavicle & SC joint Posterior ribs Pulmonary vasculature (arteries and veins), or lung markings Rt pulmonary artery Knob of aorta Anterior ribs Rt cardiophrenic angle Lt costophrenic angle Dome of the rt hemidiaphragm Hilum of Lt lung Heart in mediastinum
Anatomy Review In lab you will...
Acromion process of Rt scapula Mitchell marker Radiographic Anatomy of PA Chest Scapular spine Trachea Vertebral border of Lt scapula Inferior angle of Rt scapula Carina Gas in stomach Right and left main stem bronchi. Which is most vertical? Head of Rt humerus Axillary border of ribs
Anatomy Review
Radiographic Anatomy of Lateral Chest Axillary border of Rt and Lt scapuli Arch of aorta Posterior aspect of ribs (Rt & Lt) Main stem bronchus Rt & Lt hemidiaphragms Thoracic vertebrae Heart shadow Intervertebral foramen Retrocardiac clear space Posterior costophrenic angle Trachea (esophagus is immediately posterior to it)
Anatomy Review When the arms can only be raised to 900, the humerus and soft tissue of the arms are seen
Positioning of: Postero-Anterior (PA) Upright Lateral (Lat) Upright Antero-Posterior (AP) Upright on gurney, Wheelchair, Supine Obliques – Upright, Supine (AP & PA) Decubitus (Decubs) Apical Lordotic – AP upright including Film Critique Beginning with the routine CXR PA and Lateral Review the ARRT Standard terminology for positioning and Projections
Film Critique In addition to criteria specific to each projection, all films are evaluated for: * Patient ID * Rt/Lt, special marker * Contrast & density * Motion * Artifacts including Motion of lungs may be subtle. Note blurred electrodes around heart, next to surgical clips with no motion.
Setup L Standard PA Positioning 14” X 17” crosswise male lengthwise female Why? SID = 72” (or greater) What is this distance called? What are the advantages of using it? Why is this a good place for Lt marker Medium speed film. Grid or screen (see exposure factors). ID marker at top. Center the tube to the film transversely (then leave it alone). Collimate to film size, then cone down after patient is positioned Order of preferred positions: Erect PA: Seated PA (on gurney or stool): Seated AP: Supine
Preparation Standard PA Positioning 1. Evaluate the order 2. Greet the patient 3. Take History What is pertinent Hx? SOB? dyspnea? angina? other chest pains? cough? (productive?: appearance of sputum i.e., hemoptysis, fibrile/afibrile? aspiration? known cause? Where does it hurt? How Long? (chronic/acute) 4. Remove jewelry, check attire, snaps, pins, NG tubes, etc. 5. Explain the exam in layman’s terms 6. Questions? 7. Set technique before positioning
Vertebral border AB Inferior angle Steps Standard PA Positioning 1. Chest against film or bucky, shoulders rolled forward, dorsum of hands on hips, arms away from thorax. Criteria Soft tissue of arm not in thorax Vertebral border of scapula not in thorax This patient was so muscular he leaned forward. This is incorrect
Medial angle Criteria With the shoulders rolled forward, the vertebral border of the scapula can be projected outside the thoracic cavity Vertebral border Inferior angle
Standard PA Positioning For stability, arms may be wrapped around bucky or film holder, but in this position it is difficult to roll the shoulders forward
Steps Standard PA Positioning 2. Adjust height of film to patient’s chest. CR to T-7 or 3”-4” below the jugular notch, (top of cassette to vertebral prominens). Watch that ID marker Careful centering of film prevents clipping
All of apecies (Above first rib) All of ribs (for pleural thickenng) Costophrenic angles (for pleural fluid) Critique criteria for clipping
Steps Standard PA Positioning 3. Head straight forward In addition to the chest being flat against the film, and the shoulders rolled forward, the position of the head prevents rotation
Rotation Rotation is best evaluated by the the sternoclavicular joints being equal distant from the thoracic spine
Standard PA Positioning Steps 4. “ Take in a deep breath” Prior to the exposure, have the patient take in practice breaths. Practice breathing insures the best possible inspiration
1 3 2 Criteria for inspiration 10 Posterior ribs on the right side, showing above the diaphragm. 4 5
Criteria for inspiration Why is inspiration so important? If it can’t be seen, it can’t be diagnosed CR Photons that skim the diaphragm Bottom of collimated field This lung tissue on the lateral, is projected here on the PA Dome of right & left hemidiaphragm Ergo, the deeper the inspiration, the more lung visible
The second most dramatic example of the value of good inspiration. Child has a heart mummer. These two radiographs were taken within 10 minutes of each other. What rib are the red spots on?
The most dramatic example of the value of good inspiration. Baby has no disease. These two radiographs were taken within 10 minutes of each other. The first radiograph appears to demonstrate the “ground glass” look of hyaline membrane disease commonly seen in preemies. It was deep expiration. “Babygram” taken first
x spot Nipple Markers On rare occasions dense areola may create shadows that resemble a mass leision. Nipple markers are metallic beads used to localize the areola and nipple. What are these?
Review of PA Film Critique On all films Patient ID Rt or Lt marker Contrast & density Motion Artifacts PA chest criteria 1. Clipping 2. Inspiration 3. Rotation 4. Scapula free of lung fields 5. Penetration of mediastinum (see “exposure factors” 4 details)
Routine Left Lateral Positioning Setup 14” X 17” lengthwise SID = 72” (or greater) Medium speed film. Grid or screen (see exposure factors) Center the tube to the film transversely (then leave it alone). Collimate to film size. Height of film is similar to PA centering, though due to the impenetrability of the shoulders, it may be lowered an inch or two. Lowering also helps eliminate clipping of the posterior recess of the costophrenic angles: Important criteria for the lateral projection.
The importance of the Lateral Projection Rt hemidiaphragm L Lt hemidiaphragm Are these films hung correctly? * The lateral, 90 degrees to the PA, localizes leisons * Lung tissue obscured on the PA is visualized: Behind the mediastinum and below the hemidiaphragms R
Standard Lateral Positioning Steps 1. Left side of thorax against film. Left marker on film The left lateral projection minimizes magnification of the heart shadow, and maximizes visualization of small calcifications. 2. Arms are raised above the head, or are supported on a bar. Critique criteria: Soft tissue of arms, or the humerus should not be visible in the thoracic cavity.
Steps Standard Lateral Positioning 3. Head straight forward. Spine parallel to film (patient is not leaning) 4. Plane of posterior ribs is perpendicular to the film to prevent rotation Critique criteria for rotation: Posterior ribs are superimposed, or separation is no more than 1 cm (1/2”).
Rotation Separation of posterior ribs Rotation is evaluated by the superimposition of the posterior ribs, or separation no more than 1 cm (1/2”). Due to the possibility of reversed rotations looking identical, the direction of rotation is difficult to ascertain*. *Regarding the discussion on rotation in Bontrager (88). If the torso is twisted, the separation of ribs will be larger on top (or bottom) than the bottom (or top)
Review of Lateral Film Critique On all films Patient ID Rt or Lt marker Contrast & density Motion Artifacts Lat chest criteria 1. Clipping 3. Rotation 3. Arms free of lung fields What about inspiration? Unlike the PA, ribs cannot be counted for the evaluation.
Non routine positions: Antero-Posterior (AP) Upright on cart, Wheelchair, Supine Obliques – Upright, Supine (AP & PA) Apical Lordotic – AP upright Lateral Decubitus (Decubs)
Non routine Positioning When the patient is unable to stand, but can sit on a gurney or stool, a PA upright projection is the next best option. Any deviation from routine positioning must be noted on the film. Why? Deep inspiration is less likely when seated – is one reason. Other such designations would be: AP: Right lateral: SID other than 72”: time of day for portable work, as well as technique, and supine.
AP Upright Positioning When the patient is unable to stand or sit PA on a gurney, a seated AP upright projection is the next best option. Setup ID marker 1. 72” SID 2. Usually (but not always) done screen to avoid grid cutoff Film carefully centered to patient, with equal spacing on either side 3. Positioning and criteria are essentially the same as the PA, except...
AP Upright Positioning Because rolling the shoulders forward may be difficult, the sternal ends of the clavicles raise in relation to the thoracic cavity. To recreate the appearance of the PA projection (for purposes of comparison) a 50 caudad angle is placed on the CR. When the film cannot be vertical (such as in a wheelchair) the angle is added to the inclined plane of the film. CR with a 50 caudad angle Plane of film 900 to plane of film When this angle is not added, the film is said to look lordotic (See lordotic chest film for example)
AP Supine When the patient must remain supine, the SID is 50”, 5o caudad If done on the x-ray table the film is generally put in the bucky tray, and is referred to as a “bucky chest.” If done on a gurney, a screen technique is preferred. The supine position is less desirable because 1. Inspiration 2. Air fluid levels not demonstrated 3. Engorgement of large pulmonary vessels, and hyperemia (small vessels). ID marker
Oblique Chest Positioning Setup Same as PA Positioning 450 obliques RAO & LAO or RPO and LPO Done bilaterally What are the two possible body positions for this projection? (Answer in two screens)
Oblique Chest Positioning Dependent arm to side, hand on hip, elbow bent to free arm from superimposition If patient is stable independent arm may be placed on head Independent arm resting on film holder
Answer to the question: What are the two possible body positions for this projection? The heart, which is normally more left sided in a PA projection, becomes more left sided in an RAO or LPO (corresponding) projection. Note that the manubrium of the sternum is above the knob of the aorta, and the sternum itself is projected on the heart. Criteria: Though both sides must be demonstrated, the widened side is the side of interest. In a 450 position it should comprise 2/3 of the diameter of the thorax.
When the sternum is projected on the heart it is RAO or LPO. The RAO is the routine projection of the sternum for this reason
Apical Lordotic Setup Same as AP upright, except it may be done on a smaller (14”x14” or 10”x12” film) Positioning Usually upright, but may be supine Patient stands 1 foot from film, and arches back to reduce the kyphotic curve, making it lordotic. Dorsum of hands on hips
Apical Lordotic If the patient is unable to assume the classic position, A 15-200 cephalad angle can be substituted. Why would the classic position be preferable to the angle? If the patient is able to arch the back some, a combination of position and cephalad angle can be used to achieve the same results An angle on the body = less angle on the tube