Download
1 / 40
590 likes | 1.51k Views
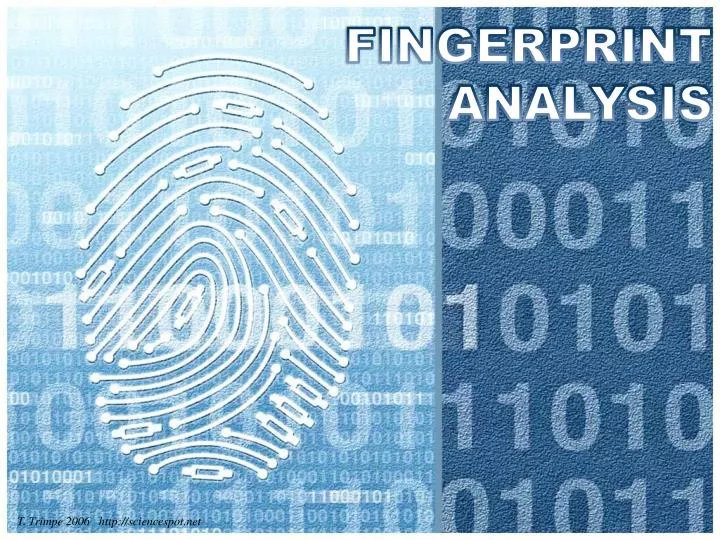
FINGERPRINT ANALYSIS. T. Trimpe 2006 http://sciencespot.net. Fingerprint Principles. A fingerprint is an individual characteristic; no two people have been found with the exact same fingerprint pattern.

E N D
FINGERPRINT ANALYSIS T. Trimpe 2006 http://sciencespot.net
Fingerprint Principles • A fingerprint is an individual characteristic; no two people have been found with the exact same fingerprint pattern. • A fingerprint pattern will remain unchanged for the life of an individual; however, the print itself may change due to permanent scars and skin diseases. • Fingerprints have general characteristic ridge patterns that allow them to be systematically identified
Fundamental Principles of Fingerprints A Fingerprint is Unchanged During an Individual’s Lifetime • The pattern of ridges determined by the dermal papillae, the boundary between the first two layers of skin • Pores are present on the top layer releasing sweat and oil – this can be transferred to a surface when touched leaving an invisible impression – latent fingerprints
Arch Plain arch Tented arch Loop Radial Loop Ulnar loop Whorl Plain whorl Central pocket whorl Double loop whorl Accidentical FingerprintClasses There are 3 specific classes for allfingerprints based upon their visual pattern: ARCHES, LOOPS, AND WHORLS
Focal points • Each of the three pattern types have focal points which are used for classification: • Core: the center of the loop. • Delta: triangulation or a dividing of the ridges. **The area between the delta and the core must be completely recorded.
Spike or “tent” Plain Arch Ridges enter on one side & exit on the other side. Tented Arches Similar to the plain arch, but has a spike in the center. Arches -simplest type of fingerprints; formed by ridges that enter on one side of the print and exit on the other. -No deltas are present.
Loops -have 1 delta and 1 or more ridges that enter and leave on the same side. These patterns are named for their positions related to the radius and ulna bones. Delta Ulnar Loop (Right Thumb) Loop opens toward right or the ulna bone. Radial Loop (Right Thumb) Loop opens toward the left or the radial bone. NOTE: On the left hand, a loop that opens to the left would be an ulnar loop, while one that opens to the right would be a radial loop.
Whorls -have at least 1 ridge that makes/tends to make) a complete circuit. They also have at least 2 deltas. -If a print has more than two deltas, it is most likely an accidental. Central Pocket Whorl Plain Whorl Draw a line between the two deltas in the plain and central pocket whorls. If some of the curved ridges touch the line, it is a plain whorl. If none of the center core touches the line, it is a central pocket whorl.
Double Loop Whorl Accidental Whorl Double loop whorls are made up of any two loops combined into one print. Accidental whorls contain two or more patterns (not including the plain arch), or does not clearly fall under any of the other categories. Delta Delta Whorls – Part 2
Identify each fingerprint pattern. ? A B Right Hand Left Hand C Right Hand E D Right Hand Left Hand
Ridge Characteristics • The individuality of a fingerprint is not determined by its general shape but by careful study of its ridge characteristicsor its minutiae • No two fingers have yet been found to possess identical ridge characteristics
Automated Fingerprint Identification System (AFIS) http://www.fdle.state.fl.us/CrimeLab/images/fingerrint%20comparison%20for%20afis.jpg Fingerprint Identification • Points of similarity or points of identification- • when minutiae on two different prints match • No international standard for the number of points of identification required for a match • U.K.equiresa minimum 16 points • Australia requires 12
Crossover Core Bifurcation (fork) Ridge ending Scar Island Delta Pore Ridge Characteristics EXAMPLE http://cnx.org/content/m12574/latest/properties.jpg
Ridge Dots • An isolated ridge unit whose length approximates its width in size
Bifurcations The point at which one friction ridge divides into two friction ridges Double Bifurcation Opposed Bifurcation
Trifurcations The point at which one friction ridge divides into three friction ridges
Ending Ridge A single friction ridge that terminates within the friction ridge structure
Ridge Crossing A point where two ridge units intersect
Enclosures (Lakes) • A single friction ridge that bifurcates and rejoins after a short course and continues as a single friction ridge
Short Ridges (Islands) • Friction ridges of varying lengths
Spurs (Hooks) • A bifurcation with one short ridge branching off a longer ridge
Bridges A connecting friction ridge between parallel running ridges, generally right angles
Classification of Fingerprints • System used by FBI converts ridge patterns on all 10 fingers into numbers in the form of a fraction • Fingerprint cards can be classified into 1024 groups • The presence or absence of a whorl pattern is the basis for the determination of the primary classification
Classification • Fingers are paired in the following sequence: R. Index R. Ring L. Thumb L. Middle L. Little R. Thumb R. Middle R. Little L. Index L. Ring • If a whorl pattern is found on any finger in the first pair, it is assigned a value of 16; on the second pair, a value of 8; on the third pair, a value of 4; on the fourth pair, a value of 2; and on the fifth pair, a value of 1. Any finger have an arch or loop is assigned a value of 0. • Add all the values for the 10 fingers and then add 1 to both the numerator and denominator. • The fraction obtained is the classification. For example: 16 + 0 + 0 + 0 + 0 + 1 17 = 0 + 8 + 0 + 0 + 0 + 1 9
It’s time to makesome prints! GOOD PRINTGet as much of the top part of your finger as possible! Avoid Partial Prints
Directions 1st – Roll the “pad” portion of your thumb over the ink pad from the left side of your thumb to the right. You do not have to push down really hard! 2nd – Roll the “pad” portion of your thumb from the left side of your thumb to the right in the correct box on your paper to make a thumbprint. 3rd – Continue this process to make a fingerprint of all ten fingers on the “My Prints” worksheet. 4th –Use your notes and a magnifying lens to help you figure out what type of pattern is found in each of your fingerprints. Label each one with the pattern’s name.
Toe Print Students create their own "ink" by rubbing pencils on an index card and then pressing it to their toes. They use a piece of clear tape to lift the print and tape it to the correct spot on the worksheet.
Types of Prints • Visible Prints fingers touch a surface after the ridges have been in contact with a colored material such as blood, paint, grease or ink. • Plastic prints ridge impressions left on a soft material such as putty, wax, soap or dust. • Latent Prints impressions caused by the transfer of body perspiration or oils present on finger ridges to the surface of an object.
Latent Prints • Prints on soft or porous material (paper, cardboard, cloth) require treatment with 1or more chemicals
HW: Methods of Detecting Fingerprints • Each group will be assigned one of the methods used for detecting fingerprints. • Read pages 417-424 in the text and answer the following questions in your notes: • What type of print does it detect? • On which type of surface does it work best? • What is the process used to visualize the prints and retrieve them? • Type up your notes in a few concise lines and email to me
Did you know? Camel hair is the most common animal hair used to make fingerprint brushes. Now many brushes (like the one above) are made out of fiberglass. Latent Prints collected by revealing them with a dusting of black powder and then lifted with a piece of clear tape .
Magnetic powder can also be used to reveal latent prints. This type of powder works better on shiny surfaces or plastic baggies or containers. Some investigators use fluorescent powder and UV lights to help them find latent prints on multi-colored or dark surfaces. The cyanoacrylate fuming method a.k.a. super glue methodis isused to develop latent fingerprints Ninhydrinbonds with the amino acids in fingerprints and will produce a blue or purple color. It is used to lift prints from surfaces such as paper and cardboard. Click the icon to view the Crime 360Super Glue Video Top Left: http://www.stapletonandassociates.com/images/MagPowder.jpg Bottom Left: http://www.ok.gov/osbi/images/ninhydrin%20print.jpg Bottom Right: http://www.forensicsrus.com/images/SupergluePrint.jpg
http://www.youtube.com/watch?v=VWiak1ocK7I • http://www.youtube.com/watch?v=NjGyil6k75M&feature=related
Directions: 1 - Cover your table with white butcher paper or newspaper. You must dust everything on the paper! 2 - Get a lifting kit from your teacher that contains black powder, brushes, and clear tape. 3 - Press the pad of your right thumb on a CD or glass slide to make a print. Place on the paper covering your table. 4 – Dip a brush lightly into the container of black powder and then tap off the extra on the lid. You only need a very small amount of powder to dust the print. 5 – Hold the brush over the print and rotate it between your thumb and fingers. Use the brush to remove any extra powder. 6 - Use a small piece of clear tape to lift the print and place it in the box on your worksheet. CAUTION: The black powder will be messy and isn’t easy to clean up. Don’t dust anything without permission!
Clean Up 1 – Clean off the CDs or glass slides and put them back in the kit with the brushes and tape. 2 – Have someone help you fold the paper in half and tap it to return the extra black powder to the container. 3 – Put the black powder in the box and have it checked in by your teacher. 4 – Get a towel and “dry” wash the table – especially the edges that weren’t covered with paper. 5 – Get a wet towel to wash off the table and then wipe it with some dry towels. Keep cleaning until all the black powder is off the table!
RUVIS • Sometimes the most difficult aspect of fingerprint examination can be the location of the print. • Recent advances in fingerprint technology have led to the development of an ultraviolet image converter for the purpose of detecting latent prints. • This device, called the Reflected Ultraviolet Imaging System (RUVIS), can locate prints on most nonabsorbent surfaces without the aid of chemical or powder treatments. • RUVIS detects the print in its natural state by aiming UV light at the surface suspected of containing prints. When the UV light strikes the fingerprint, the light is reflected back to the to the viewer, differentiating the print from its background surface. • The transmitted UV light is then converted into visible light by an image intensifier. Once located in this manner, the crime-scene investigator can develop the print in the most appropriate manner.
Other techniques for detecting prints • Iodine Fuming is a technique for visualizing latent fingerprints by exposing them to iodine vapors. • Sublimation is a physical change from the solid directly to the gas state. • Ninhydrin is a chemical reagent used to develop latent fingerprints on porous material by reacting with amino acids in perspiration.
Other techniques for detecting prints • Physical developer: a silver-based reagent formulated to develop latent fingerprints on porous surfaces. • Super Glue Fuming: A technique used for visualizing latent fingerprints on non-porous surfaces by exposing them to cyanoacrylate vapors; named for the commercial product “Super Glue”.