Download
1 / 11
110 likes | 125 Views
Learn how to create and manipulate tables in MS Word to organize data and design visually appealing layouts. Discover techniques to align, format, and customize tables efficiently, enhancing your document presentation.

E N D
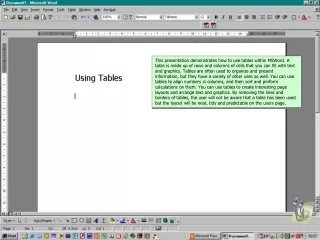
This presentation demonstrates how to use tables within MSWord. A table is made up of rows and columns of cells that you can fill with text and graphics. Tables are often used to organize and present information, but they have a variety of other uses as well. You can use tables to align numbers in columns, and then sort and perform calculations on them. You can use tables to create interesting page layouts and arrange text and graphics. By removing the lines and borders of tables, the user will not be aware that a table has been used but the layout will be neat, tidy and predictable on the users page.
Place your cursor where you wish the table to be inserted. Click table / insert / table
Then choose the number of columns and rows you need. [you can insert more later if necessary]
Click in the cell and type. At the border of the cell the sentence will automatically take a new line or “wordwrap”
Pictures can be inserted easily. Cell contents can be formatted and positioned using the usual icons on the formatting toolbar.
To remove borders highlight the table / click the borders icon and choose the style you want to use
The contents of each cell will remain. It’s a good idea to put the borders back on before editing the table.
To add a border to a specific cell or cells highlight the cell and choose the style you want to use.
To resize a column or cell move the cursor to a line. It will change to a double headed tool. Click & drag the line to it’s new position. Resizing a row is done using the same technique.
Tools to edit the table are generally found in the table drop down menu.