Download

1 / 200
2k likes | 2.35k Views
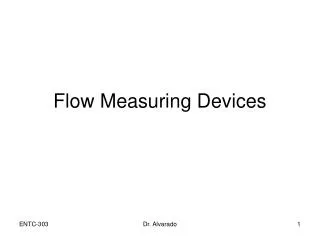
Demonstrating Measuring Devices. What is linear measurement?. A system for measuring length Measuring devices, also called layout tools, are used to measure length. Examples of tools used: rules, squares, scratch awls, calipers, measuring tapes and dividers. Photo courtesy of Snap-on Tools.

E N D
What is linear measurement? A system for measuring length Measuring devices, also called layout tools, are used to measure length. Examples of tools used: rules, squares, scratchawls, calipers,measuring tapesand dividers Photo courtesy of Snap-on Tools.
Purpose of linear measurements: Measure and mark materials before cutting or shaping Construct a project from a pattern Create your own pattern Lay out a project
Materials for measuring devices … • Steel • Durable – lines and numbers stay visible for a long time • Bends without breaking • Withstands rough use • First choice of material for calipers, dividers and other slender tools that must measure very accurately and not bend easily
Materials for measuring devices (cont.) … • Aluminum • 2nd choice for many layout tools • Tough, lightweight and durable • Wood • Cheap, soft and lightweight • Breaks easily, absorbs moisture • Does not wear well • Popular for the wooden folding rule
Materials for measuring devices (cont.) … • Plastic • Tough and lightweight • Melts if touches hot object or flame • May be damaged by solvents • Limited use • Cloth • Used for some 50-foot tapes • Cheap and lightweight • Not very accurate – stretches under stress
Cost vs. quality … Cheap tools are seldom a bargain. Cheap tools are likely to be inaccurate and unsatisfactory after very little use. Good tools may seem expensive, but last a lifetime with proper use. Good tools allow skilled labor and craft. Even a skilled worker cannot do good work with poor tools.
English/U.S. customary system of measurements … Uses inch, foot, yard, rod and mile INCH – traditional U.S. unit for woodworking and metalworking
Metric system of measurement … Used for scientific work in the U.S. Increasingly used for nonscientific use. Many layout tools use both metric and U.S. customary markings. Based on multiples of ten Easy to use without fractions
Common tools for linear measurements: Tapes, rules and scales Last number on the scale is read plus any fraction
Measuring tape: Flexible measuring device that rolls into a case. Several feet to hundreds of feet Steel, cloth or fiber Often self-retracting withlocks or buttons Usually has end hook Easily broken – handlewith care Photo courtesy of Snap-on Tools.
Folding rule: Rigid rule 2-8 feet in length Foldable for easy handling and storage Insert for easy inside measurements Wood, plastic or metal Take care whenopening and closing
Scale: In this use, refers to rigid steel or metal measuring device 1-3 feet in length, ¾ to 1” in width Wooden scales sometimes called bench rules – about ¼” thick Metal scales are relatively thin, accurate Handy in the shop, not used much otherwise
Why use squares, levels and lines? Measuring angles and cutting accurately are essential for the success of any construction project. Squares, levels and lines are all tools that are used to guide the builder, where a particular angle or a level measurement is needed.
Essential measuring and cutting tools: Squares – draw angles for cutting and check cuts for accuracy Levels – determine if an object has the same height at two or more points Line – thin material stretched tightly between two or more points
More about squares: • Used to draw angles for cutting and to check the cuts for accuracy • Most commonly used squares: • Framing square • Try square • Combination square • Sliding T bevel, also called a bevel square
The framing square: Flat square with a body and tongue Usually made of steel Also called a carpenter's squareand a steel square May contain tables to calculateboard feet and rafters Has both inside and outsidemeasurements 16” wide 24” long
The try square: Used to try or test accuracy of cuts Used to mark lines on boards before cutting Steel blades with wood, steel or plastic handles Good for marking boardsup to 12” Used to draw 90 or 45°lines on boards
Combination square: Combines many tools Bubble for leveling Bubble for plumbing Depth gauge Removable blade for steel scale Use for square and for 45° angle Most commonly used square
Sliding T bevel Device to lay out angles Also called bevel square A bevel is a sloping edge as when a corner edge is cut away from a board
Using a spirit level: Determine if an object has the same height at two or more points Contains alcohol in a sealed, curved tube with a small air space or bubble Mounting is wood or aluminum Bubble between 2 lineswhen both ends areeven Crossways mountedtube can be used toplumb an object
Using a line level: Attached to a string or line stretched between two distant points When the string is pulled tight, the level indicates when both ends are the same height. Useful for leveling the corners when building with block and for setting stakes to gauge the depth of concrete.
Laser beam level: Directs a strong beam of light across a space Level mark can be made at several points and at varying distances Useful in laying out houses and other buildings
Using lines: Strong cotton or nylon line For block, flooring, cutting rafters, ceiling tiles, etc. Chalk line – cord with chalk leaves trail Plumb line – string with round and pointed metal plumb bob attached which hangs in perfect vertical line
Using a square to mark a board: Measure and mark the desired length. Place handle firmly against board edge. Move the blade against the mark. Draw a line across the board.
Squaring a large area: Even 1° error can cause serious problems on large construction job Measure 90° angle by creating a right triangle with sides that are 3’, 4’ and 5’. Determine if a rectangle is square by measuring the diagonals. Both must be equal.
Parts of a portable electric drill: • A portable power drill is a small tool run by an electric motor that can be easily moved to the work. • Power cord • Handle • Motor housing • Gear chuck • Vents • Trigger switch • Trigger switch lock • Reversing switch • Chuck key or wrench
Classifying drills: • Chuck Size (the device that holds a drill or tool bit in the machine): commonly 1/4”, 3/8”, 1/2” • Power Rating: typically from 2 to 5 amperes. A 115-volt motor using 5 amperes equals about ½ horsepower and is considered powerful for a portable drill. • Duty Cycle: the amount of time a motor can run versus the time it needs to cool off. Continuous duty drills can be used all the time for 6-8 hrs.
Types of drills: Photo courtesy Snap-on Tools. Variable Speed: motor speed can be controlled by the operator Reversible Drills: can run backward and forward
Types of drills: Photos courtesySnap-on Tools. Hammer Drills: will turn a bit and also provide rapid striking action useful for masonry materials Cordless Drills: contain a rechargeable battery pack
Uses for drills: Drilling holes Turning screws in and out Drilling holes in brick, block or stone Making holes Sanding and polishing
Recommended procedures: • Use only straight shank bits. • When tightening a drill chuck, place the key into the hole and tighten the chuck securely. Place the key into a second hole and, again, tighten securely. • Center punch metal to help start a drill bit. • Always make sure the drill bit is sharp. • Hold materials to be drilled in a vise or other secure device. • Use slow-turning drills for large bits.
Recommended procedures: • Use even pressure on the drill. • Ease off the pressure when the drill is breaking through the material. • Hold the drill so as to avoid binding the drill bit. • Position yourself so that balance is always maintained; never lean on a drill. • Remove the drill bit from the chuck when finished. • Store the portable power drill in its own case or in a special storage rack.
Pilot holes: For large holes, a pilot hole is used – a small hole drilled in material to guide the center point of larger drills. Pilot holes are also used when installing screws to prevent splitting the wood. If a drill bit is not cutting, check to see if the reverse switch is on. If the drill is turning clockwise and not cutting, the drill bit is dull and must be sharpened.
Ag Engineering Library Indentify and Demonstrate Common Tools: Hand Tools
So what’s the big deal about hand tools? Have been around for centuries Can create very high quality projects Require more skill than power tools Generally safer than power tools Safety procedures required High quality hand tools may be more expensive than power tools.
Advantages to hand tools: Can be used without electricity Sometimes more appropriate than power tools No set-up needed
Classifying hand tools: No power required – use simple machine principles like inclined planes, wheel and axle, levels and fulcrums May be named for user (carpenter, mason, machinist, mechanic) Use or function (layout, cutting, boring, driving, holding, turning)
Layout tools: Measure or mark wood, metal and other materials before cutting or shaping Examples: rulers, squares, scratch awls, gauges, calipers, measuring tapes and dividers Ensure correct length, width, thickness and/or shape An example of hand tools that are not generally replaced by power tools
Layout tools – examples: Photos courtesy of Snap-on Tools.
Cutting tools: Photo courtesy of Snap-on Tools. Chop, cut, saw orotherwise removematerial Permit user to shapematerial Examples: saws, chisels, hatchets and knives Sharp edge must be kept keen. Cutting edges are usually made of high carbon steel, tungsten or carbide.
Handsaws: • Cut across boards or rip boards and panels • Crosscut means to cut across the grain; Rip means to cut along the length of the board or with the grain. • Teeth determine use. • Filed to a point = cut across the grain of boards (crosscut saws) • Filed to a knifelike edge = cut with the grain (ripsaws)
More details on handsaws: Length from 20 to 28 inches Shorter saws for smaller people Shorter saws for finer cuts use finer teeth Teeth range from 6 to 14/inch Backsaw is mounted in box or frame to cut precise angles Coping saw used to cut curves in wood
Boring tools: Make, size or shape holes Examples: drills, bits, reams and the devices used to turn them Sharp cutting edge must be maintained Variety of shapes, sizes and types
Driving tools: Used to move another tool or object such as a nail, a punch or a chisel Examples: mallets, hammers and sledges. Size and type depend on intended use Claw hammers – 2 types (curved and ripping) – are used to pry wood apart and to extract nails. Rubber and plastic mallets are used for moving wood and other materials without marring the surface.
Holding tools: Used to grip wood, metal or plastic Used as an aid while other tools are used to cut, shape, modify or fasten the material being held Examples: clamps, pliers and vises