Download

1 / 50
570 likes | 794 Views
Use and Functional Verification of Automatic and Micro-Pipettes. Module 7: Quality Assurance of Analytical Phase. Objectives. Upon completion of this lesson the student will be able to: Discuss the appropriate usage of: Automatic/micropipette Repipettor

E N D
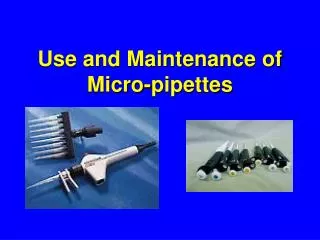
Use and Functional Verification of Automatic and Micro-Pipettes Module 7: Quality Assurance of Analytical Phase
Objectives Upon completion of this lesson the student will be able to: • Discuss the appropriate usage of: • Automatic/micropipette • Repipettor • Explain the need to verify pipette calibration periodically
Objectives • Describe methods used to verify pipette calibration • List the statistical calculations needed to determine pipette precision and accuracy • Calculate statistical data to verify pipette accuracy and precision
Reasons for Pipetting Pipetting is a part of all types of laboratory testing. • Immunology-Serology • Microbiology • Body Fluid testing • Hematology • Blood Transfusion Medicine • Biochemistry/Clinical Chemistry
Specific Reasons for Pipetting Dilutions of patient samples when the concentration of a substance is too high to be accurately measured Preparation of stock standards to yield various target concentrations for working standards Reconstitution of controls used to assess instrument performance and validity of test results. Dilution or preparation of reagents used in the testing method.
Uses of Micropipettes • Glass pipettes are not highly accurate at dispensing < 1 milliliter (1 mL) • Automatic pipettes are both accurate and precise for small volumes • These may be adjustable digital pipettes
Role of Pipettes Good laboratory practice requires accurate and precise pipetting. It is part of Quality Assurance. • Accurate pipetting is a critical skill required of all clinical laboratory scientists • Good pipetting skills are required to prepare accurate and precise dilutions of: • Reagents • Patient specimens • For quantitative measurements in the clinical laboratory
Micropipettes: Small Volumes Dispensed A micro-volume pipette is used when pipetting < 1.0 mL
Advantagesand Disadvantages • Micropipettes Don’t • Need a suction bulb for aspiration • Need as much hand-eye coordination • Micropipettes Do • Seem easier for most people to operate • Disadvantages • Require proper training for use • Require periodic validation of calibration • Sometimes require cleaning and lubrication
Types of Micropipettes • Types of micro-pipettes • Air Displacement • Positive Displacement • Repipettor
Mechanical Micropipettes • There are 2 basic types of mechanical or manual micropipettes • Piston (air displacement) • The piston style may have 2 stops, in which the lowest position is to ensure that air blows out the last drop • Note: a one-stop piston micropipette is easiest to use but prone to having too much of the sample retained behind in the pipette • Syringe (positive displacement)
Quality Assurance Micropipette Procedures • Always follow the procedural instructions provided by the manufacturer for the proper use of a micropipette
Quality Assurance of Micropipette Use • Select the appropriate pipette for the volume required • Select the appropriate pipette tip • Ensure that there are enough tips for the procedure • Ensure that the pipettor, tips, and specimen are at the same temperature
Operating the MicropipetteStep 1: Set the Volume Pipettors – 3 Volumes: Volume Adjustment Knob: Digital Volume Indicator:
Setting Adjustable Volume • Course and fine setting of the pipette line. Because the course and fine settings are separate, it is not necessary to "wind" the pipette as would be done on a screw-type adjustment
Operating the MicropipetteStep 2: Attach the Disposable Tip Attaching the disposable tip: Example of tip sizes:
Operating the Micropipette Steps 3-6 • Step 3: Depress the Plunger to the First Stop • Step 4: Immerse Tip in Sample • Step 5: Draw up the sample • Step 6: Pause before withdrawing tip • Wait a few seconds
Mechanical Micropipette Procedures • Particularly important is removing excess fluid from the outside of the pipette tip • For syringe pipettes • The filled syringe should be dipped in distilled water to remove excess fluid clinging to the outside • For piston pipettes • The outside of the pipette should be carefully wiped with a disposable tissue, taking care not to touch the bottom of the pipette tip
Operating the MicropipetteStep 7: Wiping the Tip Proper Droplet Removal WRONG Droplet Removal
Operating the Micropipette Steps 9-11 • Step 9: Withdraw the Pipette • Step 10: Release the Plunger • Step 11: Discard the Tip Press ejector button to discard tip.
Pipette: Use and Care • Discard contaminated tips in appropriate container after completion of task • Handle carefully • Store in an appropriate rack or stand • DO NOT RE-USE • Pipette tips • Graduated plastic bulb transfer pipettes
Routine Maintenance Check at the beginning of each workday for dust and dirt on the outside surfaces. Pay particular attention to the tip cone Clean with 70% isopropyl alcohol In addition to routine calibration, pipettes should be cleaned and lubricated as recommended by the manufacturer
Routine Maintenance Inspect the pipette for scratches or other damage to the nose cone Check for leaks by aspirating the maximum listed volume of distilled water If the pipette is dropped or you suspect any type of damage, do calibration check
Mechanical Pipette Maintenance • Maintain complete records of pipette calibration function check • Include serial and other identifying numbers • Annual check of calibration with gravimetric or spectrophotometric method
Mechanical Pipette Maintenance See job aid for complete maintenance procedures • The accuracy and precision should be checked the first time of use and periodically thereafter • Accuracy and precision should be checked at least once every year • If either fails, it is important to follow the manufacturer’s instructions
Application 1: Troubleshooting • A technologist observed that when using the pipette method for analysis, the volume of sample dispensed into each tube seemed to look different. Question: • What is the next step the technologist should take? Answer: • Check the precision and accuracy of the pipette
How to Organize Pipette Calibration Check • If a site has an analytic balance on-site, do calibration at the site • If no analytic balance is available on-site • Send pipette for calibration to a nearby site with a balance • An optional procedure using a spectrophotometer may be used
Precision Pipettes Require Performance Checks • Performed periodically (at least once per year) • Required supplies: • Pipette • Pipette tips • Analytical balance (micrograms) • Weigh boats • Distilled or deionsed water
Testing Pipetting Accuracy • The accuracy of pipetting should be evaluated periodically (i.e. every 6-12 months) • Retain the evaluation records for each pipette for quality management purposes • Select a volume normally used in the procedure • Using the pipetting technique, pipette replicates of distilled water and record the weights
Testing Pipette Accuracy • The following procedure can be used to test how accurately the pipette measures volume (water is used because the weight of water is 1g/mL): • Using the correct pipetting technique, pipette 10 replicates of 50 μl of distilled water and record the weight to the nearest 0.0000 g • Calculate the mean weight • The mean should fall within 0.0490 and 0.0510 • A correction factor for the room temperature may be needed to convert weight to volume.
Checking Pipette Precision • Set the pipette to 50 µL • Using pipetting technique, pipette 10 replicates of distilled water and record the weights • A correction factor for the room temperature may be needed to convert weight to volume. • Calculate the mean, standard deviation and coefficient of variation (CV) • The CV for replicates should be < 0.3% • Standard deviation (s) may be compared with published requirement
Pipetting 0.0000 g 0.0495 g 0.1001 g 0.1499 g
Calculations of Second Weight From Combined Aliquots 1 and 2
Temperature Conversion for Water Density Multiple correction factor by mass in g to determine corrected volume in mL. T (°C) Corr. Fact. (mL/g) T (°C) Corr. Fact. (mL/g) 17 1.0023 23 1.0035 18 1.0025 24 1.0038 19 1.0027 25 1.0040 20 1.0029 26 1.0043 21 1.0031 27 1.0046 22 1.0033 28 1.0048
Calculations for Precision and Accuracy Arithmetic mean Standard deviation Coefficient of variation
Application 2: Practice with Precision and Accuracy Calculation • In order to be precise for patient testing, the 50 uL pipette was required to have a % coefficient of variation of < 2% and accuracy was required to have < 1% error rate. • A quick precision and accuracy study was performed with the following results:
Application 2: Precision and Accuracy Calculation • The mean, s and %CV should be determined. • The % accuracy or mean volume error is determined using the following formula: (Expected volume -Mean of Measured volume) / Expected volume X 100% Remember that 1 g = 1 mL or I mg = 1 uL In order to be precise for patient testing, the 50 uL pipette was required to have a % CV < 2% and accuracy was required to have a <1% error rate.
Application 2: Precision and Accuracy Calculation Questions: What is the mean? What is the standard deviation? What is the coefficient of variation (%C.V.)? What is the accuracy error of this pipette? Is this pipette acceptable to use? Why or why not? Work in groups to determine these results. The pipette was required to have a % CV < 2% and accuracy was required to have a <1% error rate.
Application 2 Debrief: Precision Calculation 0.0492 mL or 49.2 uL 6.1% 0.003 mL or 3 uL [(0.05 – 0.0492)/0.05] x 100 = 1.6% Not acceptable since accuracy error > 1% and precision > 2%
Summary • Discuss the advantage of using volumetric equipment when preparing standard solutions, diluting controls and patient samples • Discuss the appropriate usage of automatic/ micropipettes for quality • Discuss the need to verify pipette calibration (precision and accuracy) periodically • Discuss the main procedure used to verify pipette calibration