Download

1 / 16
160 likes | 294 Views
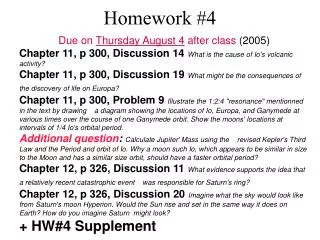
Homework 4 Hints. Chapter 6 Guided Exercise. Make sure to enforce Referential Integrity and Cascade Update when prompted Step 4 Make sure to add a record for your TA. Step 5 Primary key is indicated by a KEY next to the field Remember ERD rules for this homework (what are foreign keys?).

E N D
Chapter 6 Guided Exercise • Make sure to enforce Referential Integrity and Cascade Update when prompted • Step 4 • Make sure to add a record for your TA. • Step 5 • Primary key is indicated by a KEY next to the field • Remember ERD rules for this homework (what are foreign keys?)
Chapter 6 GE • Step 8: • Step 9-13: • REMEMBER TO SET RELATIONSHIPS between tables! • Step 15-19: • REMEMBER TO: • Set “ENFORCE REFERENTIAL INTEGRITY” and “CASCADE UPDATE” ALL RELATIONSHIPS for the rest of the homework! • Do this by right clicking on the relationship and “edit relationship”
Chapter 6 GE • Step 23: 1. Table on the one side of a relationship can be a main form 2. Related table on the many side of the relationship can be a subform
Chapter 6 GE • Step 25 and 26: Updating a subform automatically updates the tables too. (Remember to SAVE) Navigate through records in the subform (Counselor) Navigate through records in the main Form (Location)
CHAPTER 6 GE • Step #28-40 • This is how you will link your tables to your forms and create subforms • This will be used in your final project • Please make sure you understand these steps • Step #31 bug:
Chapter 6 GE • Step 34 • The Subform/Subreport button is under the Design ribbon 2. Click to go to row 2. This is where the subform/subreport is located 1. Click on Design
Chapter 6 GE • Step 36: • Formatting! • REMEMBER TO RESIZE THE DETAILS SECTION • Step 39 • Remember to switch the Couselors Sub form from datasheet view to Single Form view in the property sheet! • Save and close form after changes are made • Step 40 • Re-open the form to make sure changes were made properly (see in form view)
Chapter 6 Applied Exercise • Step 1: • Create table in DESIGN VIEW AND SET DATATYPES • Step 2: • Set Primary key by highlighting field (in design view) and clicking on • Add “LocationID” To same table in design view
Chapter 6 Applied Exercise • Step 3 • See GE Step # 8 • Click on Design, then click on Show Table • See GE Step # 9through 14 to create a relationship
Ch 6 AE • Step 3 cont. • Add Location Facilities to Relationships window • Drag and drop “Location ID” from Location Table to LocationFacilities table • Continue like in steps (9-14) in GE
Chapter 6 Applied Exercise • Step 4 • Make sure to add data to the LocationFacilities table as instructed • It's very similar to what you do for Steps 34 & 35 in the Guided Exercise - except that instead of choosing the Counselors Table you choose the Location Facilities Table. • When the SubForm Wizard pops up choose "Use existing Tables and Queries", click "Next", then select "Table: Location Facilities" from the drop down menu, then click the double right arrow, and finally "Finish".
Chapter 6 Applied Exercise • Step #4 cont. • Remember: “Location 2” is the 2nd Record in the Locations Complete Form • Add these directly in the SUBFORM for LOCATION 2 ONLY! (DO NOT PUT ANYTHING IN LOCATION 1 SUBFORM!) • This is indicating that Archery Range, Craft Hall, etc are located at Location #2 only and NOT Location #1
Chapter 6 Applied Exercise • Step 5 • Again, very similar to Steps 34 & 35, but instead of selecting "Use existing Tables and Queries" choose "Use an existing form" and select the "Counselors Sub" form created in Guided Exercise Steps 34 - 37. • Nested subform= a subform inside of a subform • *Add the Counselors Subform in the Locations Complete form • AND Add a Campers nested subform INSIDE OF THE COUNSELORS SUBFORM • Window and edit that relationship (GE #14-18)
Chapter 6 Applied Exercise • Step 6 • Pay attention Change only Couselorssubform to DATASHEET (not single form see step #39) • Step 7 • Go to Relationship
REMEMBER! • CHECK YOUR FORMATTING! • Go to the Form view and check ALL your forms for: • Make sure no fields/ names/ words are being cut-off • Make sure you can see ALL your subforms • Avoid unnecessary spaces/ gaps between controls/fields/subforms