EMS1EP Lecture 4 Intro to Programming
In this lecture, Dr. Robert Ross introduces the fundamentals of programming using Arduino, focusing on number systems, bits, bytes, and the basics of firmware. Students will learn about binary (base 2), decimal (base 10), and hexadecimal (base 16) systems, as well as how to manipulate microcontroller pins for various tasks. The session covers essential programming concepts, such as writing instructions, setting up Arduino IDE, and creating simple programs like 'Hello World' and LED flashers. This is a vital foundation for controlling hardware and writing effective code for microcontrollers.

EMS1EP Lecture 4 Intro to Programming
E N D
Presentation Transcript
EMS1EP Lecture 4Intro to Programming Dr. Robert Ross
Overview (what you should learn today) • Number systems • Bits, Bytes, Pins • Hello World – Arduino style
Digital Revision – Number Systems • Computers use binary (base 2 number system) • Humans like to use decimal (base 10 number system) • Hexadecimal (hex) is a nice way of displaying binary numbers • Notations: • Binary: 01010010b or 010100102 • Decimal: 212 or 21210 • Hex: 0x31 or 31h or 3116 • When you write code – the compiler doesn’t understand the subscript 2, 10 or 16, so just use the first notation
Bits and Bytes • A Byte is a single binary digit • It can hold either a ‘0’ or a ‘1’ • A Byte is a collection of 8 bits • e.g. 01001101 • In hexadecimal: 0x4D • A normal DVD holds 4.7GB (GigaBytes) so it holds (1024 x 1024 x 1024 x 4.7) Bytes of data
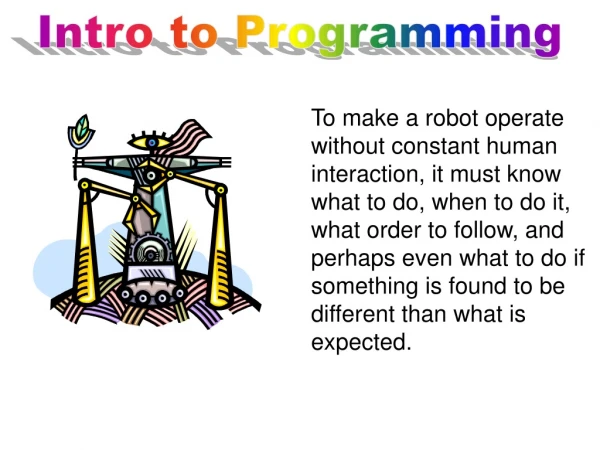
Pins • The microcontroller has many pins (legs) on it • Most of these we can independently control (set HIGH/LOW or read the HIGH/LOW state) • Some pins are used to supply power and a clock signal • In contrast to ‘normal’ computer programming – here we are actually writing firmware to control and manipulate hardware at an electrical level
Programming intro • Microcontrollers have many features: • Set pins high/low • Read if pins are high/low • Perform logical, arithmetic and timing operations • The way we control and use these features is by writing code (programming)
Code 101 • A program is made up of a series of instructions • Executed sequentially • Sample types of instructions • Arithmetic • Logical Comparisons • Controlling pins
Verify (compile code) Arduino IDE - Terminology • Sketch – A program that you write • setup() – Function run once when device started – used for initialisations • loop() – Infinite loop function – runs forever Program device Serial monitor
Arduino IDE – Setting up Before code is run a few things need to be setup Tools->Board->”Arduino Uno” Tools->Serial Port-> What is the Arduino plugged into? Easiest way to determine this is to unplug the arduino and check the available ports Then plug the Arduino in and choose the new port that has appeared Free to download: http://arduino.cc/en/Main/Software
Arduino Hello World • First program – write ‘Hello World’ to the screen • Arduinos don’t have a screen • They can send data in a serial format back to the PC – and the PC can display it on the screen (use the serial monitor option) • Program purpose – send the message “Hello World” to the PC
Arduino Hello World // The setup() method runs once, when the sketch starts void setup() { // initialize the serial port interface (baud rate 9600bps) Serial.begin(9600); } // loop() method runs as infinite loop void loop() { //Send serial message Serial.print(“Hello World”); delay(1000); // Wait for a second }
LED Flasher for Arduino • Another simple program that is often a first microcontroller program is flashing an LED on and off • Need to set output of digital pin to high then low • Delay in-between so doesn't flash too fast (8MHz)
Pin Declarations Setup Function Loop Function Arduino LED Flasher // PIN ASSIGNMENTS int ledPin = 10; // LED connected to digital pin10 // The setup() method runs once on startup void setup() { // initialize pin as output: pinMode(ledPin, OUTPUT); } // Infinite loop void loop() { digitalWrite(ledPin, HIGH); // LED OFF delay(1000); // Wait 1S digitalWrite(ledPin, LOW); // LED ON delay(1000); // Wait 1S }
Pin Declarations Setup Function Loop Function Pin Declarations • Global variables used to give names to specific pins • Helps the programmer know what the pins are connected to • If a red LED was connected to Pin 9: • intledRedPin = 9; • If a button to control an up counter was on Pin 12: • intbuttonUpPin = 12;
Pin Declarations Setup Function Loop Function Setup Function • The setup function is always run once at the start of the program • This sets up the microcontroller – setting up pins (previously they were just defined), comms interfaces and timers void setup() { // initialize as output pinMode(ledPin, OUTPUT); }
Pin Declarations Setup Function Loop Function Loop Function • This is a loop that runs directly after the setup() function • This loop runs and repeats forever until you remove power to the Arduino • Equivalent of a while(1) loop • Other functions can be called from within this loop void loop() { digitalWrite(ledPin, HIGH); delay(1000); digitalWrite(ledPin, LOW); delay(1000); }
delay() • The Arduino board is operating at 16MHz • If we flash an LED on and off at 16MHz it is much to fast for us to see • Need to add delays to visibly see the LED turn on and off • delay() is a millisecond delay function • delay(1000) will delay for 1000ms or 1 second • delay(5000) will delay for 5 seconds
Variables • Variables are small chunks of memory where we can store data • Variables have a name (generally something that describes its use e.g. ‘counter’) • Variables have a type (describes how big the variables can be (e.g. Integer) • Variables have a value e.g. counter = 5 • Need to declare the variable before using it (this tells the compiler to save a small chuck of memory for this data)
Basics of control flow • Most higher level languages have basic constructs for control flow (looping and decision making) • IF, WHILE, FOR, DO…WHILE • Arduino is basically C code and so these still apply and are useful
Revision: If statement • Allows you to do different things depending if a statement is true or false • Syntax: if(<condition statement>){ <Operation if statement is true> } else{ <Operation if statement is false> } • Example: if(counter == 5){ counter = 0; //Set counter to zero } else{ counter = counter + 1; //Increment counter by 1 }
Revision: While Loop • Keep looping while a conditional statement is true • Syntax: while(<Conditional Statement>){ <Operations if statement is true> } • Example: while(a > 5){ a = a + 1; }
Revision: For Loop • Keep looping for a certain number of iterations • Syntax: for(<CounterInital>,<CounterStop>,<CountInterval>){ <Operations while still counting> } • Example: for(j = 0; j < 10; j++){ //Do something } • If j hasn’t been declared previously can do this: for(int j = 0; j < 10; j++){ • Note j++ is the same as j=j+1
Bit Manipulations • Some functions are available to allow individual bits to be read or written to: • bitRead(x, n); • Returns the nth LSB bit of x • If a = 201; • Z = bitRead(a, 0); //Returns 1 as bit 0 is 1 • Z = bitRead(a, 1);//Returns 0 as bit 1 is 0 • bitWrite(x, n, b); • Writes a value (b = 0 or 1) to the nth LSB of x bitWrite(a, 1, 1); //Sets bit1 to high, now a = 203 Least Significant Bit (LSB)
Practice Programs • Write a program that tests the variable ‘a’ if a > 92 then set it to zero, otherwise increment it by 2 • Write a program using a while statement that loops 10 times
Summary(What you learnt in this session) • Microcontrollers are small programmable devices we write code for to control things • Arduinos are microcontrollers with lots of simple to use high level instructions • The basics of programming