Download
1 / 37
370 likes | 460 Views
Index. There are several PowerPoint 2007 features covered in this presentation. It is best to view it in Slide show Mode.

E N D
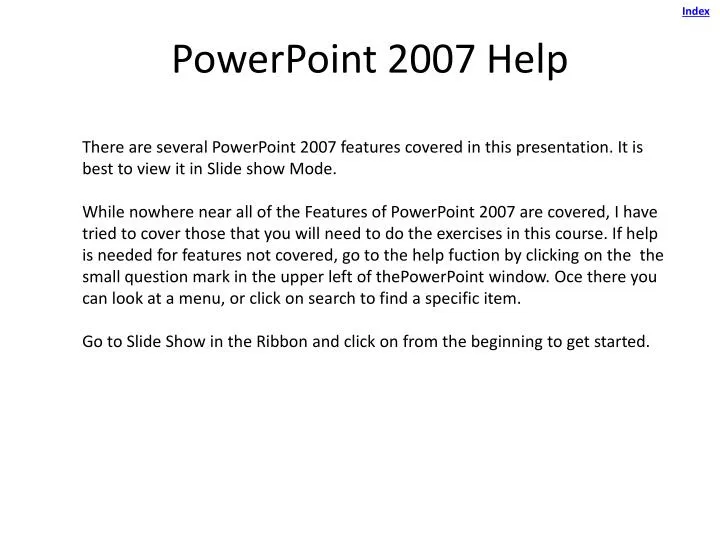
Index There are several PowerPoint 2007 features covered in this presentation. It is best to view it in Slide show Mode. While nowhere near all of the Features of PowerPoint 2007 are covered, I have tried to cover those that you will need to do the exercises in this course. If help is needed for features not covered, go to the help fuction by clicking on the the small question mark in the upper left of thePowerPoint window. Oce there you can look at a menu, or click on search to find a specific item. Go to Slide Show in the Ribbon and click on from the beginning to get started. PowerPoint 2007 Help
Animation Choices Animation Demo Borders and Fill Clip Art Inserting Creating a second Slide Guides and Grids Hyperlink Objects Adding Object Arrangement Objects Resizing Open PowerPoint Shapes Inserting Text Shapes Changing Size Shapes Fill Shapes Grouping Shapes Inserting Shapes Selection Window Slide Master Slide Master Footer Text Box Inserting WordArt Inserting Index
This is the slide that could appear upon opening PPT by double clicking on it with left mouse button. A title for this slide and a subtitle can be added here. Just click on the “Click to Add Title” or Click to Add Subtitle. An insertion icon will appear and the Title or Subtitle can be entered. Theses will both appear in a list when clicking on the Outline Tab in the left sidebar. When clicking on the Slides tab in the left sidebar a miniature of the slide or slides appears Go to next slide to see what else may open Index Open PowerPoint
Index Index Open PowerPoint 2 This is an alternate slide that could appear upon opening PPT. If it does, Click on Blank Presentation and you will get a slide display from a previous presentation, if listed in the right side bar, if chosen.
Index Index Guides/Grids Show and Hide On the Home tab, in the Drawing group, click Arrange, point to Align, and then click Grid Settings. Tip You can also right-click an empty area of the slide (not a placeholder (placeholders: Boxes with dotted or hatch-marked borders that are part of most slide layouts. These boxes hold title and body text or objects such as charts, tables, and pictures.)) or the margin around the slide, and then click Grid and Guides. Under Go to next slide. You need to draw an object of some knd and sellect it to see the s
Index When Guide settings check box is checked, the Display drawing guides will appear on screen. When it is unchecked, they will disappear. Chose the desired setting and click OK. A Grid overlay can also be viewed or not viewed by checking or un-checking the Display Grid on Screen checkbox. Either the guidelines or grid lines can be used to align objects, Including textboxes on the slide. The objects can be aligned by the top, bottom, sides or center of object. The object will pop to the line when moved close to the position you want. The guide lines can be moved up, down, right or left. A number representing the position appears when clicking on the guide line. The Gridlines can also be turned on and off by going to the View/Show/Hide. A ruler can also be turned on, and off here, as well as turning other options on and off. Guides/Grids Show and Hide 2
Index To create another slide after the first slide, click on New Slide in the Slides tools on the Home Tab The slide displayed below will appear. Unfortunately this is the default slide that appears on all subsequent slide. Do not use this slide. Click on Layout in the Home Slides group A window opens displaying several choices. If you want to retain the format of he slide being worked on create a duplicate slide rather than a new slide. Do this by clicking on the layout triangle By the words New Slide, to open a menu window, at the bottom will be a “Duplicate selected Slides” option. For Layout choices, see next slide Creating Second Slide
Creating Second Slide 2 Index When clicking on the Layout selection the window below appears. Click on the Title Slide Layout and the slide will appear as it does beneath the Layout window illustrated below For this course the second and all subsequent slides are to use this format . The First slide in a presentation should have the Title Slide format, subsequent slides the Title Only format. The Title and Subtitle, when used,s can have the text format revised, or can be deleted. Creating Second Slide 2
Index Objects Adding There are many objects that can be added to a web Page. Open the Insert tab to view the options Four of these are addressed in this help presentation. Two are available via the Illustration set: Clip Art for adding images (pictures are for adding pictures you have on file) and Shapes. The other two are accessed via the Text Set These are Text Box and Word Ar.t
Index When the Text Box icon is clicked, three things occur. 1.When placing the cursor over the slide area, a downward pointing arrow is displayed. 2. When the arrow is placed where the text is start, click on it and a + sign appears. 3. Dragging the plus sign to the right creates a rectangular text box with the insert cursor blinking in it. Now the text can be entered. The Text Box can be resizde by grabbing on one of the handles and dragging the box to the desired size. It can be rotated by clicking on the Green dot, the cursor changes to a circle with arrows and dragging it to the right or left turns the text to verticalor any other angle chosen. If the text box gets too long, grab a handle and make it smaller. Borders and fill can also be added to the text box. Just click on it and select the Drawing tools tab above the Format Tab, More on this in a later slide. Inserting a Text Box
Index Inserting a Text Box 2
Index To insert a clip art image, Click on “Clip Art.” When this is done, the sidebar to the right of the slide appears. Click on: “Organize Clips…” and the window below is displayed. When it does, select “Office Collections.” Several folders appear. When clicking on a folder the slides contained in it are displayed to the right of the folders. In this example, The nature folder is chosen. The picture depicting hand holding flowers is dragged to the slide proper, when completely on the slide a dotted rectangle appears. Releasing the mouse puts the image in place of the dotted rectangle. Next Slide. Inserting a Clip Art
Index Resizing Objects The following is not true for Text Boxes These can be rotated, however stretching right or left merely changes the size of the Text Box and rearranges the text as seen in a previous slide. Other objects can be enlarged so they keep the proper proportion, or stretched both horizontally and vertically. This is done by grapping on of the handles on the object and sliding the mouse right, left, up or down. To keep Proportions Stretch from any corner. To Stretch horizontally grab a side handle, to stretch vertically grab a top or bottom handle. To rotate click on the green circle at the top and move the mouse right or left.
Index Borders and Fill All Objects can be filled and can be outlined with borders. Some but not all Clip Art can be filled with available backgrounds. To add features to the object, select the object and click on the Picture Tools tab, then click on the down triangle (can’t be seen here at the left of the Picture Styles bar. A window will open that displays the options for formatting the object. The window displayed below shows the options for filling an object. For this particular image, I chose the Solid Fill. There are choices for several different types of backgrounds for the object. Play with them to see the various effects. Other choices for the formatting, are Line color for the border shadow effects, etc. Borders can also be chosen by clicking on Picture Border, or shape by clicking on Picture Shape. If an object is hidden by another object, click on the object doing the hiding and send to back. Images can also be brought forward. Go to Alignto see the choices for positioning images.
Index Inserting Shapes In the Home Tab and located above the Drawing Bar is a small rectangular window displaying several icons illustrating different shapes. Click on a shape icon, like the rectangle, and placing the cursor over the slide development area. When this is done a small + icon appears replacing the normal arrow. The chosen shape is created by dragging this arrow in any direction. The farther the arrow is dragged the larger the shape. Shape size can be changed by grabbing on one of the handles and dragging it to the desired shape. A square can be created by holding the shift key down while dragging. This is true when creating a circle as well. Different shapes can be found by scrolling the through the window as displayed below. Go to next slide for more information on shapes. +
Index Changing Shape size Some examples of different shapes and how they can be manipulated. Also a window with all the shapes can be displayed by clicking on the small triangle with the bar above it in the shapes window. Go to next slide to see this window. +
Index Shapes Window This is the window that appears when clicking the small triangle with bar in the smaller shapes scroll bar Go to next slide for borders and filling shapes +
Index This slide covers two things. First the window seen to the left is the same window displayed in slide 11.In the wind the action required is chosen: Fill, Line color, Line Style, etc. Clicking on one of these results in the various actions that can be performed for each category. Line can have colors. Thicknesses and styles changed, This includes the lines around borders. Fill colors can be changed and shadows can be placed around the object, the dame as for images and text boxes. Text can be placed in side these objects. Using the text box enter the text to be displayed . The text can disappear if the shape is clicked on. This is because the text is displayed behind the object. When the text is moved over the box it will be highlighted. It can be brought to the front by clicking on the Bring to Front icon. If it has disappeared already it can be brought into view by highlighting the shape and then clicking on the Send to Back icon. To see why objects are on different plains go to next slide. Shapes Fill and Text
Index Grouping Shapes
Index Slide Object Arrangement
This slide must be viewed in slide Mode Click on Slide tab and choose “From Current Slide” on the Left of the Ribbon . Click on Enter until end of show (this slide only). Index Animation Demo This slide is to demonstrate animation. Text or any other object can be animated to add zip to a presentation. Animation only works in the Slide Show mode. Then the objects can be mad to appear (the text you are reading just appears) in various ways, fly randomly around the screen and many other effects. Sound can be added as well. To bring up the next object click on the enter key down arrow key. To Reverse click on the up arrow key. If not already in slide mode Click on the Slide Show tab and then on from the beginning. And let this single slide show begin. Text can just appear as in this text, Or… Text can be made to fly in from the left, Or from the right Boring if too long Text came come in one character at a time It can also come in at one word at a time Clip Art can also fly in fast Or fly in slow
Index Animation Choices 1
Index Animation Choices 2
Index Animation Choices 3
Index Animation Choices 3
Index Slide Master 1 To create or the Change Slide Master First click on the View Tab button, Then Click on the Slide Master button The Slide Master is a special slide that enables you to put the same object on each slide that you have created. You can add text, WordArt or Clip Art, as you desire. This is also where you add footnotes and page numbers to the presentation slides. To create a Slide Master in this exercise you must open the slides in Exercise 1 (your presidential election slides). Then open the slide master view. Once open, place the objects requested on the slide. You must be careful where the object is placed on the Master slide as it will appear behind and objects that are on the Normal slide, that is the slides in the presentation that you are creating. So, you may have to go back to the slide master and move things around, so they are not behind objects on your normal slides. There are also slide masters for the handout master and the notes master that enable you to put headers and footers on these slide.
Index Slide Master 2 This is the window that will appear when you view the Slide Master. The Miniature windows in the left sidebar depict the various slide layouts available to you when creating the slide show If you want the objects on the Master Slide to appear on all slides choose the first, the largest, of the miniatures. For other options see next slide.
Index Slide Master 2 When the Slide Master option opens, the window that appears has several miniature windows in the left side panel. Each of these windows depicts one of the slide layouts available. When a specific slide layout is chosen, when creating slides, the objects you place on the Slide Master layout choice appear only on those layouts you have chosen for specific slides. If you have no specific slide layouts, but chose one for the Slide Master objects, they will not appear on any slides. For the Slide Master objects to appear on all of the slides regardless of slide layout type, you need to put the Slide Master objects on the first (the largest) of the slide images in the left side panel
Index Slide Master Footer Insert Slide number, Insert Footer Insert Date & Time all create the above window. The “Date and Time,” “Slide Number” and “Footer” check boxes must be checked as above for the Information to appear on all of the slides. A small rectangle appears for each one chosen. You can enter comments in the footer. DO NOT enter any numbers in the Slide number box. A counter is set up to do this automatically when you check ”Slide Number.” Dates can be fixed (you set) or updated automatically (PowerPoint sets).
Index Insert WorArt
Index Insert WorArt 2
Index Text Box Text Fill Drawing Tool Selction Text Outline To get the Text box tool, go to Insert Tab/Text Group/Text Box. Click on Text Box and position the insert arrow at the place the text box is to be inserted and start typing. This box can be moved, resized, filled with a color or a border can be paced aound it. This Text Box is filled with the color white and has a 13pt black border around it. To select tools and fill, first click on the text box. (make sure the insert tool isn’t present), the Drawing Tools Format tab will appear. The fill and border functions can be selcted by clicking on the Text fill icon and the Text Outline icon For more effects, open the Format Text window
Index To use this tutorial presentation you should be in the slide show mode. This will enable you to use the hypwelinks Link Index Adding Hyperlinks • Link to Slide in this Presentation – • Method 1. Insert Hyperlink in a word or sentence • Method 2. Insert Hyperlink in a word or sentence • Removing a Hyperlink • Other Hyperlinks Since a link can be created that will link a slide to any other slide I created one here to return to the first slide in this tutorial. I then copied it and pasted it to each slide,This way can get from any slide back to my index. This can also be put on a Slide Master so it appears automatically on the rest of the slides. There is a section in this slide show that illustrates how to created a Slide Master, Go to the index and click on Slide MAster
Index You can now go back to the slide with the link just created. To test you must be in Slide Shjw mode Insert Hyperlink in a word or sentence 3. Left click onthe name of the slide that you want to display next and left click on it. (second slide in this presentation 1. Left click on Insert tab, then on Hyperlink 2. The window below opens, In the left sidebar, left click on “Places in this document
Index Method 2. Insert Hyperlink in a word or sentences Highlight the word or sentence in which a Hyperlink is to be inserted. Then while it is selected, Position the pointer over the shaded area and right click the mouse. The illustrated window appears as below Left Click Hyperlink. The same window appears as in Method one andthe same choices made create the link to another slide
Index Other Hyperlinks If it is desired to link to these Email, or otherdocuments left click on Hyperlink. The same window that appears as in Linking same document The choices are: Existing File or Web page, browse the choices or type in a URL Email adress Type in Email Address in space provided Create new document – Create a new document and Edit now or later
Index Remove a Hyperlink To remove a Hyperlink, highlight the link then position the pointer over the highlighted link and click the right mouse button . The menu illustrated below appears. Click on remove Hyperlink and voila it is gone,