Download
1 / 53
600 likes | 922 Views
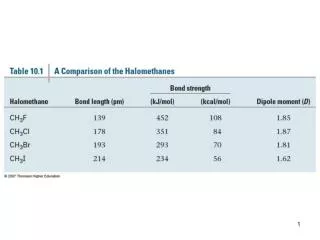
CI-340 Training. Hand-Held Portable Photosynthesis System. Introduction. Smallest, Lightest Truly Portable Entirely Self-Contained System Open or Closed System Data Download to Computer Wide Leaf Chamber Selection. Features. Infrared CO2/H2O Gas Analyzer

E N D
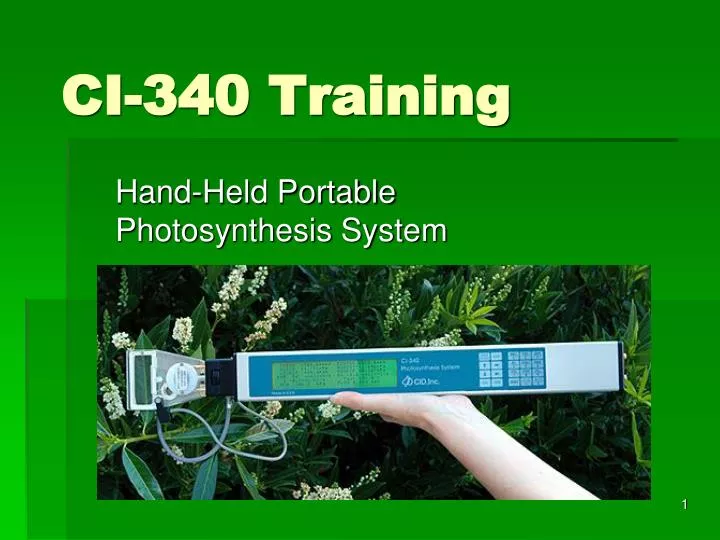
CI-340 Training Hand-Held Portable Photosynthesis System
Introduction • Smallest, Lightest • Truly Portable • Entirely Self-Contained System • Open or Closed System • Data Download to Computer • Wide Leaf Chamber Selection
Features • Infrared CO2/H2O Gas Analyzer • Infrared Non-Contact Leaf Temperature Sensor • H2O Analyzer • PAR Sensor • Air Temperature Sensor
Competitors • Li-Cor • PP Systems • ADC • Walz
Initial Set-Up • Battery Installation • Leaf Chamber Installation • Powering Up • Keypad Use
Function of Leaf Chamber • Stable environment • Housing for sensors • Self-contained fan for air circulation?
Installing a Leaf Chamber • Make sure O-rings are on the end tubes • Insert the end tubes into the CI-340 • Align and tighten the end screw • Insert IR Temperature sensor and PAR sensor into the leaf chamber and CI-340
Powering Up • Press and hold the key for a couple seconds • The display will read “Waking Up” • Allow instrument to warm up for 4 to 30 minutes before using
Using the Keypad • Pressing a key should give a “beep” • Press each key one at a time
Keypad Commands Activates the instrument Deactivates the instrument Moves cursor in menu Backspace key when entering numbers or text
Keypad Commands Aborts the operating function or stops measurements Starts measurements without saving the data Permits user to save the data or information to a file Selects next menu/function and enters data if in a special menu
Keypad Commands Enters numeric characters (and alpha characters when preceded by ) Switched to upper-level character commands. Pressing several times allows user to enter the various shifted characters.
Lab 1: Assembly • This lab will cover: • Battery Installation • Leaf Chamber Installation • Powering Up • Keypad Use
General Operation • Selecting and Using a Leaf Chamber • Taking Measurements • Open System • Closed System
Open System Square Wide Rectangular Narrow Rectangular Small Cylindrical Large Cylindrical Closed System ¼ Liter ½ Liter 1 Liter 4 Liter Selecting a Leaf Chamber
Using a Leaf Chamber • Place sample in open chamber • Gently close, it will lock in place on the sample • Allow chamber environment to stabilize for 30 seconds before measuring • Push the release head forward to open the chamber once measurements are complete
Taking Measurements • Press the key • Enter the desired file name • Enter “P”, “S” or “C” for the Measurement Type • Enter “0” if not using accessories
Taking Measurements • Enter the area of the leaf sample (in cm2) • Enter the intended flow rate (in lpm) • For open system, press • Press “C” for closed system • For closed system, attach loop to gas input and output before taking measurements
Taking Measurements • Display will read “Warming Up” while the chamber environment stabilizes • Once the unit is done warming up, the display will read “Working” and count down to 0 • The data will display, use the keys to view both data displays • Press “G” to view data as graph
Labs 2/3: Measurements • Lab 2 will cover: • Selecting a Leaf Chamber • Using a Leaf Chamber • Taking Open System Measurements • Lab 3 will cover: • Selecting a Leaf Chamber • Using a Leaf Chamber • Taking Closed System Measurements
File Viewing • Files in CI-340 • Software Installation • File Download • Saving Files on Computer • Interpretation of Data
Finding Files • Press key when “Enter File menu” displays • Use the “up arrow” and “down arrow” to view the stored files • Files stored chronologically • Press “EXIT” to leave the menu.
Deleting Stored Files • Press “SHIFT” + “DEF” to delete last file saved • Press “SHIFT” + “YZ_” to delete all files
Software Installation • Load CD into CD drive of computer • Open the CD • Double-click “Setup.exe” to install • Follow installation instructions
File Download • Connect the USB cable to CI-340 and computer • Start “C340DF.exe” on the computer • “File – Open” • Select files to download and click “Open”
Saving Files on Computer • After downloading, select File, Save to save the data • Power down the instrument or press to take more measurements • View the files with spreadsheet program before deleting from CI-340
Interpretation of Data A SAMPLE DATA FILE
Lab 4: File Viewing • This Lab will cover: • Finding and Deleting Files • Software Installation • File Download • Viewing Files on Computer • Interpretation of Data
Environmental Control Modules • Light Module CI-301LA • CO2 & H2O Supply Module CI-301AD • Temperature Control Module CI-510CS • Chlorophyll Fluorescence Module CI-510CF
Using Modules • After entering a file name, enter the appropriate number for the module used: • CI-510CS – 1 • CI-301AD – 2 • CI-301LA – 4 • For multiple, add numbers and enter
Module Attachment • The CI-340 Battery Pack is necessary to operate the modules to control • light • temperature, • CO2 concentration • humidity level • chlorophyll fluorescence measurement The colored jacks on the accessory control cable indicate the accessory / module to plug into. red plug to CI-510CS blue to the CI-301LA green to the CI-510CF yellow to CI-301AD
Light Module CI-301LA used as an alternative to sunlight and an intensity-controlled light source. The light emitted covers the photosynthesis wave band.
Lab 5: CI-301LA • Lab will cover: • Set-Up • Measurements • Data Analysis
CO2 & H20 Control Module CI-301AD a CO2 cartridge and soda lime to regulate CO2 levels with a concentration adjustable from approximately 0 to 2000 ppm at flow rates up to 0.5 lpm. uses silica gel and water to control humidity level from approximately 5% relative humidity to 20-30% above ambient humidity levels up to 95%., and
Lab 6: CI-301AD • Lab will cover: • Set-Up • Measurements • Data Analysis
Lab 7: CI-510CS • Lab will cover: • Set-Up • Measurements • Data Analysis
Chlorophyll Fluorescence Module CI-510CF This module performs two functions: 1 - generated chlorophyll fluorescence trace data, 2 - individual pulse (calculated) data. From this, complex kinetic tests can be performed and analyzed.
Lab 8: CI-510CF • Lab will cover: • Set-Up • Measurements • Data Analysis
Care & Maintenance • Instrument Care • Battery Care • Leaf Chamber Care • Module Care
CI-340 Care • Avoid unneeded movement and shock • Avoid very high humidity and moisture • Avoid very dusty conditions • Use in temperatures 5-45°C • Store in cool, dry location in case • Do not open or break the seal • Turn off before removing battery