Download

1 / 29
290 likes | 445 Views
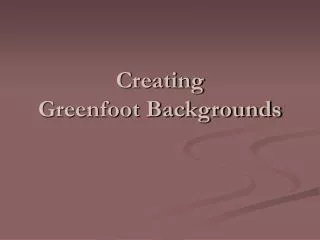
Creating More Effective Backgrounds. Hands-on Approach to Creating More Effective Backgrounds Dr . Steve Broskoske Misericordia University. Reasons to Use Creative Backgrounds. Support content. Illustrate content. Create a sensory experience. Support organization of presentation.

E N D
Creating MoreEffective Backgrounds Hands-on Approachto Creating More Effective BackgroundsDr. Steve BroskoskeMisericordia University
Reasons to UseCreative Backgrounds • Support content. • Illustrate content. • Create a sensory experience. • Support organization of presentation. More Effective Learning
A Word about Themes • MS Office Help states: • Document themes are shared across Office programs so that all of your Office documents can have the same, uniform look. • This feature makes designing the screen “easy” (dumbs it down). • Everything looks the same. Translation: boring!
A Word about Themes • While you don’t want to create a different background on every slide (that’s overkill), having the same background (theme) on every slide is B-O-R-I-N-G! • Didn’t we say that PP has the power to hold learner attention? It also has the ability to lose attention and bore an audience, depending how skillfully you use it.
Choosing a Solid Color How to Do It • Select design tab. • Under the backgroundgroup, press the little arrow to open the format background dialog box. • Select solid fill and choose colors.
Using a Solid Color Any Color to Indicate a Theme
Using a Solid Color Counting Money
Using a Color Gradient How to Do It • Select design tab-- backgroundgroup, open the format background dialog box. • Select gradient fill. • Select preset color OR make your own.
Using a Color Gradient How to Do It • Pick colors (stops). • Slide stop positionslider.
Using a Color Gradient Any Color to Indicate a Theme
Using a Color Gradient Exploring the Hot Sun
Trick Trick: Duplicating Slides How to Do It If you create a background you want to reuse, you can duplicate a slide and then edit it. • On the left-hand slide pane, right-click a slide, and select duplicate slide. Now you can edit the new slide. Alternately, you can select another slide(s) and press control-Y to repeat the action.
Using a Color Gradient A Pond
Using a Color Gradient A Beautiful Blue Sky
Using a Color Gradient A Rainbow
Using a Texture How to Do It • Select design tab -- backgroundgroup, open the format background dialog box. • Select texture fill. • Select texture from list.
Using a Texture Any Backgroundto Indicate a Theme
Using a Texture Prehistoric Times
UDL Alert! Making Text Boxes Readable How to Do It • Double-click a text box border (be out of the box) to open drawing tools--format. • From the shape styles group, use the following tools as needed: • Shape fill. • Shape outline. • Shape effects.
Using a Texture How an Historical Figure Died
Background Washout Graphics How to Do It (Method 2) • Select insert tab -- illustrationsgroup – Clip Art OR picture. • As in Word: • Resize picture as needed. • Under picture tools--format, in the adjust group select recolor and washout. • Right-click graphic and select send to back.
Using Background Graphics Learning About Computers
Using Background Graphics Learning about a City/Country
Tricks with Graphicsand Text Boxes How to Do It • Select the insert tab -- Clip Art OR picture from the illustrations group. • From the insert tab, select text box from the text group. • Position and format text box to achieve desired effect.
Tricks with Graphics and Text Boxes See What the Teacher Writes
Tricks with Graphics and Text Boxes You Can Write in This Book
Tricks with Graphics and Text Boxes Write on the Computer Screen
Tricks with Graphics and Text Boxes Reminder: Transparent Color
Tricks with Graphics and Text Boxes Reminder: Compressing Images