Download
1 / 14
180 likes | 431 Views
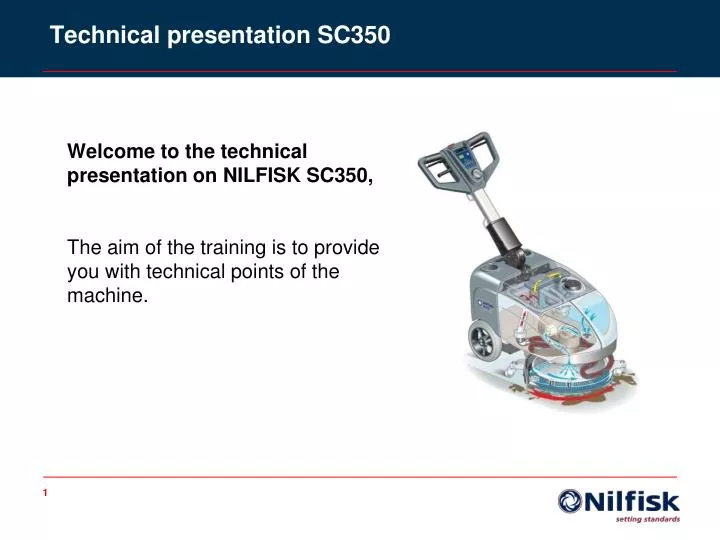
Technical presentation SC350. Welcome to the technical presentation on NILFISK SC350, The aim of the training is to provide you with technical points of the machine. Technical specifications. Turnable BRUSH DECK.

E N D
Technical presentation SC350 Welcome to the technical presentation on NILFISK SC350, The aim of the training is to provide you with technical points of the machine.
Turnable BRUSH DECK The system works once the machine is lifted due the friction of the rubber pad (D) on the top of the brush allow the deck is pulled by the brush rotation. Disassembly: Remove the screw (C), then remove the hub assembly (D). Remove the 4 screws (E). Remove the gear motor. Remove the 4 screws (A), the flange (B) and disassemble the brush deck. Check the rubber pads (D) for integrity; if necessary replace them.
BRUSH DECK - TROUBLESHOOTING Open circuit The resettable fuse (F1) determines an open in the supply circuit of the brush deck motor. This system allows to prevent the circuits from being damaged under overload conditions. The open in the fuse can be caused by the following: 1. Short circuit in the brush motor wiring harness; fault in the motor. 2. Overvoltage of the gear motor. Brush do not turn Possible causes: 1. The brush motor electromagnetic switch wiring harness is damaged (repair). 2. The brush motor electromagnetic switch (ES1) is damaged (replace). 3. The brush motor fuse (F1) is tripped (reset). 4. The motor is faulty (repair or replace). 5. The wiring harness is damaged (repair). Malfunction of the brush deck mechanical rotation system Possible causes: 1. The rubber pads between deck and brush are worn (replace). 2. The rubber damping joint is worn (replace). 3. The end-of-stroke cable is broken (replace).
BRUSH MOTOR ELECTRICAL INPUT CHECK Lift the machine, Apply an ammeter on the blue power supply cable, Turn on the machine with the main switch, check that the electrical input of the motor is 6-8 Amps at 12V. (without load) If the electrical input is higher: Check if there is dust or dirt (ropes, cables, etc.) on the brush hubs. Disassemble the motor and check the condition of all its components. Replace the motor. NOTE Sealed gearmotor, No carbon brush replacement, No motor available separately, No gearbox available separately
SOLUTION SYSTEM SOLENOID VALVE Solenoid valve (E) has stamped arrow (F) must be tuned in the direction of the solution flow as shown in the figure.
SOLUTION SYSTEM - TROUBLESHOOTING Small amount of solution or no solution to the brush Possible causes: 1. The solution tank valve is clogged/dirty or broken (clean or replace). 2. The solenoid valve (EV) is broken or there is an open in the electrical connection (replace the solenoid valve/repair the electrical connection). 3. There is debris in the solution tank clogging the output hole (clean the tank). 4. There is debris in the solution hoses and/or reducer clogging the flow (clean the hose). The solution reaches the brush also when the machine is off Possible causes: 1. There is dirt or calcium deposit on the solenoid valve gasket (clean). 2. The solenoid valve (EV) is broken (replace).
VACUUM SYSTEM Apply an ammeter on the cable (B), Turn on the machine with the main switch, Check the motor electrical input is 15-18 Amps at 12V.
VACUUM SYSTEM - TROUBLESHOOTING The vacuum system motor does not turn on, Possible causes: 1. The vacuum system motor wiring harness is damaged or disconnected (repair / connect). 2. The fuse (F2) is blown (replace). 3. The vacuum system motor is faulty (check the electrical input). Dirty water vacuuming is insufficient or there is no vacuuming, Possible causes: 1. The vacuum grid with automatic shut-off fl oat is activated because the recovery tank is full (empty the recovery tank). 2. The debris tray is clogged (clean). 3. The vacuum grid with automatic shut-off fl oat is dirty, or the vacuum pre-filter is dirty (clean). 4. The tank cover is not correctly positioned (adjust). 5. The tank cover gasket is not efficient (replace/clean). 6. The vacuum system motor filter is dirty (clean). 7. The squeegee or the vacuum hose is clogged or damaged (clean or repair/replace). 8. The vacuum gaskets are damaged or do not match perfectly (repair or replace). The squeegee leaves lining on the floor or does not collect water, Possible causes: 1. There is debris under the blade (remove). 2. The squeegee blade edges are torn or worn (replace).
Battery & onboard charger • Standard on-board charger • SPE CBHD2 12V 12A high frequency • POWER SUPPLY:100-240 V±10% 50-60 Hz • PROTECTION GRADE: IP66 • Fully controlled by machine electronics • CERTIFICATION: UL RECOGNIZED, PSE MARKED • DEFAULT CHARGING CURVES: OPTIMA BATTERIES OPTIMA BATTERY 12V 55 Ah C20 AGM SPIRACEL - BTDCM4.2
Battery & charger curve selection DIPSWITCH CONFIGURATION To change the dipswitch configuration, remove the round black cap located close to the openings on the bottom of the charger using a tool like a screwdriver.
END OF PRESENTATION QUESTION & COMMENTS?