Download
1 / 50
520 likes | 735 Views
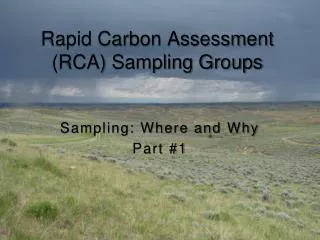
Rapid Carbon Assessment. Major Steps. Goals. Soil carbon inventory Management/Cover effects on soil carbon. Major Steps. Navigate to RCA Location/point Verify Soil Group and Land Use Layout Plot Document Land Cover/Use Collect Pedon Data and Samples. Transport and Store Sample

E N D
Rapid Carbon Assessment Major Steps
Goals • Soil carbon inventory • Management/Cover effects on soil carbon
Major Steps • Navigate to RCA Location/point • Verify Soil Group and Land Use • Layout Plot • Document Land Cover/Use • Collect Pedon Data and Samples • Transport and Store Sample • Analyze Moist Sample • Dry Samples • Analyze Air-dry Sample • Compile and Upload Data
Step #1: Navigate to RCA Sample Location (point) • This sample point has been selected because it falls in a particular soil group and land cover/use. • The permissions for access to this land should have already been cleared by the local District Conservationist or other local official, but this should be confirmed. • The sample point can be moved within the same land use and map unit component for any of the following reasons: • Unsafe conditions • Extreme disturbance (for example: fence, road, borrow pit or other new construction)
If you need to move a point… • Move the point to the nearest location (up to 50m) that meets the soil group and land cover/use requirements • Record the azimuth and distance of the offset of the Plot Master Form (up next) • If the point cannot be reasonably moved, it should be rejected. • The sample point can also be rejected through step #2 and #3.
If a point is rejected, • You will then need to plan to visit another point from that group and land use/cover combination in the future. When that is accomplished will depend on your schedule and the location of appropriate points. This is logistically challenging, but important to meeting the overall goals of the project.
Step #2: Verify Soil Group and Land Use • Is it in the correct soil group and land cover/use? • Assess visually • Confirm with excavation of soil • If not, can you find the correct soil group and land cover/use within 50m ? • Assess visually • Confirm with excavation of soil • If yes – record offset and go to step #3 • If not – reject point
Step #2: Verify Soil Group and Land Use No No Does the point appear to meet the target land use? Is the target landuse accessible within 50m Reject • Identify target soil group series (components) and land use • Use decision tree to either accept or reject the point Relocate to suitable location Yes Yes Is a soil in the target group present within 50m No Does soil present appear to fall within the target soil group? No Reject Relocate to suitable location Yes Relocate to suitable location Yes Not verified Excavate at point to verify component/ soil group Continue with Step 2) Layout Plot Verified
Step #3 - Plot Layout • Rapid C Assessment Sampling occurs in a nested or clustered design. • A center pedon (point 1) is a located at the Rapid C Sample Point/Location • Outer pedons (Point 2 – 5) are clustered around the central pedon according to the following procedure.
Procedure for locating pedons • Complete Ste #2: Locate center point (pedon) and confirm the soil group and land use. • Determine whether a standard or modified cluster will be necessary by asking: • What is the minimum distance to soils that would fall in another group, an alternate land cover or use, or access impediments (such as a property line)? • Min > 30m: use standard cluster • Min < 30m: Assess the direction of suitable locations
Procedure for locating pedons • On what portion of a 360o circle do these restrictions occur? • < 25%: use standard cluster distance and rotate directions (Rotated Cluster Design) • > 25 %: move central pedon towards the center of the polygon • Use original pedon as outer pedon (Shifted Cluster Design) • If this fails use chain or other design (Chain Cluster Design) • If 5 suitable points cannot be located at the current location – REJECT the location.
Pasture Cropland 30 m
Cropland Pasture 30 m
Soil A – Group 1 Soil B – Group 9 Soil B – Group 9 30 m
Soil A – Group 1 Soil B – Group 9 Soil B – Group 9 20 m 30 m
Soil A – Group 1 Soil B – Group 9 Soil B – Group 9 20 m 30 m
Soil A – Group 1 Soil B – Group 9 30 m Soil B – Group 9 30 m 30 m
Soil A – Group 1 Note: You will still record the location of the outer points as azimuth and distance from the central point. Set your points up 30 m apart Sight azimuth back to central point. Either measure distance or use geometry to calculate Soil B – Group 9 30 m Soil B – Group 9 30 m 30 m
After a layout is Determined… • Record type of plot of Plot Master Form • Record location of center pedon • Including any offset information • Flag and record location of outer pedons • Count bare ground at each meter mark • along tape as its being laid out
Step # 4: Document Land Cover/Use • Photograph the plot from various angles • At min: from center towards each outer point and straight down on center point • If available in your area: • Ecological site ID – this is correlated to soil component phase • Community Phase ID – use ESD to idenitify the community name and ID. • Disturbance • note the type and distance to any acute disturbance that may influence soil carbon stocks (for example: water trough and trampling)
Step # 4: Document Land Cover/Use • ESD, If available in your area: • Ecological site ID – this is correlated to soil component phase • Community Phase ID – use ESD to identify the community name and ID. • Disturbance • note the type and distance to any acute disturbance that may influence soil carbon stocks (for example: water trough and trampling)
Step #4: % Bare Ground • As you are laying out your outer points • Walk the length of tape • At each meter mark from 6 - 30 m, note if the soil surface is bare or covered. • Count number or bare marks for each tape. • Sum the 4 bare ground counts to get an average % bare ground.
Step #4: Forest Info • Is it a plantation: yes/no • Is it bedded: yes/no • Stage (of rotation) - what percentage of the rotation is complete: regeneration, 0 – 25, 25 – 50, 50-75, or 75 – 100% complete
Step #4: Forest Info • Basal Area • Use an angle gauge to estimate Basal Area of standing tree > 4 in. in diameter • BAF: factor, size of opening in the angle gauge – 5, 10, 20, 40 • Nmbr in – number of trees that fill the gauge at that factor • First 4 trees counted “in” for BA • Estimate DBH with a Biltmore stick • Estimate height with clinometer • We’ll practice these outside tomorrow!
Step #4: Dominant Species • Visually assess the most abundant species • Record whatever information is known about each species • National Plant Symbol is from the NRCS website/database and can be added later in the office
Step # 5: Collect Pedon Data and Samples • General Guidelines • Dig a shallow pit to at least 50 cm. • Use probe or auger to sample to 100cm • Observe to a depth necessary to ID the soil • One arbitrary sample from 0 -5 cm will typically be described and sampled as a horizon (see decision rules) • A description for each pedon/point will be entered into Pedon PC for all horizons
Step #5: Collect Samples • Collect samples using Sample Collection Decision Rules • Determine bulk density sampling procedure using decision rules. • Collect Samples, carefully labeling bag with RCA pt number, point/pedon number, and the layer information
Sampling Decision Rules Most General Level • Sample surface horizons with special rules • Sample 0 – 50 cm for Bulk Density and VNIR Carbon • Sample 50 – 100 cm for VNIR Carbon only
Surface Sampling Decision Rules • O horizons (Db and VNIR carbon sample). • Horizons at mineral surface (Db and VNIR carbon sample): • upper most mineral horizon (not O) • Mineral surface horizon < 2 cm thick • Sample surface horizon • Sample from bottom of surface horizon – 5cm
Surface Sampling Decision Rules • Mineral surface horizon 3 – 5 cm thick • Sample entire surface horizon • Sample from bottom of surface horizon by genetic horizon • Mineral surface horizon 6 – 7cm thick • Sample for Db and VNIR carbon from 0 – 5 cm or top of horizon – top of horizon+5 cm • Db and VNIR carbon obtained will be applied to entire horizon. • Mineral surface horizon >7 • Sample for Db and VNIR carbon from top of horizon - +5cm • Sample from +5 – bottom of surface horizon.
Sub-surface Sampling Decision Rules • Other mineral horizons to 50 cm (Db and VNIR carbon samples using Db method flow chart): • By genetic horizon • Horizons < 3cm thick • Sample with most similar adjoining horizon • Horizons 5 – 50 cm thick • Use Db method flow chart • Db sample will be used for both Db and carbon • Horizons 50 – 100cm from the surface (NVIR carbon sample only) • Collect by genetic horizon
A = 0 - 25 cm Samples Bulk Density and Carbon • A1 – 0-5cm • A2 – 5 – 25cm • E and Bt1 – 25 – 50cm Carbon Only • Bt2 – 50 – 86 cm • BC – 86 – 100 cm E = 25 - 27 cm Bt1 = 27 - 50 cm BT2 = 50 - 86 cm BC = 86 - 101
A = 2 cm Bw1 = 2 - 24 cm Samples Bulk Density and Carbon • A: 0-2cm • Bw1a: 5 – 24cm • Bw1b: 24 – 47cm Bw2 = 24 – 47 cm R
A = 0 - 7 cm Bt1 = 7 - 14cm Samples Bulk Density and Carbon • A: 0 - 5cm • Bt1: 7 – 14cm • Btk1: 14 – 35cm • Btk2: 35 – 81cm Carbon Only • BC : 81 – 100 cm Btk1 = 14 - 35 cm Btk2 = 35 - 81 cm BC = 81 – 123 cm
Oa = 0 – 4 cm A = 4 – 13 cm Samples Bulk Density and Carbon • Oa: 0 – 4cm • A1: 4 – 9 cm • A and E: 9 – 15cm • Bhs: 15 – 27cm • Bs: 27 – 53 cm Carbon Only • C: – 53 – 100 cm E = 13 - 15 cm Bhs = 15 - 27 Bs = 27 - 53 cm C = 86 - 101
Bulk Density Decision Rules • Will be covered in detail tomorrow • Method used will depend on the location, thickness and properties of the horizon • Compliant cavity • Scoop • Core • Full – constant volume • Partially filled – variable volume • Ring (for Oi horizons)
QA/QC • Check data as it is entered • Do hand calculations occasionally • 3% of samples will be sub-sampled and sent to SSL (Lincoln) for total carbon measurement • These will come from flagged pedons (every horizon from those pedons will be sub-sampled) • All central pedon/point horizon samples will be archived