Download
1 / 15
160 likes | 301 Views
Gothic short story/screenplay. How to…. Step 1: Prewriting. Prewriting- outline the different aspects of your story: Genre- Gothic Theme (What’s the message of your story?) Mood (What is the mood of your story?) Plot (exposition, rising action, climax, falling action, denouement)

E N D
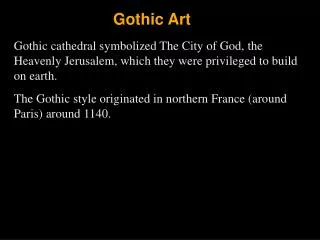
Gothic short story/screenplay How to…
Step 1: Prewriting • Prewriting- outline the different aspects of your story: • Genre- Gothic • Theme (What’s the message of your story?) • Mood (What is the mood of your story?) • Plot (exposition, rising action, climax, falling action, denouement) • Setting (when and where) • Point of View (1st person, 3rd person, 3rd person omniscient) • Conflict (problem that must be overcome) • Characterization (protagonist, antagonist, supporting characters)
Step1 Continued… • Outline and Character Sketch: • Complete the Freytag’s Pyramid Chart • Complete the character sketches for your main and supporting characters on the back of your Freytag’s Pyramid.
Step 1 continued… • Exposition • the introductory material, which often creates the tone. Gives the setting, introduces the characters, and supplies other facts necessary for understanding • Inciting Moment/Conflict • the event or force that sets in motion the rising action of a work of fiction. Also called the precipitating incident, exciting force or narrative hook.
Step 1 continued… • Rising Action • the part of the dramatic action that has to do with the complication of the action. Begins with the inciting moment, gains interest or power as the opposing groups/ideas come into conflict, and proceeds to the climax. It can also be called the complication. • Climax • the turning point in the action, the crisis at which the rising action reverses and becomes the falling action. Sometimes called the reversal.
Step 1 continued… • Falling Action • the second half of the dramatic plot. It follows the climax and often exhibits the winding down of the climax. • Resolution • the end of the falling action and the solution of the conflict. The resolution is not always a happy ending.
Step 1 continued… Character Sketches: Your sketch is not a drawing of your character, rather it is a detailed description of who your character is and what he/she is all about. • What does the character look like? • How does he/she talk? • How old is he/she? • What are his/her relationships like? • What kind of person is he/she? • What is his/her motivation?
Step 2: Begin Story • Begin Story (be sure to add dialogue) • Dialogue between characters serves a purpose – it should move the story forward and help the reader better understand your characters. • Dialogue: • Reveals character and establishes relationships • Provides exposition • Conveys a sense of place and time • Establishes and develops conflict • Dialogue Tags: he said, she replied, he answered, etc.
Step 2 continued… • Show, Don’t Tell – like good description, good dialogue shows instead of tells tells, but doesn’t show Shows us the emotion “I think you are annoyed with me,” she said. “Yes, I am annoyed with you,” he said. He jerked his head away as she tried to fix his hair. “What’s wrong?” she asked. “Nothing!” he said.
Step 2 continued… Tips on how to format dialogue: • Put all dialogue in quotation marks: • “The view from here is beautiful.” • When a quote is a complete sentence without a tag, insert a period inside the quotation marks at the end of the sentence: • “The mountains are spectacular.” • If a complete sentence is attributed to a speaker, insert a comma inside the quotation marks & put a period after the dialogue tag: • “The view from here is beautiful,” he said.
Step 2 continued… • If you want to put your dialogue tag in the middle of a sentence, put a comma inside the first set of closing quotation marks and after the dialogue tag: • “Ever since this morning,” he said, “my allergies have been driving me crazy.” • If your quotation ends with a question mark or exclamation point, put it inside the quotation marks. Your dialogue tag will still be lower case and will end with a period: • “Did you remember the bug spray?” she asked. • If you introduce the dialogue, insert a comma before the opening quotation marks and start the quotation with a capital letter: • She asked, “Did you remember the bug spray?”
Step 3: Proof reading • Once you have finished writing your story, you will need to proof read it. This means you will check for: • Grammar, punctuation, spelling errors, etc. • Missing information, clarifying details (does the story make sense? • Style (how does the writing sound? Is it choppy or does is flow smoothly from one thought to the other?
Step 4: formatting • How to format your essay: (MLA format) • Typed: • 12 point, Times New Roman font • Heading & Title • Margins Set to 1” all around • Header with Your Last Name and Numbered Pages
Step 5: turn it in • Turn your story into netschool.