Download
1 / 30
300 likes | 753 Views
A Picture Speaks A Thousand Words: Using Digital Cameras to Enhance Teaching & Learning (Adapted from work by Paula Pedersen & Helen Mongan-Rallis) Objectives - What you should be able to do after today’s class: Demonstrate specific ways to use digital cameras to teach specific concepts.

E N D
A Picture Speaks A Thousand Words: Using Digital Cameras to Enhance Teaching & Learning (Adapted from work by Paula Pedersen & Helen Mongan-Rallis)
Objectives - What you should be able to do after today’s class: • Demonstrate specific ways to use digital cameras to teach specific concepts. • Describe & explain ideas for using digital cameras & digital photos as teaching & learning tools in your own profession.
We use Sony Mavica because: • no software needed • no downloading • takes images on floppy disks • cross platform • .jpg format so web & PP ready Practical Issues • Why use photos? • Why digital cameras? • What kind of cameras?
Enhancing Teaching & Learning with Digital Photos What you do depends on what you want to achieve
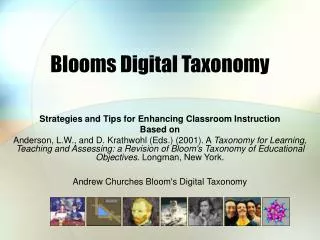
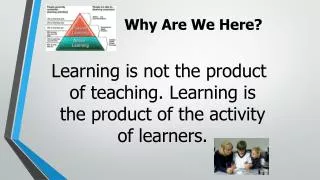
Low level ? High level A Framework for Using Photos: Using Bloom’s Taxonomy • Knowledge • Comprehension • Application • Analysis • Synthesis • Evaluation
Knowledge & Comprehension To teach or demonstratelower level thinking
Learning student names: Photos on Course Web Page.Also print hard copy and paste on course folder [Photo of students deleted from this slide because of privacy issues in having this slide posted on the web]
“how-to” guidelines for equipment use http://www.d.umn.edu/itss/classroom/MONH108/SLIDE.HTM
Guidelines for teaching students lab procedures http://www.d.umn.edu/~hrallis/guides/imovie/importing.html
Teach identification http://www.d.umn.edu/geology/coursehtmls/missrocks/intro.html PowerPoint of Minerals (shown in class & postedon the web) http://www.d.umn.edu/~pmorton/geol2300/powerpoint/color/sld002.htm
Students in Tim Roufs’ Anthro class can download a PowerPoint of slides for the class. Many of these slides show photos Dr. Roufs took with a digital camera http://www.d.umn.edu/cla/faculty/troufs/anth1602/pcweek06.html
Application & Analysis To teach or demonstratemiddle level thinking
Preparation for field trips http://www.d.umn.edu/~pmorton/geol2311/field%20trip/fieldtripoct28%2C2000.html
To learn about other cultures This can be combined with an e-mail pal program, video-conferencing, orweb-based discussion boardbetween groups of studentsfrom different cultural groups.Student from each site take digital photos and e-mail theseor post on web site for othersto see.
“Here is a photo which shows Tina facilitating the children rechecking their heights. This was a very natural outgrowth of the children's interests and did not disrupt the group.” Students take photographs atto illustrateconcepts learnedin the class.In observationlog they analyze the scenes. http://www.d.umn.edu/~hrallis/STEP/TinasObservation/ObservationOneTL.html
Synthesis & Evaluation To teach or demonstratehigher level thinking
Senior Anthropology Seminar: Students reflect on what they have learned and post this on the course web site http://www.d.umn.edu/~lbelote/srseminar/lastwords2000.html
Teaching Englishelectronic portfolio: Students are required to createa web-based versionof their teachingportfolios. This mustinclude photos & videoclips. http://www.d.umn.edu/~lmillerc/TeachingEnglishHomePage/Portfolios/Portfolio%20Requirements.html
Example of electronic (web-based)portfolio Use of photos or video clips in portfolio http://www.d.umn.edu/~kwilliam/portfolio.htm
Photos with StudentsStudents take photos of each otherto show their use of different techniques http://www.d.umn.edu/~kwilliam/student_pictures.htm
Web-based portfolio for Art Pre-Service TeacherThis student took photos ofher senior art show & createda virtual exhibition to showher work http://www.d.umn.edu/~jhummel/portfolio.html
Using Video Clips • Teaching sign language. • Teaching foreign language • Demonstration of techniques (e.g. physical education, science lab) • Speech pathology • Digital storytelling
Using still pictures to create videos Here a student usedphotos she had taken and also scannedimages to createa video to teach about water (video by Rachel Barr)
Activity • In your small groups take your digital camera and photograph examples to illustrate your topic. • Choose pictures that will promote greater understanding on the concept. • As a group, plan how you will use these pictures to teach the concept to the class.
Photo Group Assignments • Different geometric shapes (as many different kinds as you can find) • Teaching language: position of lips or tongue to create different sounds • Examples of non-verbal communication • The different parts of a computer
Sharing of Photos Show your photos. Explain how you would use the pictures you took to teach the concept.
Discussion • How did this activity expand your thinking about using digital cameras for teaching and learning? • What ways can you think of to use digital photos in your own teaching context? (Sharing in 2s)
Conclusion: Where to Now? • Select cameras that are easy to use • Begin where you & your students are comfortable • Use framework to scaffold teaching and learning (e.g. Bloom’s Taxonomy) • Be creative! Experiment • Just do it!