Download
1 / 12
120 likes | 189 Views
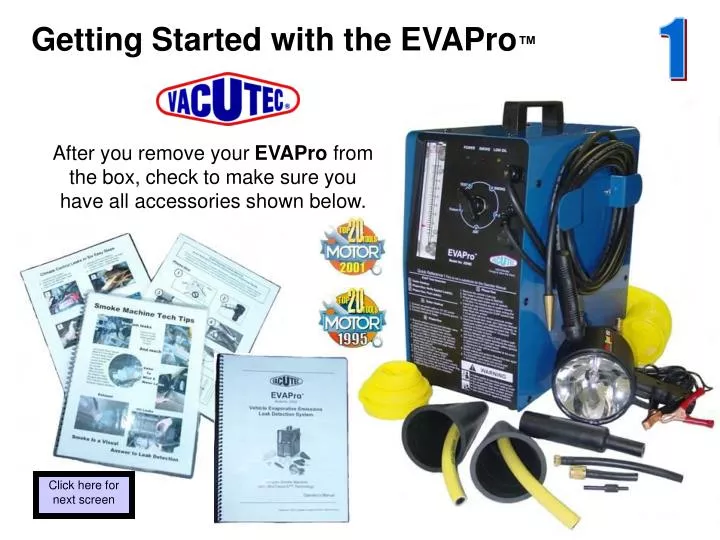
Getting Started with the EVAPro ™. 1. After you remove your EVAPro from the box, check to make sure you have all accessories shown below. Click here for next screen. 2. Power. ON. Flow Meter. Check Oil. Fail Pass. Flag. Power. On. Flow Meter Ball. Check Oil. Selector Switch.

E N D
Getting Started with the EVAPro™ 1 After you remove your EVAPro from the box, check to make sure you have all accessories shown below. Click here for next screen
2 Power ON Flow Meter Check Oil Fail Pass Flag Power On Flow Meter Ball Check Oil Selector Switch Test Smoke 0.040” 0.020” Future Quick Reference Tester Hook Up Phase-One Phase-Two Click here for next screen
3 Nitrogen / Shop Air Connector Fitting Remote Smoke Button 12-Volt DC Power Cable Smoke Supply Hose Accessories Compartment Click here for next screen
4 Connect nitrogen or shop air supply hose to the quick-connector shown below. The EVAPro comes with a built-in regulator that allows you to use nitrogen for all EVAP testing or shop air for all of your general purpose leak detection needs. Click here for next screen
5 Choose the proper EVAP port adaptor for the Vehicle from the accessory kit. The Schrader removal tool is used for taking the core out of the EVAP service port. Click here for next screen
6 1. Remove the OBD-II service port adaptor cap. 2. With the Schrader removal tool turn clockwise and remove the core from the service port *. You must remove the core before testing. [After testing,don’t forget to reinstall the OBD-II service port Schrader core and cap]. * If the vehicle being tested does not have an EVAP service port, then access the EVAP system at the purge valve line that leads to the charcoal canister. Click here for next screen
7 Let’s do a step by step EVAP test. Remember that you must use nitrogen! 1. Connect the red lead to positive on battery. 2. Connect the black lead to chassis ground. With power leads connected, the green light should be ON. A low battery will cause the Tester’s green Power light to blink. See Trouble Codes in your Operator Manual. Click here for next screen
8 For the purpose of this presentation, we will use the .040” standard. • Position the Tester’s selector switch to the .040” calibration. • Turn the Tester ON. • Set the Pass / Fail mark by using your thumb to align the red pointer flag with the ball. • Now the red flag is set to equal a .040” leak and it is calibrated for that vehicle. Power ON Check Oil Click here for next screen Remember to calibrate for .040” or .020” before each test.
Have your scan tool ready. Go to: “Vent Solenoid ( On / Off )” as shown below. 9 If scantool doesn’t close vent solenoid, refer to Tech Tip Booklet Click here for next screen
Phase One 10 1. Set selector switch to TEST. 2. Close EVAP vent solenoid. 3. Turn the Tester ON. Power ON Check Oil At first the ball will go to the top of the flow meter. The ball will slowly drop until it no longer goes down. 3. Once the ball stops moving downward, check the alignment with the red flag. If the ball is below the red flag, the leak(s) are less than .040”; PASS If the ball is above the red flag, the leak(s) are greater than .040”; FAIL Go to Phase Two. Five minutes after turning the Tester ON, it will turn off automatically. Click here for next screen
Phase Two 11 Power ON Check Oil • Set selector switch to SMOKE. • Turn the Tester ON. • 3. Look for Smoke and/or dye exiting the leak(s). Five minutes after turning the Tester ON, it will turn off automatically. Click here for next screen
Look for both smoke and the ultraviolet-activated fluorescent dye. 888-822-8832 www.vacutec.com Click here to Exit PowerPoint