DEFECTS OBSERVED IN RADIOGRAPHIC TESTING
410 likes | 1.23k Views
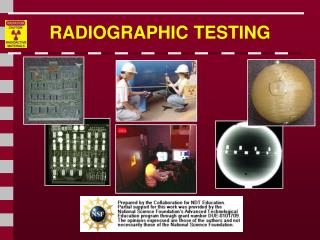
DEFECTS OBSERVED IN RADIOGRAPHIC TESTING. What is Radiographic Testing. It is the non-destructive testing to observe the various defects in the weld joints. It is most common in Piping fabrication workshops. 100% weld joints in High pressure vessels/pipes are radio-graphed.

DEFECTS OBSERVED IN RADIOGRAPHIC TESTING
E N D
Presentation Transcript
What is Radiographic Testing • It is the non-destructive testing to observe the various defects in the weld joints. • It is most common in Piping fabrication workshops. • 100% weld joints in High pressure vessels/pipes are radio-graphed.
How radiograph testing is done in case of piping spools. • The welded joint is placed before the undeveloped film. • The source emits x-rays or gamma rays which penetrates through the welded part. • The bead formed by weld pool is having different density as compared to the parent material and hence it allows less or more rays to pass through it.Finally we get imprints on the film. • For a perfect joint , Joint efficiency factor should be more then 1. • We are assigning particular film for certain marked welded joint to re-weld in case of defect.
The following discontinuities are typical of all types of welding. • Cold lap due to improper fusion of filler wire with base metal.
Porosity is the result of gas entrapment in the solidifying metal.
Cluster porosity is caused when flux coated electrodes are contaminated with moisture.
Slag inclusions are nonmetallic solid material entrapped in weld metal or between weld and base metal.
Incomplete penetration (IP) or lack of penetration (LOP) occurs when the weld metal fails to penetrate the joint.
Incomplete fusion is a condition where the weld filler metal does not properly fuse with the base metal.
Internal concavity or suck back is a condition where the weld metal has contracted as it cools and has been drawn up into the root of the weld.
Internal or root undercut is an erosion of the base metal next to the root of the weld.
External or crown undercut is an erosion of the base metal next to the crown of the weld.
Offset or mismatch are terms associated with a condition where two pieces being welded together are not properly aligned.
Inadequate weld reinforcement is an area of a weld where the thickness of weld metal deposited is less than the thickness of the base material.
Excess weld reinforcement is an area of a weld that has weld metal added in excess of that specified by engineering drawings and codes.
Cracks can be detected in a radiograph only when they are propagating in a direction that produces a change in thickness that is parallel to the x-ray beam.
Discontinuities in TIG welds • Tungsten inclusions. Tungsten is a brittle and inherently dense material used in the electrode in tungsten inert gas welding.
Oxide inclusions are usually visible on the surface of material being welded (especially aluminum
Burn-Through results when too much heat causes excessive weld metal to penetrate the weld zone.
