Download
1 / 16
160 likes | 399 Views
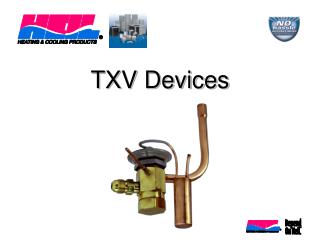
TXV Kits. How to apply a TXV kit to an evaporator coil – Initial installation. Coil Preparation. Relieve the pressure from the coil by loosening the 13/16 nut 1 turn only. Remove the nut and discard the black seal. Coil Preparation. Remove the check piston and discard. Coil Preparation.

E N D
TXV Kits How to apply a TXV kit to an evaporator coil – Initial installation
Coil Preparation • Relieve the pressure from the coil by loosening the 13/16 nut 1 turn only. • Remove the nut and discard the black seal
Coil Preparation • Remove the check piston and discard
Coil Preparation • Use a tube cutter to remove the spin closure on the suction line
Coil Preparation • Remove the tailpiece clamped to the exterior
Suction Line Connection • Slide back the suction line grommet before brazing • Insert the TXV equalizer line with flare nut into the grommet • Then insert the suction line tubing (line set)
Suction Line Connection • Braze suction line tubing (line set) to the suction line field connection on coil
Expansion Valve Connection • Connect expansion valve outlet to flowrator body. Make sure Teflon seal is in place
Expansion Valve Connection • Slide the 13/16 nut into position. Braze tailpiece to the liquid tube (line set)
Expansion Valve Connection • AFTER THE TAILPIECE HAS COOLED, position the white Teflon seal and hand tighten the nut
Expansion Valve Connection • Torque the 13/16 nut to 10-30 ft/lb
Expansion Valve Connection • Connect equalizer tube with 1/4 flare nut to suction line fitting on the suction manifold (internal to the case)
Expansion Valve Connection • Torque to 8-10 ft/lb • Dress the tube to avoid rubbing and replace the grommet
Expansion Valve Connection • Secure expansion valve bulb to suction line (exterior to the case) with banding straps provided at the 10 o’clock or 2 o’clock position • IMPORTANT: Insulate the bulb and adjacent area
Wrap Up • Finally – Check for leaks