Download
1 / 21
230 likes | 481 Views
Beetel. Model 450BX, BX-2. Migration to New Schoolnet Network. Procedure as follow:- Configure Pc for Modem re-configuration Reset Modem Configure Modem 4. Check Connection. Pc Configuration - Proxy. Edit Proxy Settings as follows:- Open Internet Explorer.

E N D
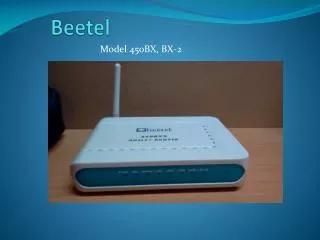
Beetel Model 450BX, BX-2
Migration to New Schoolnet Network Procedure as follow:- Configure Pc for Modem re-configuration Reset Modem Configure Modem 4. Check Connection
Pc Configuration - Proxy Edit Proxy Settings as follows:- Open Internet Explorer. Click : Tools -> Internet Options-> Connections ->LAN settings Uncheck: Proxy server.
Pc Configuration – LAN Settings Edit LAN settings as follows:- Go to Local Area Connection Properties -> Internet Protocol version 4 (TCP/IPv4) Properties Choose :Obtain ip address automatically, Obtain DNS Server address automatically Click: Ok, Ok , Close.
Reset Modem Power Modem and Press Reset Button for 15 Secs as described below
Check Access to Modem from PC Make sure PC is connected to Modem using LAN cable On Pc, Open Command Window as follows:- Click Start,-> Run , Type CMD, Enter. At Command Prompt, type: ping 192.168.1.1, Enter. Modem will reply as indicated below.
Configuration Access Modem from Browser ( e.g Internet explorer/ Firefox etc) as follows: In Browser, type modem ip address: 192.168.1.1 Username : admin Password : admin
1. Click Advanced Setup -> WAN2. Remove 2 unused Wan interfaces. Tick the check boxes and click Remove as shown.
Configure VC Set VPI value to 8 Set VCI value to 35 Click Next
Connection Type Leave setting on PPP Over Ethernet (PPPoE) Click Next
PPP Configuration 1. Enter ppp username and ppp password for adsl provided by ISP(MT)2. Change MTU size from1492 to 14003. Click Next at bottom of page
NAT Setting Change Service name to Schoolnet Click Next
Interface Group Re - Access modem via Browser Click Advanced Setup -> Interface Group Remove tick in Enable Virtual ports Click Save/Apply
Configure Wi-Fi SSID Click Wireless and Change SSID setting from Broadcom to Schoolnet Click Apply/Save
Configure Wi-Fi Security Under Wireless click Security Click Network Authentication Dropdown menu Select WPA2/PSK
Wi-Fi Security Insert new WPA password as indicated below Click Save/Apply
Enable proxy in Browser Note: Proxy Server settings must be re-enabled to have internet access In Internet Explorer, go to Tools-> Internet Options-> Connections-> LAN Settings . Tick the Checkbox under Proxy Server Click OK
Check Internet Connectivity DSL should be Solid Green showing Sync is up Internet should be Green showing internet is up