Download
1 / 54

E N D
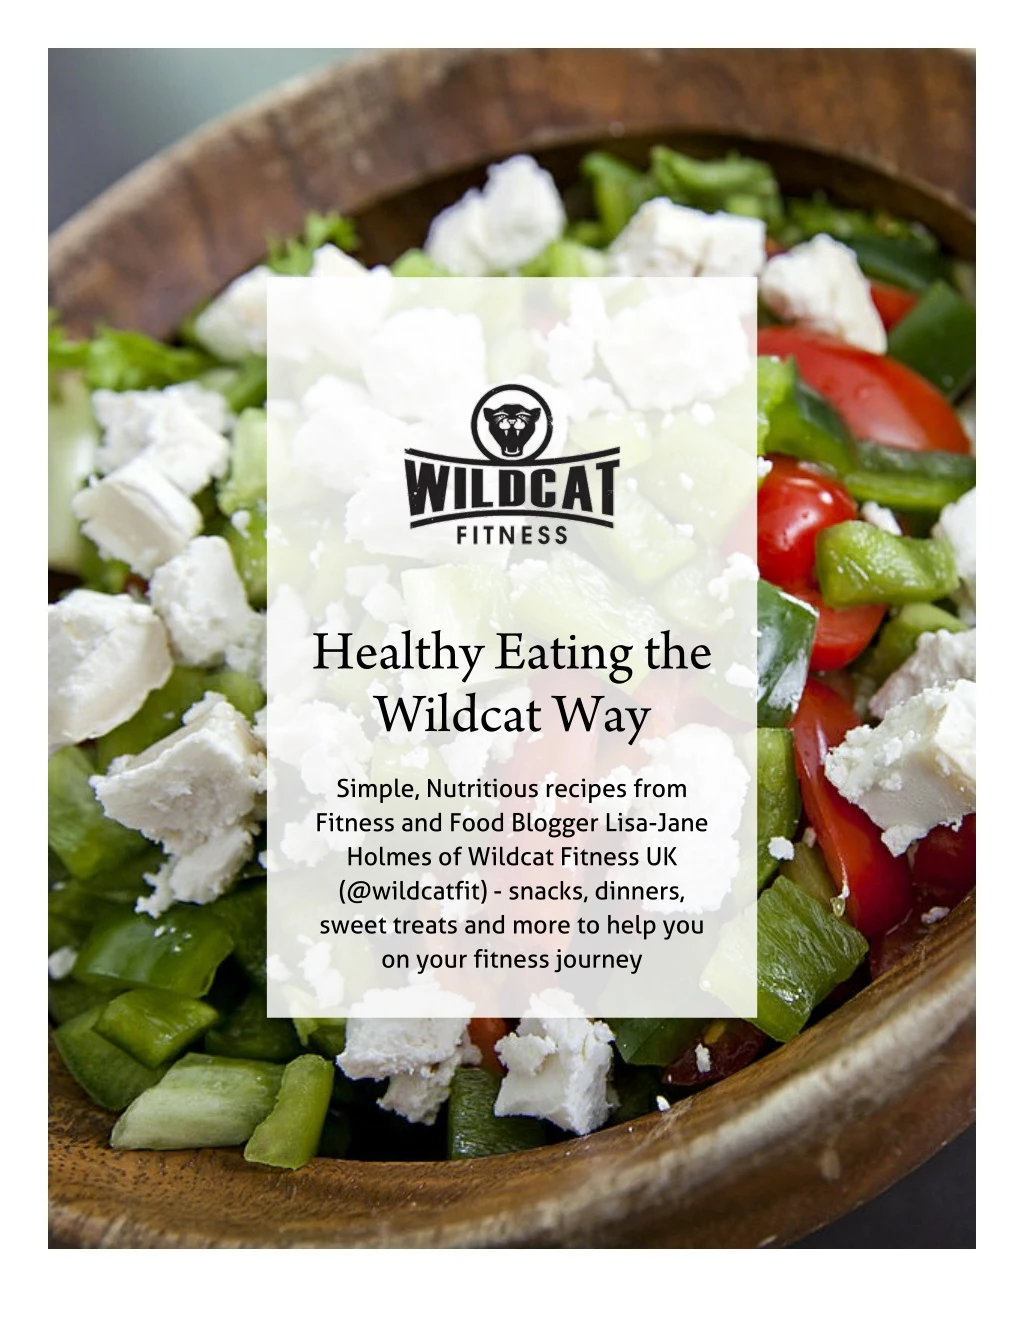
Healthy Eating the Wildcat Way Simple, Nutritious recipes from Fitness and Food Blogger Lisa-Jane Holmes of Wildcat Fitness UK (@wildcatfit) - snacks, dinners, sweet treats and more to help you on your fitness journey
About Wildcat Fitness UK Winner of "Best Fitness Blog" at the Health Blog Awards 2016. Fitness, food, health, lifestyle and nutrition from London Personal Trainer, Instructor and Blogger Lisa-Jane Holmes, aiming to help everyone to unleash their Inner Wildcat and become the best version of themselves! Wildcat Fitness UK is my fitness, health, lifestyle, food and nutrition blog, which I created to give you an insight into everyday life as a London PT, but also an account of my personal fitness and weight loss story. I also aim to bring honest reviews of products, clothing, venues and experiences, as well as workout tips and healthy recipe ideas.
I have been through a long and interesting journey with my personal fitness, one that has not always been easy, but one that has always been rewarding in so many ways. I hope that through my Blog and social media I can inspire others to make the same changes I did, support them along the way and show that there is no “quick fix” when it comes to fitness and weight loss. Changing my diet and eating more home-cooked meals was a huge part of my own personal weight loss, which is why I am passionate about creating quick, simple recipes that anyone can make to help them stay on track and support an active lifestyle. The recipes in this book are some of my favourites that I have created over the years - I want to prove that eating well doesn't have to be boring! Visit My Blog : https://www.wildcatfitnessuk.com/ Follow me on Follow me on Facebook | Instagram | Twitter | Youtube
Light Bites, Lunches and Snacks
Recipe: Supergreen Soup - The Ultimate Healthy Winter Warmer! There are fewer things more comforting on a cold night that a hearty bowl of warming soup. The great news about this simple yet satisfying dish is that it's really easy to make, and that my particular version is absolutely packed with vitamins, nutrients and minerals. It really is one of the best ways to stay healthy and boost your immune system during the colder months. It also keeps really well for several days, or can be frozen so a batch of this made on a Sunday night makes a speedy weeknight supper, and the ingredients can be mixed and matched - so it's handy if you need to use up leftover veg. I love to pack mine full of greens as they contain so many good things - minerals, vitamins, iron and anti-oxidants. If this doesn't keep coughs, colds and flu at bay I don't know what will!
Here's what you need to make this Supergreen supper.... Ingredients: Ingredients: Oil of your choice for cooking - I used a mix of coconut and rapeseed 1 x large onion, roughly chopped 2 x garlic cloves, roughly chopped 2 x leeks, roughly chopped 1 x large potato, peeled and chopped into cubes Greens of your choice - in this particular version I used a whole bag of spinach and watercress but you can use spring greens, kale, cabbage, broccoli - the greener the better and feel free to use as much as you want! 2 x tablespoons vegetable stock powder (I used Marigold Health Bouillon) Approx 500ml boiling water Seasoning to taste Cream to garnish
Method: Method: In a large pan, heat a tablespoon of oil and add the onion and garlic. Cook on a medium heat until the onion starts to turn translucent, at which point add the leeks and potato and cook for another 5 minutes, stirring often to ensure the onions don't start to burn. Don't cook on too high a temperature to ensure this doesn't happen. Whilst the veg are cooking, add the stock powder to the boiling water, stir well and add to the pan. The liquid should be enough to easily cover the vegetables, if not add more. If you like your soup a little thicker, then the veggies need to be just covered, if you prefer thinner then add a little more. Season (I used pink himalayan salt and black pepper), bring to the boil and then simmer for around 10-15 minutes, stirring often. Once the potatoes are softening, add the greens - if you are using leafy greens as I did they can be added at the latter stages of cooking as they don't need long.
Once you can easily pierce the potato chunks with a knife you can remove the pan from the heat. Allow to cool for a few minutes, and then add the mixture to a food processor and blitz until smooth. If you prefer you can do this with a stick blender directly in the pan. Once a smooth consistency is achieved you can return the soup back to the pan, heat for a couple of minutes and it is then ready to serve. I garnish mine with a swirl of single cream, but you could also use creme fraiche, dairy free cream or fresh herbs and a knob of butter. As mentioned above, this soup can either be frozen and reheated thoroughly, or will keep for around 3-4 days, so feel free to increase the quantities above and make a bigger batch that you can enough for lunch or dinner for several days. As always, if you give my Supergreen Soup a go and indeed come up with your own unique recipe please tag me - I love seeing your versions of my creations! There's never been a more comforting way to eat your greens.....
Recipe: Light And Easy Tuna Salad A lot of clients come to me saying that they struggle to eat healthily because they either can't, or don't have time to cook. Well with recipes as quick and easy as this one there are quite literally no excuses! Such a perfect dinner for these warmer, lighter evenings and packed full of protein and good fats. The ingredients can even be picked up from a corner shop or local supermarket on your way home - and you can customise the salad anyway you like it! Ten minutes front door to dinner plate - but how?
Ingredients: Ingredients: (Serves one - double for two) Bag of mixed salad leaves (I used Tesco baby leaf and rocket salad) 1/4 cucumber 1/2 red pepper 2 stalks celery 1 small red chilli Tin of tuna in spring water (the ones in brine or oil will add extra sodium and fat) Small pot of natural yogurt Juice of 1/2 lemon Method: Method: Place the salad leaves and chopped cucumber and pepper onto a plate. In a separate bowl, mix the sliced celery and chilli, drained tin of tuna and pot of yogurt until combined. Squeeze the lemon juice and stir in well - taste the mixture and add seasoning if desired - but the chilli and lemon should give it a real flavour kick. Spoon the tuna mixture on top of the leaves and voila - dinner is served! This is also a great make-ahead packed lunch option, and the salad vegetables are of course entirely up to you - you can replace the cucumber and pepper with any combination - tomatoes, radishes, red onions etc..... mix it up and enjoy!
Recipe: Avocado Protein Dip On the days I am not seeing clients at lunchtime I love to pop home and make a healthy homemade lunch. This is one of my favourites at the moment - quick to make, super delicious and full of protein, good fat and nutrients to keep me going all afternoon. It would also make a great snack or starter and you could double the quantity to make a dinner party appetiser for friends. Ingredients: One ripe avocado One garlic clove (peeled) 100g plain quark (if you can't find quark you can use natural or greek yogurt) Squeeze of lemon juice Large pinch of dill - fresh or dried
Method: Method: Put everything in a blender, blend until smooth and serve. Really, that's it! If you don't have access to a blender or food processor make sure to buy super ripe avocado, mash it first, chop the garlic clove finely and stir in, then add all other ingredients and blend well. You will end up with a much smoother consistency from a blender. I usually serve mine with sugar snap peas and spelt crisp breads but it would be great with any kind of crackers, rye bread, carrot sticks, cucumber batons etc.
Recipe: Marvellous Maple Water And Super Summer Smoothie Recipe Move over coconut water, there's a new nutrient packed drink in town - and this one contains 46 naturally occurring vitamins, nutrients, antioxidants and prebiotics - and comes straight from the tree without harming it..... ladies and gentlemen I present you with DRINKmaple!
One ingredient - straight from the organic maple trees in North America, it contains half the sugar of coconut water and contains more manganese than a cup of kale. A perfect post workout pick-up, natural hydrator on a hot Summer day and even cocktail mixer! Why not do what I do though and add DRINKmaple to your homemade smoothies to create an even bigger and better nutrient boost? Read on for my Super Summer Smoothie recipe, made with DRINKmaple. Super Summer Smoothie recipe Ingredients: Ingredients: 1 x handful of spinach leaves 1 x inch piece of raw ginger 1 x scoop of vanilla or berry protein powder (down to taste preference!) 1 x handful frozen mixed berries Pinch of cinnamon 250ml DRINKmaple maple water 1 x tbsp of chia seeds Method: Method: Place all ingredients into your Nutri-Bullet or blender. blend until everything is well combined, feel free to add ice to taste and enjoy! This is the one of the best starts to the day you could possibly have - so many nutrients, vitamins and antioxidants - not to mention protein to help repair and refuel, as the hydrating properties of the DRINKmaple to refresh your body after dehydration during sleep.
As you can see below, it's the perfect breakfast drink if you're in a rush, or equally delicious enjoyed as part of a sit down brunch. Raise your DRINKmaple and cheers!
Recipe: Squash, Spinach And Lentil Curry For a variety of different reasons - health, environmental or even just emotional - more and more people are giving up eating meat, or at least limiting their intake. Personally I have been a vegetarian for over 15 years, which means in that time I have had to come up with many different ways to make meat-free dishes, and create my own recipes. When people first give up meat they can sometimes find it hard to be creative or have variety in their meals - which is hopefully where I (and this recipe) can help! One cuisine that is super-vegetarian friendly is Indian - dhaals, ghobis, saag…. all of these dishes are vegetable based. So I’ve come up with a simple vegetarian curry recipe that is easy and inexpensive to make, and should easily last at least 3 days, so it’s the perfect dish to cook on a Sunday night to see you through midweek suppers and lunches.
So without further ado, here is my recipe for Squash, Spinach and Lentil Curry. Ingredients Ingredients (to make large curry for 4-6 people or 3-4 days worth for one person) 2 x finely chopped onions 2 x chopped garlic cloves Either 1 x chopped fresh chilli or 1 tsp dried chilli flakes 1 tbsp cumin 1 tbsp turmeric 1 tbsp curry powder (I used madras but use one appropriate to your spice preference!) 1 tsp ground ginger 1 chopped butternut squash (I used a pre-prepared bag of squash chunks from Waitrose - this can save time and hassle) 1 x small bag (250g) of red split lentils Vegetable stock cube or Bouillon powder dissolved in 500ml water Small bag of spinach leaves (or approximately 4 handfuls) Coconut oil to cook Natural or coconut yogurt to serve
Method: Method: In a large saucepan, heat approx 1tbsp of coconut oil until melted. On a medium heat, fry the chopped onions and garlic until transparent. Do not allow to burn. Add in all the spices, chilli and curry powder and stir until the onions and garlic are coated. Add in the chopped squash and again ensure it is coated in the mixture. Pour in the bag of lentils and the stock/water - the mixture should be just covered but if not feel free to top up with more water. The lentils will soak up a lot of moisture so don’t let the mixture become too dry. Bring to the boil then reduce to a gentle simmer, but check every 3-4 minutes and stir.
Feel free to add more water as necessary. Once the squash and lentils are tender, add in the spinach and stir well. Cook for a further 2 minutes then remove from the heat. Serve immediately with rice of your choice - basmati or cauliflower work well - and garnish with a spoonful of yogurt. The mixture will keep in and airtight container in the fridge for up to 4 days, and can also be frozen and reheated. This recipe can also be adapted for other vegetables if you prefer - chickpeas, sweet potato, aubergines all work well in curries so once you’ve mastered this dish feel free to get creative! And as always, if you give this one a go please tag me in your photos as I love seeing when you guys try my recipes!
Recipe: Broccoli and Butternut Squash Crustless Quiche I am sure for many of us kids of the 80s (showing my age now!) that the word "quiche" conjures up unpleasant memories of very beige looking creations with strips of fatty ham and a thick and soggy pastry casing..... so I'm pleased to tell you that I've given this childhood picnic staple a makeover and present this remixed high protein, nutrient packed version that makes a great dinner and an even better lunch the next day. Not only that, but you can customise the filling to fit your needs and macros. How do you make this vitamin-filled vegetarian version? Read on!
Ingredients: Ingredients: (This will make one full quiche, which contains 4 servings) 500g chopped butternut squash 500g trimmed broccoli florets 1 tablespoon coconut oil 5 eggs 3 tbsp Quark 3 tbsp milk of your choice (I used skimmed but full fat or soya, rice or unsweetened nut milk works too) Handful chopped parsley Handful grated cheese of your choice (I used cheddar but any cheese will work) Salt and pepper to taste Method: Method: Pre-heat oven to 180c. Peel and chop the butternut squash so that it is in small cubes or thin slices. Arrange on a baking tray, drizzle the coconut oil over the top and add a generous pinch of Himalayan pink salt before baking in the oven for approx 20 minutes (do not allow to burn). After 20 minutes, or when the squash is starting to soften, add the broccoli florets and stir well, making sure they are coated in the coconut oil. If the mixture seems quite dry, feel free to drizzle a little more oil over the broccoli. Put back into the oven for around 5 minutes - again, do not allow the broccoli to burn (this can happen quite quickly so keep an eye on the oven). Remove from the oven and set aside.
In a bowl, beat the eggs, followed by the quark and milk, mixing well to get rid of any lumps. Add the chopped herbs and seasoning before stirring in the cooked vegetables, making sure everything has combined well. Pour the mixture into a tart tin (a cake tin will do the job just as well) and put back into the oven for 15- 20 minutes. Once you can see the top is set but there is a slight wobble in the middle then remove from the oven, top with the grated cheese and put back into the heat for 5-10 minutes until the surface is golden and bubbling. Remove from the heat, cut, serve and enjoy! As you can see, I served mine with a baby kale salad, but any kind of leaves would work. Once completely cooled then the quiche can be stored in the fridge for 3-4 days and a slice of this with salad would make the perfect lunch - no soggy pastry bottom in sight! As I mentioned at the start, you can customise this recipe to fit your own needs and macros. If you need to up tho protein content then you could add salmon or lean bacon, or you could use other vegetables in season such as asparagus or peas. Get creative, and if you make this yourself please tag me in your photos - I love seeing you guys using my recipes!
Recipe: Spiced Chickpea Pancakes With Spinach And Feta It seems you can't open a health and fitness magazine now without seeing a mention of the spice of the moment - turmeric. It has long been a staple in Indian cooking and ayurvedic medicine, and little wonder with it boasting properties such as being an anti-inflammatory and anti-oxidant, as well as being reported to aid in warding off diabetes, strokes and even cancer. I therefore wanted to create a recipe that used the power of this mighty spice (that wasn't a curry) so I therefore present to you my chickpea pancakes stuffed with spinach and feta.
Ingredients: Ingredients: 200g gram (chickpea) flour 1 egg, beaten Tablespoon each of turmeric and cumin Approx 250ml water 1x finely chopped onion 2x chopped garlic cloves Two large handfuls of spinach 100g of feta cheese (goats cheese or paneer also works well in this recipe) Coconut oil to fry Method: Method: In a large bowl mix the flour and spices, and then season with salt and pepper if desired (I used Himalayan pink salt). Add in the beaten egg and then slowly add in the water until a pancake batter consistency is achieved. Stir thoroughly to remove any lumps in the batter and ensure it can be easily poured into a frying pan. You may need a little more or a little less water - hence add it gradually after the egg until you achieve the batter consistency. Leave this mixture to settle whilst you prepare the filling. Gently sautée the onion and garlic in coconut oil, do this slowly so as not to burn them and keep the flavour in. Once the onion is almost cooked (this should take around 8-10 minutes) stir in the spinach until it starts to wilt, season to your taste - you could add nutmeg, chilli, salt and pepper, or even ghee for an authentic Indian flavour. Take the pan off the heat so that the spinach does not break down too much. Chop the cheese into small cubes and set to one side.
In another pan, add a little more coconut oil and one by one cook the pancakes. Do this by spooning a large ladle full of batter into a hot pan, once bubbles form on the surface you can flip the pancake over. This mixture should make 4-6 small pancakes, when one is cooked pop it into a warm oven to keep it hot whilst the others are cooking. Once you have made all your pancakes, remove from the oven, and then add the onion and spinach mix to each one as a filling, and before folding in half and adding the cheese on top, divided evenly between all your pancakes. I served mine with a fennel salad, but this would also work well with lentils, broccoli, quinoa..... the choices are endless! Enjoy the benefits of wonder spice turmeric with this easy dinner recipe :)
Recipe: The Ultimate Autumn Comfort Food - Healthy Vegetarian Shepherds Pie It can't be helped that as the evenings get shorter and darker and the temperatures start to drop then our thoughts turn to warming, hearty comfort food for Autumn. Sadly for us a lot of these dishes are comforting because of all the delicious yet calorific things they contain - butter, sugar, cream, cheese..... which is why I've created this healthy alternative to the traditional Shepherds Pie that is not only lower in fat than the classic dish, but packed full of nutrients and vitamins to help support our immune system through the germ-filled Autumn months.
How to make: Ingredients Ingredients Serves 4-6 (or two people for at least two meals - this dish keeps brilliantly in the fridge for 2-3 days, or can easily be frozen and reheated) One 500g bag frozen Quorn mince One large or two small diced onions Two cloves garlic, chopped Two tins chopped tomatoes Tomato puree or passata to taste 3 x stalks celery, chopped 3 x medium carrots, chopped Vegetable stock Seasoning For the topping: 5 large sweet potatoes, peeled and diced Splash of milk (could be dairy or almond, rice, coconut etc) Teaspoon of butter (ideally Kerrygold grass fed butter) Cheese to taste (using parmesan will reduce the fat content over using cheddar, if you want to make this version super low fat then nutritional yeast flakes will give a cheesy taste with none of the calories) - I used a handful of organic cheddar for this particular recipe, it just depends on your own personal diet.
Method: Method: Pre-heat oven to 180 degrees. Heat a large pan of water and then add the diced sweet potato. Bring to the boil then simmer for around 20 minutes, or until sweet potatoes are soft. Once they are, set aside. You can prepare the pie filling whilst they are cooking. Heat a little oil in a large saucepan. I always cook using coconut oil (my oil of choice is Vita Coco) but use your preferred cooking fat. Add the onion and garlic and sauté until soft - do not allow to burn. This should take 3-4 minutes. Add the chopped celery and carrots and continue to cook for another 3-4 minutes before adding the frozen Quorn mince. (An aside: I cook with quorn because I don't eat meat, but also because I find it an excellent meat substitute - it is tasty, filling and low in fat. My husband also struggles to tell the difference between quorn and regular mince so it's a winner in our house! However, if you're a die hard carnivore you could use very lean beef mince for this recipe, but be aware it will up the fat content) Once the Quorn mince has started to brown then stir in the tinned tomatoes and when combined add a little tomato puree or passata to taste. I usually use around 2 tablespoons. Cook for 2-3 minutes and then add in around 200ml of hot vegetable stock (my go-to stock is Marigold Bouillon but again, feel free to use your own preference or indeed make your own veggie stock if you have the time), stir well to combine and then add seasoning to taste. I usually add a pinch of himalayan crystal salt, a pinch of black pepper, a pinch of dried mixed herbs and a splash of Worcestershire sauce, but season to your own taste. Bring to the boil then reduce heat and simmer gently until mixture has reduced and most of the liquid has evaporated (but ensure it does not get too dry.) Remove from the heat and then pour this pie filling into a baking dish ready to be topped and put into the oven.
Drain the cooked sweet potatoes and then mash, adding a splash of milk and butter to make a creamy mash topping. Spread this topping over the Quorn mince mixture already in the baking dish, smooth over and then top with cheese of your choice. A light sprinkling of parmesan will give flavour without adding too many extra calories and fat, but if you are trying to keep calories low then cook the shepherds pie as is and then add a sprinkling of nutritional yeast flakes to the top around 5 minutes before the pie is ready. Put the Pie into the pre-heated oven for around 15-20 minutes, or until you can see the mince filling bubbling away. Remove from the heat, and then serve - this recipe goes brilliantly with most green vegetables - peas, kale, cabbage, broccoli etc. As mentioned above, this will easily service 4 people, but this dish also keeps really well, so if you are refrigerating or freezing the leftovers, ensure they have cooled down completely before storing in an air tight contained and making sure they are heated well throughout before serving again. Warming, healthy and most of all comforting - this is the perfect weekend dinner dish. Please tag me in your photos if you give this Pie a go - can't wait to see your creations. Happy eating!
Recipe: Winter Vegetable Gratin Winter may be dark and cold but it is good for one thing - root vegetables like parsnips, turnips and celeriac being in season. As well as this, these starchy vegetables pack a nutrient punch whilst at the same time satisfying our carb and comfort food cravings on dark Winter nights. This Winter Vegetable Gratin recipe works with pretty much any root vegetable so do feel free to experiment and find your favourite combination. I personally love the taste of celeriac (which is extremely low in calories but contains plenty of vitamin K which can boost bone health) and in this particular version I combined it with parsnips, squash and sweet potato - but carrots, potatoes, swede, fennel and turnip also work really well - if you have a favourite root vegetable now is the time to let it shine! This recipe makes a great side dish - I served it last night alongside steak for my husband and tuna steak for me, but it also works well with white meat. It was also delicious heated up again today for my lunch, so it works really well as a stand alone dish as well as an accompaniment. So how do you make it?
Ingredients Ingredients (makes one large gratin) 1 x celeriac bulb (peeled and chopped into cubes) 1 x large sweet potato (peeled and chopped into cubes) 1/2 large butternut squash (peeled and chopped into cubes) 2 x large parsnips (peeled and sliced) 1 x 500g tub of creme fraiche 2 x tbsp wholegrain mustard (less if you want a milder version) Emmental cheese to garnish (or gruyere for a slightly stronger taste) Method: Method: Heat the oven to 180 degrees and lightly grease an ovenproof dish. Prepare all the vegetables by peeling and chopping where necessary - or feel free to use pre-prepared bags of vegetables to save time. Put all vegetables into a large mixing bowl, and in a separate bowl combine the creme fraiche and mustard. Once well mixed then pour over the vegetables and stir until everything is coated, before pouring into the ovenproof dish.
Sprinkle the Emmental on top of the gratin - a small handful if you need to keep the calorie and fat content down, or a large handful if you want a cheesier taste! Bake in the oven for around 45 minutes, checking every 15 minutes to ensure the top isn't burning and all the veg are cooked through. Once you can easily put a knife through all the vegetables then remove from the oven and serve. Will keep up to three days and can be reheated. Such a simple recipe but one I am sure you will come back to again and again due to its versatility - oh and the fact that it's delicious :) As always, please do tag me if you give this one a go, and of course let me know what vegetable combinations you used - this one works in so many ways!
Recipe: Spicy Chickpeas With Grilled Halloumi And Quinoa This is a great “base” recipe, and you can play with the flavours, quantities and accompaniments as much as you want. This is my basic staple though… 1 x onion, finely diced 2 x garlic cloves, finely diced 6 x chopped organic plum tomatoes (tinned if you are really short of time) ½ cup organic passata or organic tomato puree (one with as few additives as possible, Biona is great as it is pure tomatoes only) 1 x tin pre-soaked chickpeas Pinch chilli flakes Pinch paprika Other seasoning to taste (you can add sea salt, pepper, bay leaves, basil…. Whatever takes your fancy) 1 x block halloumi cheese 1 x cup cooked quinoa per person
Sautee the onion and garlic over a medium heat in either raw butter or coconut oil until soft and translucent. Add the chopped tomatoes and passata continue to cook for 5 minutes until sauce starts to thicken. Once the sauce has a thicker consistency, add the chickpeas and stir well, then add the chilli and paprika and whatever seasoning you would like. Bring to the boil, then reduce the heat to a gentle simmer, stirring occasionally. In the meantime prepare the quinoa according to the packet instructions, which will be along the line of one cup quinoa to two cups of water, bring to the boil then simmer for approximately 15 minutes until the grains start to separate. Once cooked set to one side – the chickpeas should be almost ready. Slice the halloumi and press with kitchen paper to remove any excess moisture, then add to a hot griddle pan and pan fry each side for 2-3 minutes until they start to brown. Remove from the heat, reheat the quinoa if necessary for 2-3 minutes, and then serve – quinoa, spicy chickpeas and grilled halloumi. The chickpea sauce will keep in the fridge for 2-3 days and also makes a great accompaniment to brown rice, tuna steaks or baked sweet potatoes. This recipe can also be made with salmon or chicken instead of halloumi for a leaner protein source. Once you realise how quick, easy and tasty this is I’m sure it will become a dinner time staple for you too!
Sweet Treats and Baking
Recipe: Cacao, Cinnamon And Walnut Brownies Who doesn't love Brownies? I mean genuinely, who wouldn't want to enjoy a warm, rich, moist chocolatey square with their afternoon tea or for dessert? In my 30 something years on this planet I've yet to meet anyone who can look me in the eye and say they don't like Brownies - because there's nothing not to like! Well, apart from the huge amount of sugar, fat and calories that your typical shop-bought Brownie contains. So I've come up with a genuinely healthy alternative that's not only refined sugar and gluten free, but high in protein and rich in nutrients. You're welcome!
So how do you make them? Ingredients: Ingredients: 1 large cup of oat flour (I blitzed gluten-free oats in my NutriBullet) 1/2 large cup of coconut flour Teaspoon of baking powder Pinch of Himalayan Pink Sea Salt 3 tablespoons of raw cacao powder 1 tablespoon of cinnamon 1 cup of chopped walnuts (or walnut pieces) 4-5 egg whites (I used approx 1/3 carton of of pre mixed Two Chicks Liquid Egg Whites) 1 whole egg 1/3 cup of melted coconut oil Approx 15 medjool dates, chopped with stones removed 1 tsp vanilla extract Method: Method: Pre-heat your oven to 180 degrees and grease a baking tin with a little coconut oil. Mix all the dry ingredients (flours, cacao, cinnamon, salt, baking powder) in a large bowl and once combined stir in the walnuts.
In a food processor, blend the egg whites, egg, coconut oil, vanilla and chopped dates until smooth - this may take a couple of minutes. Once thoroughly mixed add the liquid into the dry mix and stir well. It should be sticky, but if it still seems a little dry feel free to add more coconut oil, or a splash of coconut or almond milk or even a little more liquid egg white. You want a sticky brownie mixture - stickier than cookie dough but not as liquid as pancake batter. Pour the mixture into the baking tin and put into the oven for 15-20 minutes. Check them mixture after 15 minutes - you want a knife inserted into the middle to come out clean, once it does the brownies are ready. You don't want to over- bake them and cause them to dry out. Remove the tin from the oven, allow to cool, then turn out and cut into brownie-sized squares. Once stored in an airtight container the brownies should keep for up to 4 days. However if you still have brownies left after 4 days can you please drop me a line and tell me your willpower secrets?! Delicious with a cup of tea for an afternoon treat, and even more decadent served warm from the oven with greek or coconut yogurt, cashew cream.... or distinctly unhealthy but thoroughly delicious ice cream like this pistachio gelato we enjoyed ours with as a Saturday night treat! As always, if you give this recipe a go please tag me in your photos and social media posts - I would love to see! Enjoy these little squares of delicious anti- oxidant rich chocolate heaven :)
Recipe: Mixed Berry And Ginger Crumble Lets's face facts: everyone loves a crumble! So warming, so comforting, and usually so full of fat and sugar. Not when you make it the Wildcat way! And not only that, my simple, healthy Crumble recipe takes less than 15 minutes to prepare (and much, much less time to devour
Ingredients: Ingredients: For the crumble topping: 250g oats 100g coconut flour Handful of nuts of your choice - I used pecans (hazelnuts, almonds and brazils also work well) 1tbsp of coconut oil 2tbsp of butter (I used Kerrygold Organic Grass Fed Butter) 50g coconut palm sugar Splash of almond or coconut milk Filling: Filling: 1 x packet of frozen mixed berries (I used Waitrose Summer Berry mix and added a drained tin of black cherries too, but any type of berries can be used - feel free to make your own selection, or combine frozen packets for ease) Large piece of root ginger, cut into small pieces 2 tbsp of pure maple syrup Method: Method: Pre-heat the oven to 180 degrees. In a food processor, combine all crumble ingredients and pulse until a coarse dough has formed. If the mixture seems very dry, add a little more milk (just a splash at a time so as not to make it too sticky) until a dough-like consistency is achieved. Set aside.
In an oven proof dish, combine the frozen berries (or whatever fruit filling you have chosen to use), chopped ginger and maple syrup until they have mixed well. Spread the crumble topping over the berry mixture until it is evenly covered, and then bake in the oven for approximately 20 minutes, but check every 5 minutes to ensure topping isn't burning - if so reduce the heat or cover with tin foil to prevent burning. I served my crumble with Oppo ice cream which is made with coconut oil, stevia and fresh milk instead of sugar and cream, so you get the same delicious ice cream taste without the high calories, not to mention the superfood boost in each flavour - the salted caramel has added lucuma which is full of antioxidants and great for your skin! Crumble and ice cream that's actually good for you? I'd call that a Wildcat Winner! Please tag me in your photos if you give this recipe a go, I love seeing your creations :) Instagram and Twitter: @wildcatfit
Recipe: Peanut Butter Truffles When brand new high protein peanut butter brand Hi-Pro approached me to create a healthy recipe with their fabulous new nut butters I knew I wanted to come up with a nutritious twist on a naughty treat. So my Hi Pro PB Truffles were born! Hi-Pro is different from other nut butters out there because it contains 33% protein per serving so these truffles are protein packed, free from refined sugar and bursting with nutrients. Check out the video here: https://twitter.com/hipronutrition/status/67471354... To make the truffles, you will need: Ingredients: Ingredients: 12-14 medjool dates 2 x tablespoons of Hi-Pro peanut butter (smooth or crunchy – your choice!) 1 x teaspoon of coconut oil Large pinch of himalayan pink salt Approx 8 squares of 90% cocoa chocolate Optional to taste: maple syrup and/or chia seeds
Method: Method: 1. Chop dates and remove stones 2. Place chopped dates into food processor and blend until a sticky paste is formed. 3. Add two tablespoons of Hi-Pro peanut butter, a large pinch of salt and a teaspoon of coconut oil and blend again until all ingredients are combined. You should have a sticky but firm mixture. 4. Remove mixture from food processor and place in the freezer for 5-10 minutes to make the filling easier to work with. 5. Take mixture from freezer and then shape into small, truffle sized balls using your hands. The ingredients above should make at least 12 truffles. Once you have rolled all the mixture into balls, place them back in the freezer for a further 10 minutes to harden. 6. Whilst the truffle centres are setting, melt the dark chocolate in a bowl over a pan of simmering water. Do not allow to boil and stir continuously to ensure the mixture does not burn and remains smooth. If you find very dark chocolate bitter, you can add a little maple syrup to the chocolate whilst it is melting to add some sweetness. 7. Take the melted chocolate from the heat and remove the truffles from the freezer. Coat the truffles in the melted chocolate and remove from the mixture using a skewer or cocktail stick. Place on a lined plate of baking sheet to ensure the truffles do not stick when set. Coat all truffles with the chocolate, and if you wish to add an extra topping, sprinkle the truffles with chia seeds before they set. 8. Place truffles back into the freezer for apron 15-20 minutes, and remove once chocolate coating has hardened. Store the truffles in the fridge – they need to be kept cool. 9. Enjoy! The hardest bit is not eating them all at once..... You can also check out not only this recipe, but plenty of other amazing Peanut Butter dishes over at the Hi-Pro website - enjoy!
Recipe: Pink Berry Protein Muffins - Cooking With Bulk Powders I was delighted when Sports Nutrition company Bulk Powders got in touch and asked me to create a recipe for them using a mystery flavour of protein that they wanted to send me.... I do love a cooking challenge! So when I received several sachets of their high quality Strawberry flavour whey protein, I decided to create a healthy muffin recipe that you can enjoy as the perfect post workout refuel, or to satisfy your sweet tooth mid-morning (without worrying about the calories). But despite having great macros, good nutritional benefits and being easy to make, to me by far the best thing about these Bulk Powder Berry Protein muffins is the fact that they are pink! A protein treat to match my gym outfit - perfect!
So how do you make them? Ingredients: Ingredients: 50g Bulk Powders Strawberry whey protein 40g Bulk Powders Vitafiber powder 250ml Bulk Powders Liquid Egg Whites 3 tbsp ground almonds 1/2 tsp baking powder Pinch Himalayan salt Handful mixed berries to your taste - I used dried goji berries and fresh blueberries to add a nice mix of textures but any berries would work
Method: Method: Pre-heat oven to 180c. Mix all the dry ingredients together in a large bowl. Once combined, add the liquid egg whites and stir well until a batter-like consistency is achieved. If the mixture still seems a little dry, feel free to add more egg whites. Stir well until you have a smooth mixture (protein powder can clump a little) and at that point, add your mixed berries - I used one small handful of goji and one small handful of blueberries. Pour the mixture into muffin cases - the amount above made 12 mini muffins for me, if you are making larger muffins this mixture should create 6-8. Place muffins into the oven and check every 5 minutes - if the tops are starting to brown before the muffins are cooked then turn the temperature down a little, or cover the muffins with tin foil. They should take 15-20 minutes to bake through. Remove from the oven and enjoy your high protein, low fat, low sugar treat!
Recipe: Superfood Chocolate Cups Do you love chocolate? Stupid question I know.... I ADORE chocolate, but I also love nourishing my body with foods that have amazing health benefits, and so this recipe is a fusion of the two - the taste of chocolate with a superfood nutrient boost! Healthy chocolate.... you can thank me later!
The beauty of this recipe is that it can be adapted to your taste, so you can mix and match the fillings to your hearts content - and not only that, you can make either bigger, dessert-sized "cups" as I did here, or smaller individual chocolates to serve with coffee or even give as a heartfelt, handmade gift. So how do you make these healthy cocoa treats? Ingredients: Ingredients: 150g dark chocolate (I used Lindt 90% cocoa, but any other brand will do, or you could make your own raw chocolate from cocoa butter and cacao powder melted together) 1 tablespoon coconut oil 1 tablespoon maple syrup 50g crumbled ginger oat cakes (I used Nairns Oat Cakes) Large handful flaked almonds Large handful goji berries 2 tablespoons chia seeds 2 tablespoons bee pollen
Method: Method: Melt the chocolate, coconut oil and maple syrup over a pan of boiling water - melt it gently until you have a smooth liquid consistency. As the chocolate is melting, in a separate bowl crush the oatcakes until you have large crumbs, then stir in the almonds, goji, chia and bee pollen until combined. Once the chocolate has fully melted, remove from the heat and then stir all the dry ingredients in until fully combined. Transfer to a silicone mould tray - I used a mini muffin tray to make "cups" to be served after dinner, and this recipe made 10 cups. If you want to make smaller, truffle sized portions then use a chocolate mould tray and you should get around 14-16 truffles. Once the tray is full, pop in the freezer for around an hour, and then once they are set remove from the moulds and either store in an airtight container, or leave out at room temperate for 10-15 minutes before serving. As long as these are stored somewhere cool and dry they should keep for up to a week. And that's it! Simple to make, and as I said above, you can substitute the ingredients for any other superfoods that take your fancy - granola, flaxseeds, pistachios, dried berries or cherries, pumpkin seeds, maca, lucuma..... the possibilities are endless! If you make these please take a photo and tag me in it as I would love to see your creations :)